編輯:關於Android編程

其實就是在Activity的布局文件中添加framgent布局。
目錄結構:
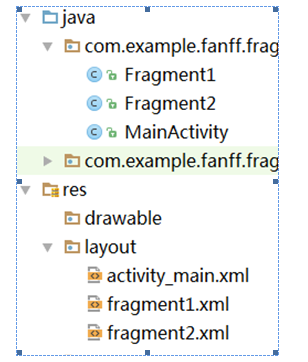
步驟如下:
(1). 創建一個Fragment的布局文件
fragment1.xml
fragment2.xml
(2) 創建繼承Fragment的類,並重寫onCreateView()方法,將布局文件變為view;
public class Fragment1 extends Fragment{
    @Nullable
    @Override
    public View onCreateView(LayoutInflater inflater, ViewGroup container, Bundle savedInstanceState) {
        return inflater.inflate(R.layout.fragment1, null);
    }
}
public class Fragment2 extends Fragment{
    /**
     * 當fragment被創建時調用,返回當前fragment顯示的內容
     */
    @Nullable
    @Override
    public View onCreateView(LayoutInflater inflater, ViewGroup container, Bundle savedInstanceState) {
        // 將layout布局文件轉換成View對象
        /**inflate方法的參數
         * resource:Fragment需要加載的布局文件
         * root:加載layout的父ViewGroup
         *( attachToRoot:false表示不返回父ViewGroup)
         */
        return inflater.inflate(R.layout.fragment2, null);
    }
}
MainActivity.java
public class MainActivity extends Activity {

    @Override
    protected void onCreate(Bundle savedInstanceState) {
        super.onCreate(savedInstanceState);
        setContentView(R.layout.activity_main);
    }
}
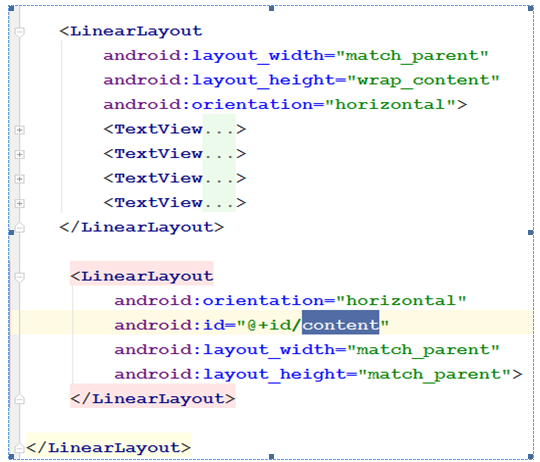
(3) 在Activity中添加“fragment標簽”,該布局文件的name屬性值即下面創建的Fragment的類名
注意:
①onCreateView()方法:Fragment第一次繪制它的用戶界面的時候,系統會調用此方法,為了繪制Fragment的UI,此方法必須放回一個View,如果不顯示UI,返回null即可。
②容易報錯:

原因可能是:繼承Fragment後沒有重寫onCreateView()方法
(1). Fragment事務:對Fragment進行添加、移除、替換或執行其它動作,提交給Activity的每一個變化。
(2). Fragment是UI模塊,自然在一個Activity中可以不只有一個模塊,所以Android提供了FragmentManage類來管理。
(3). Fragment,FragmentTransaction類來管理事務。我們對Fragment的動態加載就是先將添加、移除等操作提交到事務,然後通過FragmentManage完成的。通過FragmentManager.beginTransaction()開始一個事務。在事務中,可以對Fragment進行的操作以及常用的方法如下:
添加:add();移除:remove();替換:replace()
提交事務:commit()
(4). 注意:Fragment以ID或Tag作為唯一標識,所以remove和replace的參數是Fragment,這個Fragment目標Fragment一致。
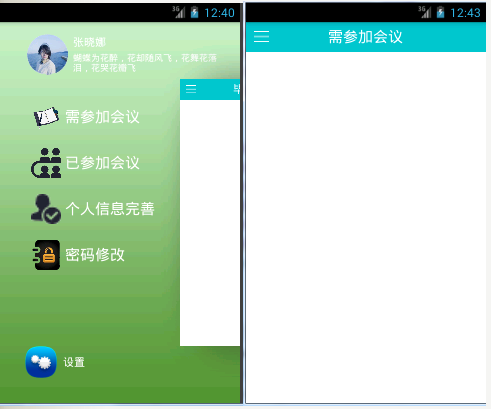
以手機橫屏和豎屏加載不同的Fragment為例,在上述代碼的基礎上只需要修改MainActivity.java如下:
public class MainActivity extends Activity {
    @Override
    protected void onCreate(Bundle savedInstanceState) {
        super.onCreate(savedInstanceState);
        setContentView(R.layout.activity_main);

        // 判斷當前手機的朝向
        int width = getWindowManager().getDefaultDisplay().getWidth();
        int height = getWindowManager().getDefaultDisplay().getHeight();

        // 動態加載Fragment
        Fragment1 f1 = new Fragment1();
        Fragment2 f2 = new Fragment2();
        FragmentManager fm = getFragmentManager();// 獲取當前Activity的Fragment管理器
        FragmentTransaction ft = fm.beginTransaction();// 開啟事務

        if (width > height){// 水平朝向
            // android.R.id.content代表當前Activity界面,也可通過給布局文件指定id來獲取
            ft.replace(android.R.id.content, f1);
        }else{// 豎直朝向
            ft.replace(android.R.id.content, f2);
        }
        ft.commit();// 提交事務
    }
}

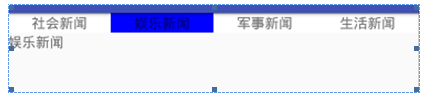
public class MainActivity extends AppCompatActivity implements View.OnClickListener {

    private LinearLayout content;
    private TextView tv1, tv2, tv3, tv4;
    private FragmentManager fm;
    private FragmentTransaction ft;

    @Override
    protected void onCreate(Bundle savedInstanceState) {
        super.onCreate(savedInstanceState);
        setContentView(R.layout.activity_main);

        content = (LinearLayout) findViewById(R.id.content);
        tv1 = (TextView) findViewById(R.id.txt1);
        tv2 = (TextView) findViewById(R.id.txt2);
        tv3 = (TextView) findViewById(R.id.txt3);
        tv4 = (TextView) findViewById(R.id.txt4);

        tv1.setOnClickListener(this);
        tv2.setOnClickListener(this);
        tv3.setOnClickListener(this);
        tv4.setOnClickListener(this);

        fm = getFragmentManager();
        ft = fm.beginTransaction();

        ft.replace(R.id.content, new Fragment1());
        tv1.setBackgroundColor(Color.BLUE);
        ft.commit();
    }

    @Override
    public void onClick(View v) {
        ft = fm.beginTransaction();
        switch (v.getId()){
            case R.id.txt1:
                ft.replace(R.id.content, new Fragment1());
                tv1.setBackgroundColor(Color.BLUE);
                clearColor(tv1);
                break;
            case R.id.txt2:
                ft.replace(R.id.content, new Fragment2());
                tv2.setBackgroundColor(Color.BLUE);
                clearColor(tv2);
                break;
            case R.id.txt3:
                ft.replace(R.id.content, new Fragment3());
                tv3.setBackgroundColor(Color.BLUE);
                clearColor(tv3);
                break;
            case R.id.txt4:
                ft.replace(R.id.content, new Fragment4());
                tv4.setBackgroundColor(Color.BLUE);
                clearColor(tv4);
                break;
        }
        ft.commit();
    }

    // 將其他的textView變回白色
    private void clearColor(TextView tv) {
        switch (tv.getId()){
            case R.id.txt1:
                tv2.setBackgroundColor(Color.WHITE);
                tv3.setBackgroundColor(Color.WHITE);
                tv4.setBackgroundColor(Color.WHITE);
                break;
            case R.id.txt2:
                tv1.setBackgroundColor(Color.WHITE);
                tv3.setBackgroundColor(Color.WHITE);
                tv4.setBackgroundColor(Color.WHITE);
                break;
            case R.id.txt3:
                tv1.setBackgroundColor(Color.WHITE);
                tv2.setBackgroundColor(Color.WHITE);
                tv4.setBackgroundColor(Color.WHITE);
                break;
            case R.id.txt4:
                tv1.setBackgroundColor(Color.WHITE);
                tv2.setBackgroundColor(Color.WHITE);
                tv3.setBackgroundColor(Color.WHITE);
                break;
        }
    }
}
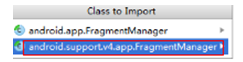
(1) 導入的是“supportt.v4…”支持包而不是“app…”包
(2) 將繼承Activity改為繼承FragmentActivity

(3) 將getFragmentManager()變為getSupportFragmentManager();
(4) Fragment繼承的Fragment導入的jar包

======無聊分割線============
簡單玩同Fragment之後,下一篇關於Fragment的blog將是關於Frament生命周期等的偏原理性的介紹了。
 android-annotations使用入門
轉載請標明出處:http://write.blog.csdn.net/postedit/41577317 androidannotation是一個非常牛逼
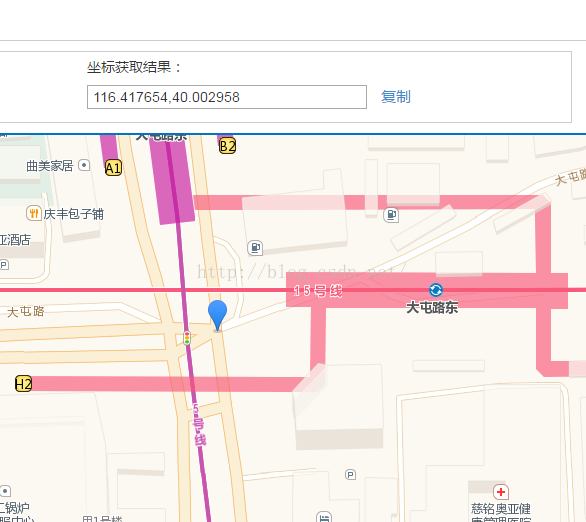 火星坐標系 (GCJ-02) 與百度坐標系 (BD-09) 簡介及轉換算法
1、美國GPS使用的是WGS84坐標系統,以經緯度的形式來表示地球平面上的某一個位置。但在我國,出於國家安全考慮,國內所有導航電子地圖必須使用國家測繪局制定的加密坐標系統
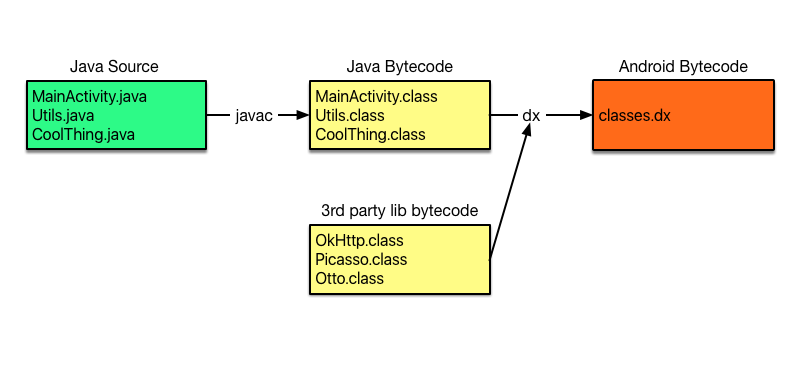 Jack和Jill的陰暗面
年Google發布了新的工具鏈 - Jack(Java Android 編譯工具)和Jill(Jack中間庫鏈接器),它們用於替換存在的javac+dx工具集。本文我將試
 Android手機使用Fiddler方法介紹
Fiddler是一款免費的抓包、調試工具,比Wireshark要小巧,更簡潔,本節就來介紹如何通過WIFI來抓取Android手機的HTTP和HTTPS包。一、連接And