編輯:關於Android編程
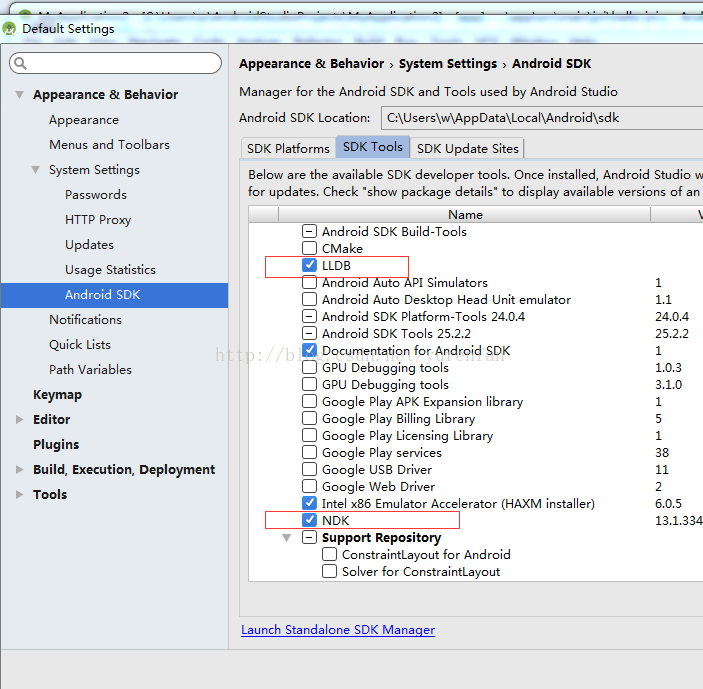
配置環境變量
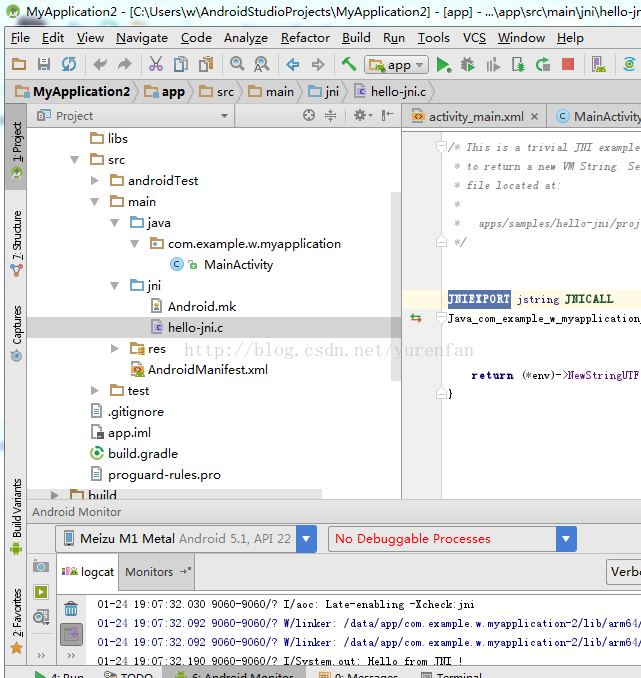 新建hello-jni.c
/* * Copyright (C) 2009 The Android Open Source Project * * Licensed under the Apache License, Version 2.0 (the "License"); * you may not use this file except in compliance with the License. * You may obtain a copy of the License at * * http://www.apache.org/licenses/LICENSE-2.0 * * Unless required by applicable law or agreed to in writing, software * distributed under the License is distributed on an "AS IS" BASIS, * WITHOUT WARRANTIES OR CONDITIONS OF ANY KIND, either express or implied. * See the License for the specific language governing permissions and * limitations under the License. * */ #include新建Android.mk#include /* This is a trivial JNI example where we use a native method * to return a new VM String. See the corresponding Java source * file located at: * * apps/samples/hello-jni/project/src/com/example/hellojni/HelloJni.java */ JNIEXPORT jstring JNICALL Java_com_example_w_myapplication_MainActivity_stringFromJNI(JNIEnv *env, jobject instance) { return (*env)->NewStringUTF(env, "Hello from JNI !"); }
LOCAL_PATH := $(call my-dir)

include $(CLEAR_VARS)

LOCAL_MODULE    := hello-jni
LOCAL_SRC_FILES := hello-jni.c

include $(BUILD_SHARED_LIBRARY)
在build.gradle中配置
externalNativeBuild {
        ndkBuild {
            path file("src\\main\\jni\\Android.mk")
        }
    }
apply plugin: 'com.android.application'

android {
    compileSdkVersion 24
    buildToolsVersion "24.0.3"
    defaultConfig {
        applicationId "com.example.w.myapplication"
        minSdkVersion 15
        targetSdkVersion 24
        versionCode 1
        versionName "1.0"
        testInstrumentationRunner "android.support.test.runner.AndroidJUnitRunner"
    }
    buildTypes {
        release {
            minifyEnabled false
            proguardFiles getDefaultProguardFile('proguard-android.txt'), 'proguard-rules.pro'
        }
    }

    externalNativeBuild {
        ndkBuild {
            path file("src\\main\\jni\\Android.mk")
        }
    }
}

dependencies {
    compile fileTree(dir: 'libs', include: ['*.jar'])
    androidTestCompile('com.android.support.test.espresso:espresso-core:2.2.2', {
        exclude group: 'com.android.support', module: 'support-annotations'
    })
    compile 'com.android.support:appcompat-v7:24.2.1'
    testCompile 'junit:junit:4.12'
}
在java層調用
public class MainActivity extends AppCompatActivity { @Override protected void onCreate(Bundle savedInstanceState) { super.onCreate(savedInstanceState); setContentView(R.layout.activity_main); System.out.println(stringFromJNI()); } public native String stringFromJNI(); static { System.loadLibrary("hello-jni"); } }
 Android自定義控件之組合控件學習筆記分享
我們來講一下自定義組合控件,相信大家也接觸過自定義組合控件吧,話不多說,直接干(哈~哈~):大家看到這個覺得這不是很簡單的嗎,這不就是寫個布局文件就搞定嘛,沒錯,確實直接
 Android NDK使用libjpeg解析JPEG圖片,並顯示到SurfaceView上
SurfaceView大概是谷歌提供給開發者最吸引人的的組件了,原因是SurfaceView的界面刷新允許在非UI線程中更新,正因為此,很多頻繁更新界面的應用,如視頻播放
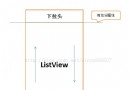
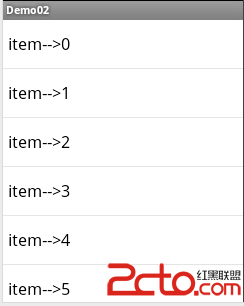 第一章,listview的簡易用法(Android)
這篇文章主要是練習了安卓listview的arrayadapter和baseadapter的簡單填充。1.arrayadapter填充布局: 代碼: pa
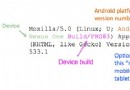 如何從UA分辨出Android設備類型
隨著Android設備增多,不少網站都開始設備Android設備,而Android主流設備類型以手機和平板為主。網站在適配時通過User Agent(用戶代理,以下簡稱U