編輯:關於Android編程
TabWidget類似於Android 中查看電話薄的界面,通過多個標簽切換顯示不同內容。要實現這一效果,首先要了解TabHost,它是一個用來存放多個Tab標簽的容器。每一個Tab都可以對應自己的布局,比如,電話薄中的Tab布局就是一個List的線性布局了。
要使用TabHost,首先需要通過getTabHost方法來獲取TabHost的對象,然後通過addTab方法來向TabHost中添加 Tab。當然每個Tab在切換時都會產生一個事件,要捕捉這個事件需要設置TabActivity的事件監聽 setOnTabChangedListener。
1、布局文件
<TabHost xmlns:android="http://schemas.android.com/apk/res/android"
android:id="@android:id/tabhost"
android:layout_width="fill_parent"
android:layout_height="fill_parent" >
<LinearLayout
android:layout_width="fill_parent"
android:layout_height="fill_parent"
android:orientation="vertical" >
<TabWidget
android:id="@android:id/tabs"
android:layout_width="fill_parent"
android:layout_height="wrap_content" />
<FrameLayout
android:id="@android:id/tabcontent"
android:layout_width="fill_parent"
android:layout_height="fill_parent" >
<TextView
android:id="@+id/textview1"
android:layout_width="fill_parent"
android:layout_height="fill_parent"
android:text="Linux"
android:textColor="#FF0000" />
<TextView
android:id="@+id/textview2"
android:layout_width="fill_parent"
android:layout_height="fill_parent"
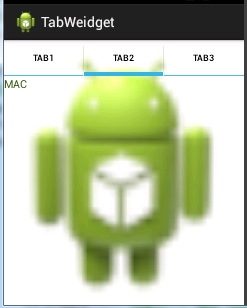
android:text="MAC"
android:textColor="#385E0F" />
<TextView
android:id="@+id/textview3"
android:layout_width="fill_parent"
android:layout_height="fill_parent"
android:text="Windows"
android:textColor="#1E90FF" />
</FrameLayout>
</LinearLayout>
</TabHost>
2、修改MainActivity,注意是繼承自TabActivity
public class MainActivity extends TabActivity {
private TabHost tabHost;
@Override
protected void onCreate(Bundle savedInstanceState) {
super.onCreate(savedInstanceState);
setContentView(R.layout.activity_main);
tabHost = getTabHost();
addTab();// 添加標簽
// 設置TabHost背景顏色
tabHost.setBackgroundColor(Color.argb(150, 20, 80, 150));
// 設置TabHost背景圖片資源
tabHost.setBackgroundResource(R.drawable.ic_launcher);
// 設置當前顯示哪一個標簽 我的理解就是當你第一次啟動程序默認顯示那個標簽 這裡是指定的選項卡的ID從0開始
tabHost.setCurrentTab(0);
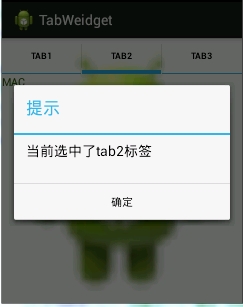
// 標簽切換事件處理,setOnTabChangedListener 注意是標簽切換事件不是點擊事件,而是從一個標簽切換到另外一個標簽會觸發的事件
tabHost.setOnTabChangedListener(new OnTabChangeListener() {
@Override
public void onTabChanged(String tabId) {
AlertDialog.Builder builder = new AlertDialog.Builder(MainActivity.this);
Dialog dia;
builder.setTitle("提示");
builder.setMessage("當前選中了" + tabId + "標簽");
builder.setPositiveButton("確定", new OnClickListener() {
@Override
public void onClick(DialogInterface dialog, int which) {
dialog.cancel();
}
});
dia = builder.create();
dia.show();
}
});
}
// 為TabHost添加標簽 新建一個newTabSped(new TabSpec) 設置其標簽和圖標(setIndicator)、設置內容(setContent)
// TabSpec是TabHost的內部類 TabHost對象的 newTabSpec()方法返回一個TabSpec對象
// 源碼裡邊是這麼寫的 public TabSpec newTabSpec(String tag)
// { return new TabSpec(tag); }
private void addTab() {
tabHost.addTab(tabHost
.newTabSpec("tab1")
.setIndicator("TAB1",
getResources().getDrawable(R.drawable.ic_launcher))// setIndicator()此方法用來設置標簽和圖表
.setContent(R.id.textview1));
// 指定內容為一個TextView --->public TabHost.TabSpec setContent(int viewId) 此方法需要一個 viewId 作為參數
tabHost.addTab(tabHost
.newTabSpec("tab2")
.setIndicator("TAB2",
getResources().getDrawable(R.drawable.ic_launcher))
.setContent(R.id.textview2));
tabHost.addTab(tabHost
.newTabSpec("tab3")
.setIndicator("TAB3",
getResources().getDrawable(R.drawable.ic_launcher))
.setContent(R.id.textview3));
}
}
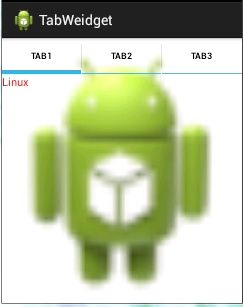
3、運行程序:如下!
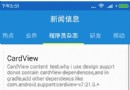
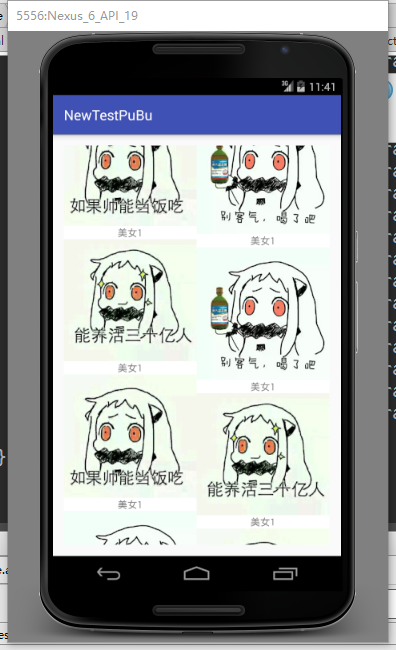 android---UI---RecyclerView實現瀑布流
一.包引入dependencies { compile fileTree(dir: 'libs', include: ['*.jar'
 Android學習筆記032之數據存儲—文件存儲讀取
我們知道,在AndroidOS中,提供了五中數據存儲方式,分別是:ContentProvider存儲、文件存儲、SharedPreference存儲、SQLite數據庫存
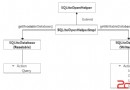 Android數據儲存——Sqlite
1.什麼是Sqlite? SQLite是輕量級的、嵌入式的、關系型數據庫. 2.Sqlite儲存在Android系統的哪? 數據庫存儲的位置在data/data
 android 飄心動畫(直播點贊)效果
前段時間在寫直播的時候,需要觀眾在看直播的時候點贊的效果,在此參照了騰訊大神寫的點贊(飄心動畫效果)。下面是效果圖:1.自定義飄心動畫的屬性在attrs.xml 中增加自
 Android Studio安裝後Fetching android sdk component information超時的解決方案
本文為大家講解的是Android Studio安裝後啟動時Fetchi