編輯:關於Android編程
本文實例講述了Android控件之ProgressBar用法。分享給大家供大家參考。具體如下:
ProgressBar位於android.widget包下,其繼承於View,主要用於顯示一些操作的進度。應用程序可以修改其長度表示當前後台操作的完成情況。因為進度條會移動,所以長時間加載某些資源或者執行某些耗時的操作時,不會使用戶界面失去響應。ProgressBar類的使用非常簡單,只需將其顯示到前台,然後啟動一個後台線程定時更改表示進度的數值即可。
以下ProgressBar跟Handle結合,模擬進度條的使用,當進度條完成時會跳轉到TestActivity
main.xml布局文件
<?xml version="1.0" encoding="utf-8"?>
<LinearLayout xmlns:android="http://schemas.android.com/apk/res/android"
 android:orientation="vertical"
 android:layout_width="fill_parent"
 android:layout_height="fill_parent">
 <!-- 長方形進度條,一開始不可見,直到點擊按鈕時才出現進度條 -->
 <ProgressBar android:id="@+id/progressBar"

  mce_
  android:layout_width="fill_parent"
  android:layout_height="wrap_content"
  android:visibility="gone"
  android:max="100" />
 <!-- 圓形進度條 -->
 <!--<ProgressBar android:id="@+id/progressBar"

  mce_
  android:layout_width="wrap_content"
  android:layout_height="wrap_content" />-->
 <Button android:id="@+id/start"
  android:text="啟動進度條"
  android:layout_width="wrap_content"
  android:layout_height="wrap_content" />
 <Button android:id="@+id/stop"
  android:text="停止進度條"
  android:layout_width="wrap_content"
  android:layout_height="wrap_content" />
</LinearLayout>
PbActivity類
package com.ljq.pb;
import android.app.Activity;
import android.content.Intent;
import android.os.Bundle;
import android.os.Handler;
import android.view.View;
import android.widget.Button;
import android.widget.ProgressBar;
public class PbActivity extends Activity {
 private ProgressBar progressBar = null;
 private Button start = null, stop = null;
 // 定義Handler對象
 private Handler handler = new Handler();
 @Override
 public void onCreate(Bundle savedInstanceState) {
  super.onCreate(savedInstanceState);
  setContentView(R.layout.main);
  progressBar = (ProgressBar) findViewById(R.id.progressBar);
  progressBar.setProgress(0);
  start = (Button) findViewById(R.id.start);
  start.setOnClickListener(new View.OnClickListener() {
   public void onClick(View v) {
    handler.post(runnable); //開始執行
   }
  });
  stop=(Button)findViewById(R.id.stop);
  stop.setOnClickListener(new View.OnClickListener() {
   public void onClick(View v) {
    handler.removeCallbacks(runnable);//停止執行
    progressBar.setProgress(0);
   }
  });
 }
 int pro=0;
 Runnable runnable=new Runnable(){
  public void run() {
   progressBar.setVisibility(View.VISIBLE);
   pro=progressBar.getProgress()+10;
   progressBar.setProgress(pro);
   //如果進度小於100,,則延遲1000毫秒後重復執行runnable
   if(pro<100){
    handler.postDelayed(runnable, 1000);
   }else{
    progressBar.setVisibility(View.GONE);
    startActivity(new Intent(PbActivity.this, TestActivity.class));
    handler.removeCallbacks(runnable);
    progressBar.setProgress(0);
   }
  }
 };
}
運行結果
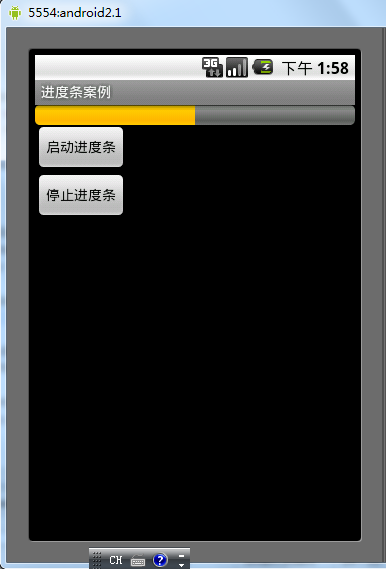
希望本文所述對大家的Android程序設計有所幫助。
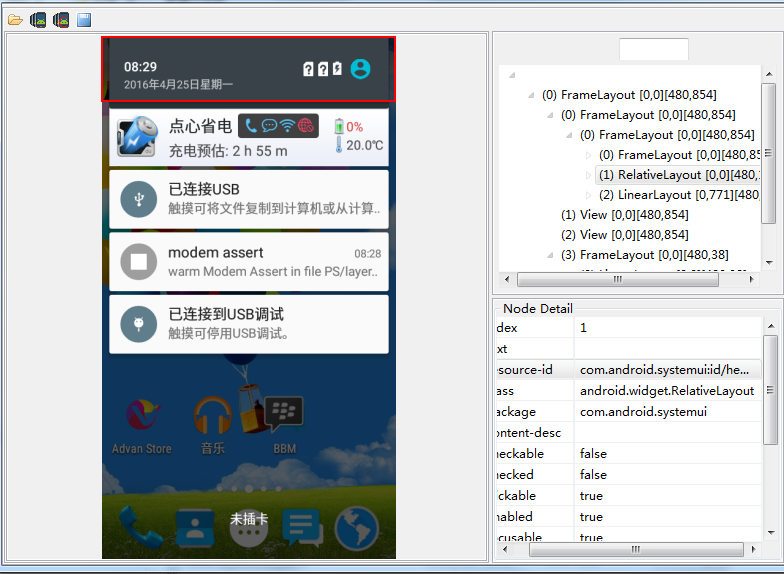 【SystemUI】修改下拉狀態欄顏色
需要改變下拉狀態欄的背景色。關於這方面的代碼路徑 frameworks/base/packages/SystemUI中通過androidSDK自帶的工具uiautomat
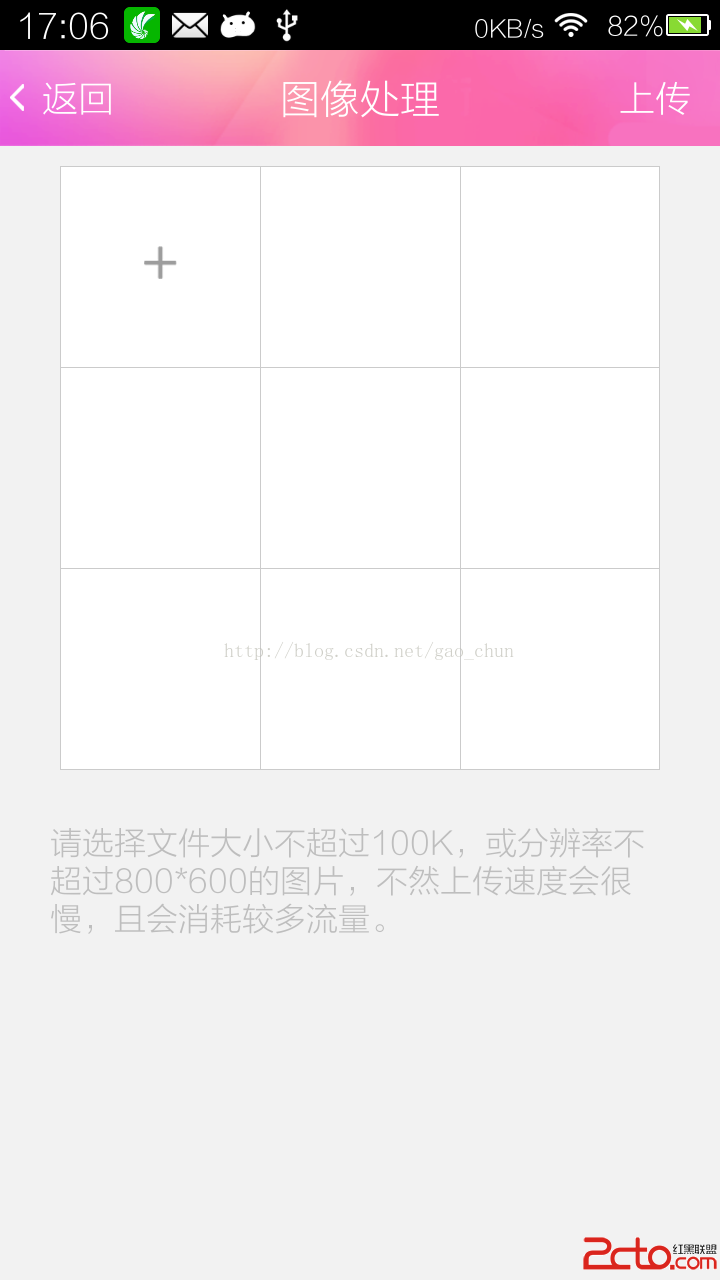 Android自定義動態布局 — 多圖片上傳
Android自定義動態布局 — 多圖片上傳 本文介紹Android中動態布局添加圖片,多圖片上傳。 項目中效果圖: 技術點
 一、初識GVR ---- Android VR視頻/Google VR for Android /VR Pano/VR Video
業余時間充足,於是想弄點自己的東西,找來找去還是回到當初感興趣的VR。目前好像沒有太多關於VR方面的教程,於是有了寫‘學習筆記’的想法。說干就干~
 android ViewFlipper使用示例(注冊引導頁)
其實ViewFlipper工作機制很簡單,如上圖,就是將添加到ViewFlipper中的子View按照順序定時的顯示是其中一個子View,其他的子View設置為Gone狀