編輯:關於Android編程
本文實例講述了Android編程之單元測試用法。分享給大家供大家參考,具體如下:
在實際開發中,開發android軟件的過程需要不斷地進行測試。使用Junint測試框架,是正規Android開發的必用技術,在Junint中可以得到組件,可以模擬發送事件和檢測程序處理的正確性。單元測試是嵌入到項目中;也可以作為一個單獨的項目爭對某個具體項目進行測試。
第一步:首先在AndroidManifest.xml中加入下面紅色代碼:
<manifest xmlns:android="http://schemas.android.com/apk/res/android"
package="com.lee0000.test" android:versionCode="1" android:versionName="1.0">
<application android:icon="@drawable/icon" android:label="@string/app_name">
<uses-library android:name="android.test.runner"/>
</application>
<use-sdk android:minSdkVersion="6"/>
<instrumentation android:name="android.test.instrumentationTestRunner" android:targetPackage="com.lee0000.test" android:label="Tests"/>
***上面targetPackage指定的包要和應用的package相同。
第二步:編寫單元測試代碼,一般對將要測試的方法命名testXXX。需要測試的時候選擇大綱(Outline視圖)選擇測試的方法右鍵點擊,選擇"Run As" - "Android Junit Test"。
例:
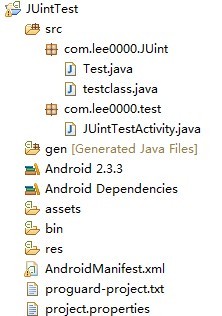
項目結構:
AndroidManifest.xml文件:
<?xml version="1.0" encoding="utf-8"?>
<manifest xmlns:android="http://schemas.android.com/apk/res/android"
 package="com.lee0000.test"
 android:versionCode="1"
 android:versionName="1.0" >
 <uses-sdk android:minSdkVersion="15" />
 <application
  android:icon="@drawable/ic_launcher"
  android:label="@string/app_name" >
  <activity
   android:name=".JUintTestActivity"
   android:label="@string/app_name" >
   <intent-filter>
    <action android:name="android.intent.action.MAIN" />
    <category android:name="android.intent.category.LAUNCHER" />
   </intent-filter>
  </activity>
 <uses-library android:name="android.test.runner" />
 </application>
 <instrumentation
  android:name="android.test.InstrumentationTestRunner"
  android:targetPackage="com.lee0000.test" android:label="Tests"/>
</manifest>
定義測試的兩個方法:
public class testclass {
 public void str(String s){
  System.out.println(s.substring(6));
 }
 public int add(int a,int b){
  return a+b;
 }
}
一般繼承的是AndroidTestCase,測試的時候就是測試這兩個方法,如果在對應方法中選擇"Run As" - "Android Junit Test"時出錯,可以右鍵Test類,選擇"Run as" - "Run Configurations",在 Instrumentation runner中選擇:
import junit.framework.Assert;
import android.test.AndroidTestCase;
public class Test extends AndroidTestCase{
 public void teststr() throws Exception{
  testclass tc = new testclass();
  tc.str("null");
 }
 public void testadd(){
  testclass tc = new testclass();
  int t = tc.add(1, 2);
  Assert.assertEquals(3, t);
 }
}
希望本文所述對大家Android程序設計有所幫助。
 Android簡易實戰教程--第三十七話《NotifiCation》
通知的使用,無疑是Android系統的亮點之一;就連IOS在5.0開始也引入了類似通知的技巧。可見它的實用性。今天這個小案例,就學習一下通知的基本使用,API是使用最新的
 Android關於Glide的使用(高斯模糊、加載監聽、圓角圖片)
高斯模糊、加載監聽、圓角圖片這些相信大家都很熟悉,那如何實現這些效果,請大家參考本文進行學習。1、引用compile com.github.bumptech.glide:
 Android編程之Fragment使用動畫造成Unknown animation name: objectAnimator異常
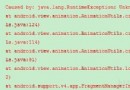
在為Fragment做切換動畫,啟動後遇到了一個異常: Caused by: java.lang.RuntimeException: Unknown animation
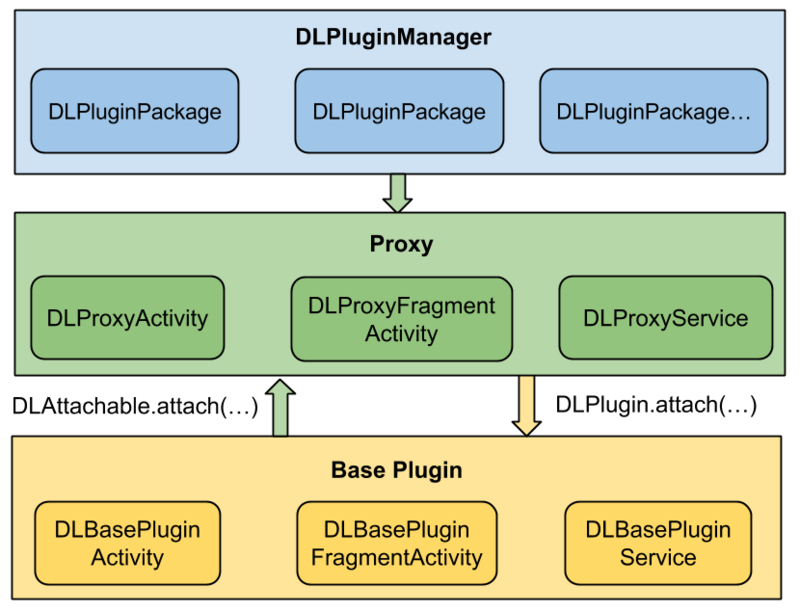 拆輪子之動態加載DynamicLoadApk
動態加載是什麼應用在運行的時候通過加載一些本地不存在的可執行文件實現一些特定的功能,Android中動態加載的核心思想是動態調用外部的Dex文件,極端的情況下,Andro