編輯:關於Android編程
首先為大家介紹Andorid5.0原生下拉刷新簡單實現。
先上效果圖;
相對於上一個19.1.0版本中的橫條效果好看了很多。使用起來也很簡單。

 <FrameLayout xmlns:android="http://schemas.android.com/apk/res/android"
 xmlns:tools="http://schemas.android.com/tools"
 android:id="@+id/container"
 android:layout_width="match_parent"
 android:layout_height="match_parent"
 tools:ignore="MergeRootFrame" >

 <android.support.v4.widget.SwipeRefreshLayout
 android:id="@+id/swipe_container"
 android:layout_width="match_parent"
 android:layout_height="match_parent" >

 <ListView
  android:id="@+id/list"
  android:layout_width="match_parent"
  android:layout_height="match_parent" >
 </ListView>
 </android.support.v4.widget.SwipeRefreshLayout>

</FrameLayout>
package hi.xiaoyu.swiperefreshlayout;

import hi.xiaoyu.swiperefreshlayout.adapter.TestAdapter;

import java.util.ArrayList;
import java.util.List;

import android.app.Activity;
import android.os.Bundle;
import android.os.Handler;
import android.support.v4.widget.SwipeRefreshLayout;
import android.support.v4.widget.SwipeRefreshLayout.OnRefreshListener;
import android.widget.ListView;

public class MainActivity extends Activity implements OnRefreshListener {

 private SwipeRefreshLayout swipeLayout;
 private ListView listView;
 private List<String> listDatas;
 private TestAdapter adapter;

 @Override
 protected void onCreate(Bundle savedInstanceState) {
 super.onCreate(savedInstanceState);
 setContentView(R.layout.activity_main);
 swipeLayout = (SwipeRefreshLayout) findViewById(R.id.swipe_container);
 listView = (ListView) findViewById(R.id.list);
 swipeLayout.setOnRefreshListener(this);
 swipeLayout.setColorSchemeResources(android.R.color.holo_orange_dark,
  android.R.color.holo_green_light,
  android.R.color.holo_orange_light,
  android.R.color.holo_red_light);
 listDatas = new ArrayList<String>();
 for (int i = 0; i < 10; i++) {
  listDatas.add("item" + i);
 }
 adapter = new TestAdapter(this, listDatas, R.layout.test_item);
 listView.setAdapter(adapter);
 }

 public void onRefresh() {
 new Handler().postDelayed(new Runnable() {
  public void run() {
  swipeLayout.setRefreshing(false);
  listDatas.addAll(listDatas);
  adapter.notifyDataSetChanged();
  }
 }, 3000);
 }

}
幾行代碼就可以實現下拉刷新,效果也還不錯,不用引入第三方jar,唯一的缺憾就是沒有上拉加載,不知道谷歌工程師基於什麼方面的考慮,希望能在下個版本看到。不過自己修改下源碼加一個上拉也比較簡單,結合上個一個版本的刷新效果做成上拉效果還不錯。
二、Android實現上拉加載更多功能以及下拉刷新功能
采用了目前比較火的PullToRefresh,他是目前實現比較好的下拉刷新的類庫。
目前他支持的控件有:ListView, ExpandableListView,GridView,WebView等。
首先第一步當然是導入libriay到咱們的項目了,具體導入方式,這裡不再贅述。
下面是個例子采用的是ListView,當然其余的和這個類似
1、布局文件activity_main.xml
<RelativeLayout xmlns:android="http://schemas.android.com/apk/res/android"
 xmlns:tools="http://schemas.android.com/tools"
 android:layout_width="match_parent"
 android:layout_height="match_parent"
 tools:context=".MainActivity" >

 <com.handmark.pulltorefresh.library.PullToRefreshListView
 android:id="@+id/pull_refresh_list"
 android:layout_width="fill_parent"
 android:layout_height="fill_parent" />
</RelativeLayout>
2、要實現下拉刷新的功能很簡單,只需要實現OnRefreshListener的OnRefresh方法即可。
這裡說一下如何實現上拉和下拉分別執行不同的操作。
原理是:根據下拉和上拉顯示的布局的可見狀態類區分上拉還是下拉,然後執行相應操作。
在PullToRefresh的類庫的com.handmark.pulltorefresh.library包下,打開PullToRefreshBase.java,在這個類的最後面添加如下代碼:
public boolean isHeaderShown() {

 return getHeaderLayout().isShown();

}

public boolean isFooterShown() {

 return getFooterLayout().isShown();
}
3、在Activity的代碼如下:
public class MainActivity extends ListActivity {

 private PullToRefreshListView mPullToRefreshListView;

 private LinkedList<String> mItemList;
 private ArrayAdapter<String> adapter;
 private Context context;
 @Override
 protected void onCreate(Bundle savedInstanceState) {
 super.onCreate(savedInstanceState);
 setContentView(R.layout.activity_main);
 context = this;
 initData();
 adapter = new ArrayAdapter<String>(this, android.R.layout.simple_list_item_1, mItemList);
 //初始化控件
 mPullToRefreshListView = (PullToRefreshListView)findViewById(R.id.pull_refresh_list);
 ListView mListView = mPullToRefreshListView.getRefreshableView();
 mListView.setAdapter(adapter);
 //設置pull-to-refresh模式為Mode.Both
 mPullToRefreshListView.setMode(Mode.BOTH);
 //設置上拉下拉事件
 mPullToRefreshListView.setOnRefreshListener(new OnRefreshListener<ListView>() {

  @Override
  public void onRefresh(PullToRefreshBase<ListView> refreshView) {
  if (refreshView.isHeaderShown()){
   Toast.makeText(context, "下拉刷新",Toast.LENGTH_SHORT).show();
   //下拉刷新 業務代碼
  }else {
   Toast.makeText(context, "上拉加載更多",Toast.LENGTH_SHORT).show();
   //上拉加載更多 業務代碼

  }

  }
 });

 }


 private void initData(){
 //初始化數據
 mItemList = new LinkedList<String>();
 mItemList.addAll(Arrays.asList(data));

 }

 private String[] data = new String[]{"data1","data2","data3","data4","data5","data6",
  "data1","data2","data3","data4","data5","data6"};
}
如上代碼所示,在OnRefresh的實現代碼中,用以區分上拉還是下拉,關鍵代碼如下:
if (refreshView.isHeaderShown()){
   Toast.makeText(context, "下拉刷新",Toast.LENGTH_SHORT).show();
   //下拉刷新 業務代碼
  }else {
   Toast.makeText(context, "上拉加載更多",Toast.LENGTH_SHORT).show();
   //上拉加載更多 業務代碼
  }
至此,運行項目,可以得到演示結果了。
本文已經被整理到《Android下拉刷新上拉加載效果》,歡迎大家學習研究。
文章內容很豐富,希望對大家學習Android實現上拉加載更多以及下拉刷新功能有所幫助。
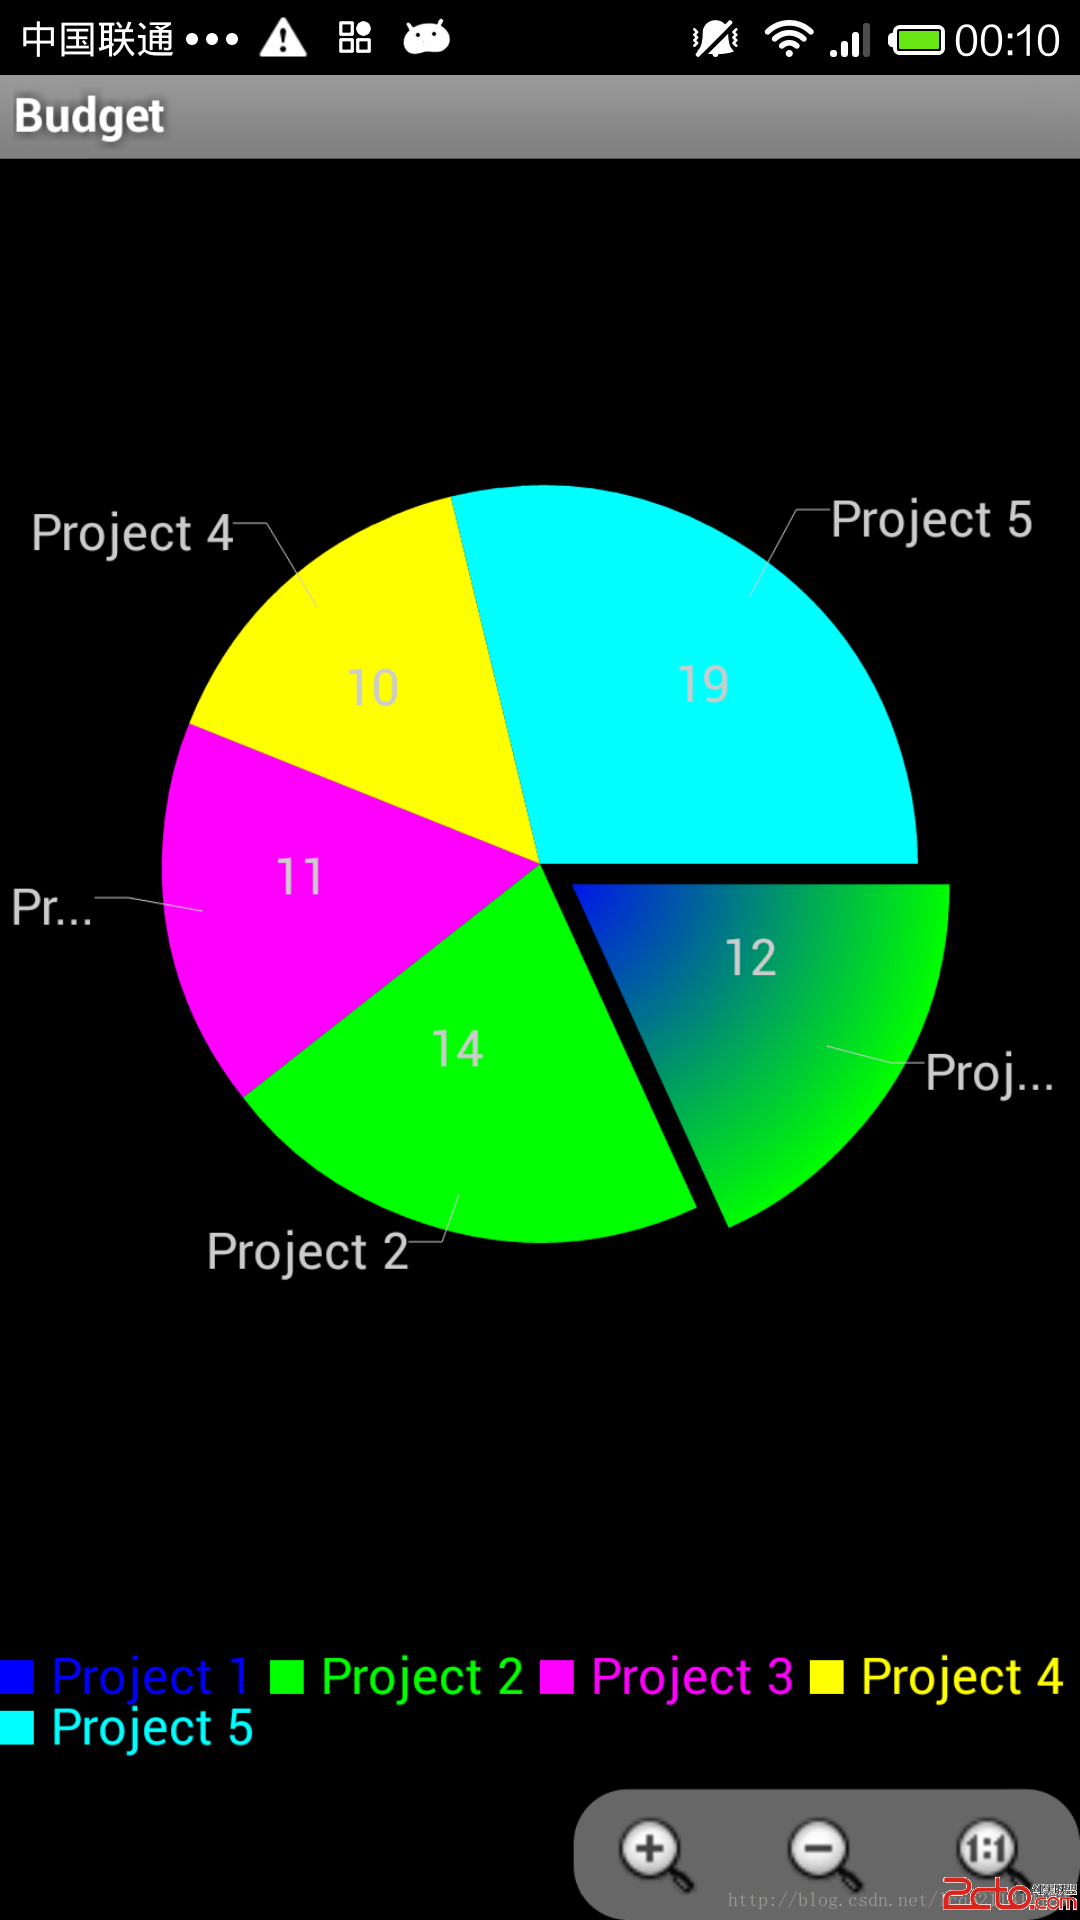 android AChartEnginee講解之自定義圖表類
前段時間下載了AChartEnginee的源碼,並且對源碼的框架進行了一些了解,講解了整個框架的組成部分和每個部分的作用,最近一周則主要看了一下源碼中的demo部分,即如
 android 系統內置浏覽器——webkit
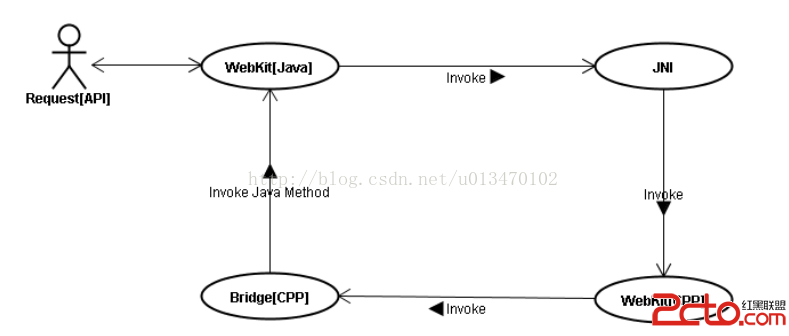
1.webkit架構 1.1 簡介 android平台的Webkit模塊可以分成Java和WebKit庫2個部分。 1.2 Webkit目錄結構 WebKit
 Andromeda是什麼 谷歌仙女座系統介紹
近幾個月傳出了谷歌正在加速整合Android和Chrome OS的消息,新操作系統定名Andromeda(仙女座)。外媒給出的最新進展是,目前已經有兩家型硬
 Android中創建對話框(確定取消對話框、單選對話框、多選對話框)實例代碼
Android中可以創建三種對話框、確定取消對話框、單選對話框、多選對話框android中的確定取消對話框演示示例Android中使用單選對話框的演示案例android中