編輯:關於Android編程
ActivityThread功能
它管理應用進程的主線程的執行(相當於普通Java程序的main入口函數),並根據AMS的要求(通過IApplicationThread接口,AMS為Client、ActivityThread.ApplicationThread為Server)負責調度和執行activities、broadcasts和其它操作。
在Android系統中,在默認情況下,一個應用程序內的各個組件(如Activity、BroadcastReceiver、Service)都會在同一個進程(Process)裡執行,且由此進程的【主線程】負責執行。
在Android系統中,如果有特別指定(通過android:process),也可以讓特定組件在不同的進程中運行。無論組件在哪一個進程中運行,默認情況下,他們都由此進程的【主線程】負責執行。
【主線程】既要處理Activity組件的UI事件,又要處理Service後台服務工作,通常會忙不過來。為了解決此問題,主線程可以創建多個子線程來處理後台服務工作,而本身專心處理UI畫面的事件。
【主線程】的主要責任:
• 快速處理UI事件。而且只有它才處理UI事件, 其它線程還不能存取UI畫面上的對象(如TextView等),此時, 主線程就叫做UI線程。基本上,Android希望UI線程能根據用戶的要求做出快速響應,如果UI線程花太多時間處理後台的工作,當UI事件發生時,讓用戶等待時間超過5秒而未處理,Android系統就會給用戶顯示ANR提示信息。
只有UI線程才能執行View派生類的onDraw()函數。
• 快速處理Broadcast消息。【主線程】除了處理UI事件之外,還要處理Broadcast消息。所以在BroadcastReceiver的onReceive()函數中,不宜占用太長的時間,否則導致【主線程】無法處理其它的Broadcast消息或UI事件。如果占用時間超過10秒, Android系統就會給用戶顯示ANR提示信息。
注意事項:
• 盡量避免讓【主線程】執行耗時的操作,讓它能快速處理UI事件和Broadcast消息。
• BroadcastReceiver的子類都是無狀態的,即每次啟動時,才會創建其對象,然後調用它的onReceive()函數,當執行完onReceive()函數時,就立即刪除此對象。由於每次調用其函數時,會重新創建一個新的對象,所以對象裡的屬性值,是無法讓各函數所共享。
一:線程通信、ActivityThread及Thread類是理解Android線程管理的關鍵。
線程,作為CPU調度資源的基本單位,在Android等針對嵌入式設備的操作系統中,有著非常重要和基礎的作用。本小節主要從以下三個方面進行分析:
1.《Android線程管理——線程通信》
2.《Android線程管理——ActivityThread》
3.《Android線程管理——Thread類的內部原理、休眠及喚醒》
--------------------------------------------------------------------------------
二、ActivityThread的主要工作及實現機制
ActivityThread是Android應用的主線程(UI線程),說起ActivityThread,不得不提到Activity的創建、啟動過程以及ActivityManagerService,但本文將僅從線程管理的角度來分析ActivityThread。ActivityManagerService、ActivityStack、ApplicationThread等會在後續文章中詳細分析,敬請期待喔~~不過為了說清楚ActivityThread的由來,還是需要簡單介紹下。
以下引用自羅升陽大師的博客:《Android應用程序的Activity啟動過程簡要介紹和學習計劃》
Step 1. 無論是通過Launcher來啟動Activity,還是通過Activity內部調用startActivity接口來啟動新的Activity,都通過Binder進程間通信進入到ActivityManagerService進程中,並且調用ActivityManagerService.startActivity接口;
Step 2. ActivityManagerService調用ActivityStack.startActivityMayWait來做准備要啟動的Activity的相關信息;
Step 3. ActivityStack通知ApplicationThread要進行Activity啟動調度了,這裡的ApplicationThread代表的是調用ActivityManagerService.startActivity接口的進程,對於通過點擊應用程序圖標的情景來說,這個進程就是Launcher了,而對於通過在Activity內部調用startActivity的情景來說,這個進程就是這個Activity所在的進程了;
Step 4. ApplicationThread不執行真正的啟動操作,它通過調用ActivityManagerService.activityPaused接口進入到ActivityManagerService進程中,看看是否需要創建新的進程來啟動Activity;
Step 5. 對於通過點擊應用程序圖標來啟動Activity的情景來說,ActivityManagerService在這一步中,會調用startProcessLocked來創建一個新的進程,而對於通過在Activity內部調用startActivity來啟動新的Activity來說,這一步是不需要執行的,因為新的Activity就在原來的Activity所在的進程中進行啟動;
Step 6. ActivityManagerServic調用ApplicationThread.scheduleLaunchActivity接口,通知相應的進程執行啟動Activity的操作;
Step 7. ApplicationThread把這個啟動Activity的操作轉發給ActivityThread,ActivityThread通過ClassLoader導入相應的Activity類,然後把它啟動起來。
大師的這段描述把ActivityManagerService、ActivityStack、ApplicationThread及ActivityThread的調用關系講的很清楚,本文將從ActivityThread的main()方法開始分析其主要工作及實現機制。
ActivityThread源碼來自:https://github.com/android/platform_frameworks_base/blob/master/core/java/android/app/ActivityThread.java
public static void main(String[] args) {
Trace.traceBegin(Trace.TRACE_TAG_ACTIVITY_MANAGER, "ActivityThreadMain");
SamplingProfilerIntegration.start();
// CloseGuard defaults to true and can be quite spammy. We
// disable it here, but selectively enable it later (via
// StrictMode) on debug builds, but using DropBox, not logs.
CloseGuard.setEnabled(false);
Environment.initForCurrentUser();
// Set the reporter for event logging in libcore
EventLogger.setReporter(new EventLoggingReporter());
AndroidKeyStoreProvider.install();
// Make sure TrustedCertificateStore looks in the right place for CA certificates
final File configDir = Environment.getUserConfigDirectory(UserHandle.myUserId());
TrustedCertificateStore.setDefaultUserDirectory(configDir);
Process.setArgV0("<pre-initialized>");
Looper.prepareMainLooper();
ActivityThread thread = new ActivityThread();
thread.attach(false);
if (sMainThreadHandler == null) {
sMainThreadHandler = thread.getHandler();
}
if (false) {
Looper.myLooper().setMessageLogging(new
LogPrinter(Log.DEBUG, "ActivityThread"));
}
// End of event ActivityThreadMain.
Trace.traceEnd(Trace.TRACE_TAG_ACTIVITY_MANAGER);
Looper.loop();
throw new RuntimeException("Main thread loop unexpectedly exited");
}
上述代碼中,紅色部分之前的代碼主要用於環境初始化、AndroidKeyStoreProvider安裝等,這裡不做重點說明。紅色部分的代碼主要分為兩個功能塊:1)綁定應用進程到ActivityManagerService;2)主線程Handler消息處理。
關於線程通信機制,Handler、MessageQueue、Message及Looper四者的關系請參考上一篇文章《Android線程管理——線程通信》。
2.1 應用進程綁定
main()方法通過thread.attach(false)綁定應用進程。ActivityManagerNative通過getDefault()方法返回ActivityManagerService實例,ActivityManagerService通過attachApplication將ApplicationThread對象綁定到ActivityManagerService,而ApplicationThread作為Binder實現ActivityManagerService對應用進程的通信和控制。
private void attach(boolean system) {
sCurrentActivityThread = this;
mSystemThread = system;
if (!system) {
…… RuntimeInit.setApplicationObject(mAppThread.asBinder());
final IActivityManager mgr = ActivityManagerNative.getDefault();
try {
mgr.attachApplication(mAppThread);
} catch (RemoteException ex) {
// Ignore
}
…… } else {
……
}
}
在ActivityManagerService內部,attachApplication實際是通過調用attachApplicationLocked實現的,這裡采用了synchronized關鍵字保證同步。
@Override
public final void attachApplication(IApplicationThread thread) {
synchronized (this) {
int callingPid = Binder.getCallingPid();
final long origId = Binder.clearCallingIdentity();
attachApplicationLocked(thread, callingPid);
Binder.restoreCallingIdentity(origId);
}
}
attachApplicationLocked的實現較為復雜,其主要功能分為兩部分:
thread.bindApplication
mStackSupervisor.attachApplicationLocked(app)
private final boolean attachApplicationLocked(IApplicationThread thread,
int pid) {
// Find the application record that is being attached... either via
// the pid if we are running in multiple processes, or just pull the
// next app record if we are emulating process with anonymous threads.
ProcessRecord app;
if (pid != MY_PID && pid >= 0) {
synchronized (mPidsSelfLocked) {
app = mPidsSelfLocked.get(pid);
}
} else {
app = null;
}
// ……
try {
// ……
thread.bindApplication(processName, appInfo, providers, app.instrumentationClass,
profilerInfo, app.instrumentationArguments, app.instrumentationWatcher,
app.instrumentationUiAutomationConnection, testMode, enableOpenGlTrace,
enableTrackAllocation, isRestrictedBackupMode || !normalMode, app.persistent,
new Configuration(mConfiguration), app.compat,
getCommonServicesLocked(app.isolated),
mCoreSettingsObserver.getCoreSettingsLocked());
updateLruProcessLocked(app, false, null);
app.lastRequestedGc = app.lastLowMemory = SystemClock.uptimeMillis();
} catch (Exception e) {
// todo: Yikes! What should we do? For now we will try to
// start another process, but that could easily get us in
// an infinite loop of restarting processes...
Slog.wtf(TAG, "Exception thrown during bind of " + app, e);
app.resetPackageList(mProcessStats);
app.unlinkDeathRecipient();
startProcessLocked(app, "bind fail", processName);
return false;
}
// See if the top visible activity is waiting to run in this process...
if (normalMode) {
try {
if (mStackSupervisor.attachApplicationLocked(app)) {
didSomething = true;
}
} catch (Exception e) {
Slog.wtf(TAG, "Exception thrown launching activities in " + app, e);
badApp = true;
}
}
// ……
}
thread對象其實是ActivityThread裡ApplicationThread對象在ActivityManagerService的代理對象,故此執行thread.bindApplication,最終會調用ApplicationThread的bindApplication方法。該bindApplication方法的實質是通過向ActivityThread的消息隊列發送BIND_APPLICATION消息,消息的處理調用handleBindApplication方法,handleBindApplication方法比較重要的是會調用如下方法:
mInstrumentation.callApplicationOnCreate(app);
callApplicationOnCreate即調用應用程序Application的onCreate()方法,說明Application的onCreate()方法會比所有activity的onCreate()方法先調用。
mStackSupervisor為ActivityManagerService的成員變量,類型為ActivityStackSupervisor。
/** Run all ActivityStacks through this */
ActivityStackSupervisor mStackSupervisor;
從注釋可以看出,mStackSupervisor為Activity堆棧管理輔助類實例。ActivityStackSupervisor的attachApplicationLocked()方法的調用了realStartActivityLocked()方法,在realStartActivityLocked()方法中,會調用scheduleLaunchActivity()方法:
final boolean realStartActivityLocked(ActivityRecord r,
ProcessRecord app, boolean andResume, boolean checkConfig)
throws RemoteException {
//...
try {
//...
app.thread.scheduleLaunchActivity(new Intent(r.intent), r.appToken,
System.identityHashCode(r), r.info,
new Configuration(mService.mConfiguration),
r.compat, r.icicle, results, newIntents, !andResume,
mService.isNextTransitionForward(), profileFile, profileFd,
profileAutoStop);
//...
} catch (RemoteException e) {
//...
}
//...
return true;
}
app.thread也是ApplicationThread對象在ActivityManagerService的一個代理對象,最終會調用ApplicationThread的scheduleLaunchActivity方法。
// we use token to identify this activity without having to send the
// activity itself back to the activity manager. (matters more with ipc)
@Override
public final void scheduleLaunchActivity(Intent intent, IBinder token, int ident,
ActivityInfo info, Configuration curConfig, Configuration overrideConfig,
CompatibilityInfo compatInfo, String referrer, IVoiceInteractor voiceInteractor,
int procState, Bundle state, PersistableBundle persistentState,
List<ResultInfo> pendingResults, List<ReferrerIntent> pendingNewIntents,
boolean notResumed, boolean isForward, ProfilerInfo profilerInfo) {
updateProcessState(procState, false);
ActivityClientRecord r = new ActivityClientRecord();
……
sendMessage(H.LAUNCH_ACTIVITY, r);
}
同bindApplication()方法,最終是通過向ActivityThread的消息隊列發送消息,在ActivityThread完成實際的LAUNCH_ACTIVITY的操作。
public void handleMessage(Message msg) {
if (DEBUG_MESSAGES) Slog.v(TAG, ">>> handling: " + codeToString(msg.what));
switch (msg.what) {
case LAUNCH_ACTIVITY: {
Trace.traceBegin(Trace.TRACE_TAG_ACTIVITY_MANAGER, "activityStart");
final ActivityClientRecord r = (ActivityClientRecord) msg.obj;
r.packageInfo = getPackageInfoNoCheck(
r.activityInfo.applicationInfo, r.compatInfo);
handleLaunchActivity(r, null);
Trace.traceEnd(Trace.TRACE_TAG_ACTIVITY_MANAGER);
} break;
……
}
handleLaunchActivity()用於啟動Activity。具體的啟動流程不在這裡詳述了,這裡重點說明ApplicationThread及ActivityThread的線程通信機制。
2.2 主線程消息處理
在《Android線程管理——線程通信》中談到了普通線程中Handler、MessageQueue、Message及Looper四者的關系,那麼,ActivityThread中的線程通信又有什麼不同呢?不同之處主要表現為兩點:1)Looper的初始化方式;2)Handler生成。
首先,ActivityThread通過Looper.prepareMainLooper()初始化Looper,為了直觀比較ActivityThread與普通線程初始化Looper的區別,把兩種初始化方法放在一起:
/** Initialize the current thread as a looper.
* This gives you a chance to create handlers that then reference
* this looper, before actually starting the loop. Be sure to call
* {@link #loop()} after calling this method, and end it by calling
* {@link #quit()}.
*/
public static void prepare() {
prepare(true);
}
private static void prepare(boolean quitAllowed) {
if (sThreadLocal.get() != null) {
throw new RuntimeException("Only one Looper may be created per thread");
}
sThreadLocal.set(new Looper(quitAllowed));
}
/**
* Initialize the current thread as a looper, marking it as an
* application's main looper. The main looper for your application
* is created by the Android environment, so you should never need
* to call this function yourself. See also: {@link #prepare()}
*/
public static void prepareMainLooper() {
prepare(false);
synchronized (Looper.class) {
if (sMainLooper != null) {
throw new IllegalStateException("The main Looper has already been prepared.");
}
sMainLooper = myLooper();
}
}
•普通線程的prepare()方法默認quitAllowed參數為true,表示允許退出,ActivityThread在prepareMainLooper()方法中調用prepare()方法,參數為false,表示主線程不允許退出。
•普通線程只調用prepare()方法,ActivityThread在調用完prepare()方法之後,會通過myLooper()方法將本地線程<ThreadLocal>的Looper對象的引用交給sMainLooper。myLooper()其實就是調用sThreadLocal的get()方法實現的。
/**
* Return the Looper object associated with the current thread. Returns
* null if the calling thread is not associated with a Looper.
*/
public static Looper myLooper() {
return sThreadLocal.get();
}
•之所以要通過sMainLooper指向ActivityThread的Looper對象,就是希望通過getMainLooper()方法將主線程的Looper對象開放給其他線程。
/** Returns the application's main looper, which lives in the main thread of the application.
*/
public static Looper getMainLooper() {
synchronized (Looper.class) {
return sMainLooper;
}
}
其次,ActivityThread與普通線程的Handler生成方式也不一樣。普通線程生成一個與Looper綁定的Handler即可,ActivityThread通過sMainThreadHandler指向getHandler()的返回值,而getHandler()方法返回的其實是一個繼承Handler的H對象。。
private class H extends Handler {
……
}
final H mH = new H();
final Handler getHandler() {
return mH;
}
真正實現消息機制“通”信的其實是Looper的loop()方法,loop()方法的核心實現如下:
/**
* Run the message queue in this thread. Be sure to call
* {@link #quit()} to end the loop.
*/
public static void loop() {
final Looper me = myLooper();
if (me == null) {
throw new RuntimeException("No Looper; Looper.prepare() wasn't called on this thread.");
}
final MessageQueue queue = me.mQueue;
// Make sure the identity of this thread is that of the local process,
// and keep track of what that identity token actually is.
Binder.clearCallingIdentity();
final long ident = Binder.clearCallingIdentity();
for (;;) {
Message msg = queue.next(); // might block
if (msg == null) {
// No message indicates that the message queue is quitting.
return;
}
// This must be in a local variable, in case a UI event sets the logger
Printer logging = me.mLogging;
if (logging != null) {
logging.println(">>>>> Dispatching to " + msg.target + " " +
msg.callback + ": " + msg.what);
}
msg.target.dispatchMessage(msg);
if (logging != null) {
logging.println("<<<<< Finished to " + msg.target + " " + msg.callback);
}
// Make sure that during the course of dispatching the
// identity of the thread wasn't corrupted.
final long newIdent = Binder.clearCallingIdentity();
if (ident != newIdent) {
Log.wtf(TAG, "Thread identity changed from 0x"
+ Long.toHexString(ident) + " to 0x"
+ Long.toHexString(newIdent) + " while dispatching to "
+ msg.target.getClass().getName() + " "
+ msg.callback + " what=" + msg.what);
}
msg.recycle();
}
}
大致流程如下:
•首先通過上述myLooper()方法獲取Looper對象,取出Looper持有的MessageQueue;
•然後從MessageQueue取出Message,如果Message為null,說明線程正在退出;
•Message不為空,則調用Message的target handler對該Message進行分發,具體分發、處理流程可參考《Android線程管理——線程通信》;
•消息處理完畢,調用recycle()方法進行回收。
 Android 底部彈出提示框的解決辦法(使用Activity以及PopupWindow)
本片文章主要談探討了如何實現在底部彈出提示框背景為半透明效果的實現。想要實現此種效果一般有兩種方式一個是使用Activity設置Theme另一種方式就是使用PopupWi
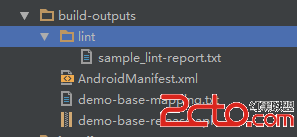 Android 攜程動態加載框架的打包流程分析
最近攜程開源了一套動態加載的框架,總的來說,該框架和OpenAtlas還是有一定的相似之處的,比如資源的分區。此外該框架也支持熱修復。個人覺得該框架中攜程做的比較多的應該
 Android手機線刷教程
本教程為通用教程 幾乎適合所有的安卓手機 希望可以幫到酷愛刷機的機油們!注意 不支持win8 支持win7/
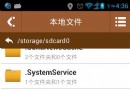 Android獲取手機文件夾及文件列表的方法
先看看效果圖:package wuwang.tools.utils; import java.io.File; import java.io.FileInputStre