編輯:關於Android編程
微信朋友圈上面的圖片封面,QQ空間說說上面的圖片封面都有下拉反彈的效果,這些都是使用滾動條實現的。下拉,當松開時候,反彈至原來的位置。下拉時候能看到背景圖片。那麼這裡簡單介紹一下這種效果的實現。
1、效果圖
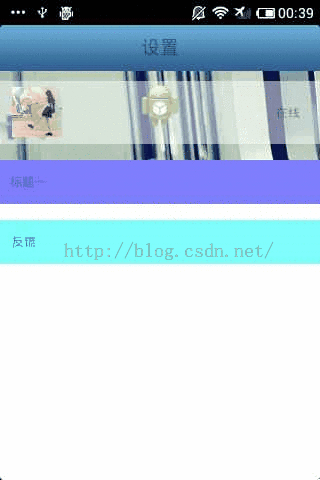
這部手機顯示的分辨率有限,很老的手機調試。
2、具有反彈效果BounceScrollView
package com.org.scroll;

import android.content.Context;
import android.graphics.Rect;
import android.util.AttributeSet;
import android.view.MotionEvent;
import android.view.View;
import android.view.animation.TranslateAnimation;
import android.widget.ScrollView;

/**
 * ScrollView反彈效果的實現
 */
public class BounceScrollView extends ScrollView {
  private View inner;// 孩子View

  private float y;// 點擊時y坐標
  // 矩形(這裡只是個形式,只是用於判斷是否需要動畫.)
  private Rect normal = new Rect();

  private boolean isCount = false;// 是否開始計算

  public BounceScrollView(Context context, AttributeSet attrs) {
    super(context, attrs);
  }

  /***
   * 根據 XML 生成視圖工作完成.該函數在生成視圖的最後調用,在所有子視圖添加完之後. 即使子類覆蓋了 onFinishInflate
   * 方法,也應該調用父類的方法,使該方法得以執行.
   */
  @Override
  protected void onFinishInflate() {
    if (getChildCount() > 0) {
      inner = getChildAt(0);
    }
  }

  /***
   * 監聽touch
   */
  @Override
  public boolean onTouchEvent(MotionEvent ev) {
    if (inner != null) {
      commOnTouchEvent(ev);
    }

    return super.onTouchEvent(ev);
  }

  /***
   * 觸摸事件
   *
   * @param ev
   */
  public void commOnTouchEvent(MotionEvent ev) {
    int action = ev.getAction();
    switch (action) {
    case MotionEvent.ACTION_DOWN:
      break;
    case MotionEvent.ACTION_UP:
      // 手指松開.
      if (isNeedAnimation()) {
        animation();
        isCount = false;
      }
      break;
    /***
     * 排除出第一次移動計算,因為第一次無法得知y坐標, 在MotionEvent.ACTION_DOWN中獲取不到,
     * 因為此時是MyScrollView的touch事件傳遞到到了LIstView的孩子item上面.所以從第二次計算開始.
     * 然而我們也要進行初始化,就是第一次移動的時候讓滑動距離歸0. 之後記錄准確了就正常執行.
     */
    case MotionEvent.ACTION_MOVE:
      final float preY = y;// 按下時的y坐標
      float nowY = ev.getY();// 時時y坐標
      int deltaY = (int) (preY - nowY);// 滑動距離
      if (!isCount) {
        deltaY = 0; // 在這裡要歸0.
      }

      y = nowY;
      // 當滾動到最上或者最下時就不會再滾動,這時移動布局
      if (isNeedMove()) {
        // 初始化頭部矩形
        if (normal.isEmpty()) {
          // 保存正常的布局位置
          normal.set(inner.getLeft(), inner.getTop(),
              inner.getRight(), inner.getBottom());
        }
//       Log.e("jj", "矩形:" + inner.getLeft() + "," + inner.getTop()
//           + "," + inner.getRight() + "," + inner.getBottom());
        // 移動布局
        inner.layout(inner.getLeft(), inner.getTop() - deltaY / 2,
            inner.getRight(), inner.getBottom() - deltaY / 2);
      }
      isCount = true;
      break;

    default:
      break;
    }
  }

  /***
   * 回縮動畫
   */
  public void animation() {
    // 開啟移動動畫
    TranslateAnimation ta = new TranslateAnimation(0, 0, inner.getTop(),
        normal.top);
    ta.setDuration(200);
    inner.startAnimation(ta);
    // 設置回到正常的布局位置
    inner.layout(normal.left, normal.top, normal.right, normal.bottom);

//   Log.e("jj", "回歸:" + normal.left + "," + normal.top + "," + normal.right
//       + "," + normal.bottom);

    normal.setEmpty();

  }

  // 是否需要開啟動畫
  public boolean isNeedAnimation() {
    return !normal.isEmpty();
  }

  /***
   * 是否需要移動布局 inner.getMeasuredHeight():獲取的是控件的總高度
   *
   * getHeight():獲取的是屏幕的高度
   *
   * @return
   */
  public boolean isNeedMove() {
    int offset = inner.getMeasuredHeight() - getHeight();
    int scrollY = getScrollY();
//   Log.e("jj", "scrolly=" + scrollY);
    // 0是頂部,後面那個是底部
    if (scrollY == 0 || scrollY == offset) {
      return true;
    }
    return false;
  }

}
3、MainActivity
package com.org.activity;

import android.os.Bundle;
import android.app.Activity;
import android.view.Menu;
import android.view.Window;

public class MainActivity extends Activity {

  @Override
  protected void onCreate(Bundle savedInstanceState) {
    super.onCreate(savedInstanceState);
    requestWindowFeature(Window.FEATURE_NO_TITLE);
    setContentView(R.layout.activity_main);
  }

  @Override
  public boolean onCreateOptionsMenu(Menu menu) {
    // Inflate the menu; this adds items to the action bar if it is present.
    getMenuInflater().inflate(R.menu.activity_main, menu);
    return true;
  }

}
這個沒做什麼,主要看布局,以及BounceScrollView類。
4、activity_main布局
<LinearLayout xmlns:android="http://schemas.android.com/apk/res/android"
  xmlns:tools="http://schemas.android.com/tools"
  android:layout_width="match_parent"
  android:layout_height="match_parent"
  android:orientation="vertical" >

  <include layout="@layout/common_title_bg" />

  <com.org.scroll.BounceScrollView
    android:layout_width="match_parent"
    android:layout_height="wrap_content"
    android:background="@drawable/coversation_bg"
    android:focusable="true"
    android:focusableInTouchMode="true" >

    <LinearLayout
      android:layout_width="match_parent"
      android:layout_height="match_parent"
      android:orientation="vertical"
      android:paddingTop="10.0dip" >

      <RelativeLayout
        android:id="@+id/accountSetting"
        android:layout_width="fill_parent"
        android:layout_height="63.0dip"
        android:background="#80ffffff"
        android:focusable="true" >

        <FrameLayout
          android:id="@+id/frameLayout1"
          android:layout_width="54.0dip"
          android:layout_height="54.0dip"
          android:layout_centerVertical="true"
          android:layout_marginLeft="10.0dip" >

          <ImageView
            android:id="@+id/face"
            android:layout_width="50.0dip"
            android:layout_height="50.0dip"
            android:layout_gravity="center"
            android:contentDescription="@null"
            android:src="@drawable/h0" />

          <ImageView
            android:id="@+id/statusIcon"
            android:layout_width="18.0dip"
            android:layout_height="18.0dip"
            android:layout_gravity="bottom|right|center"
            android:contentDescription="@null" />
        </FrameLayout>

        <ImageView
          android:id="@+id/imageView1"
          android:layout_width="wrap_content"
          android:layout_height="wrap_content"
          android:layout_alignParentRight="true"
          android:layout_centerVertical="true"
          android:layout_marginRight="10.0dip"
          android:contentDescription="@null"
          android:duplicateParentState="true" />

        <TextView
          android:id="@+id/status"
          android:layout_width="wrap_content"
          android:layout_height="wrap_content"
          android:layout_alignBottom="@+id/nick"
          android:layout_marginRight="10.0dip"
          android:layout_toLeftOf="@id/imageView1"
          android:duplicateParentState="true"
          android:text="在線" />

        <TextView
          android:id="@+id/nick"
          android:layout_width="wrap_content"
          android:layout_height="wrap_content"
          android:layout_centerVertical="true"
          android:layout_marginLeft="10.0dip"
          android:layout_marginRight="69.0dip"
          android:layout_toRightOf="@id/frameLayout1"
          android:duplicateParentState="true"
          android:ellipsize="end"
          android:singleLine="true" />
      </RelativeLayout>

      <LinearLayout
        android:layout_width="match_parent"
        android:layout_height="600dp"
        android:layout_marginTop="16.0dip"
        android:layout_weight="2.13"
        android:background="#ffffffff"
        android:orientation="vertical" >

        <TextView
          android:id="@+id/my_profile"
          android:layout_width="fill_parent"
          android:layout_height="44.0dip"
          android:background="#800000ff"
          android:clickable="true"
          android:gravity="center_vertical"
          android:paddingLeft="10.0dip"
          android:paddingRight="10.0dip"
          android:text="標題一" />

        <LinearLayout
          android:layout_width="fill_parent"
          android:layout_height="wrap_content"
          android:layout_marginTop="16.0dip"
          android:orientation="vertical" >

          <RelativeLayout
            android:id="@+id/set_feedback"
            android:layout_width="fill_parent"
            android:layout_height="44.0dip"
            android:background="#8000ffff"
            android:clickable="true"
            android:focusable="true" >

            <TextView
              android:layout_width="wrap_content"
              android:layout_height="wrap_content"
              android:layout_centerVertical="true"
              android:layout_marginLeft="12.0dip"
              android:duplicateParentState="true"
              android:gravity="center_vertical"
              android:text="反饋" />
          </RelativeLayout>
        </LinearLayout>
      </LinearLayout>
    </LinearLayout>
  </com.org.scroll.BounceScrollView>

</LinearLayout>
希望本文對大家學習Android軟件編程有所幫助。
 (Android Framework 之路) N版本 Framework Camera的一些改動
前言Android N版本最近發布,Nougat是否好吃,不得而知,慢慢看下~感謝AndroidXref這個網站,給開發者提供了大量的便捷~以後學習Android就靠它了
 一起學android之設置ListView數據顯示的動畫效果
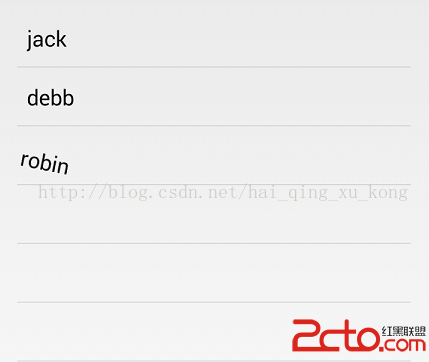
效果圖: 平時我們要實現ListView數據顯示時的動畫效果,可以使用LayoutAnimationController為ListView設置動畫效果,並通過L
 一起學android之如何獲取手機程序列表以及程序相關信息並啟動指定程序
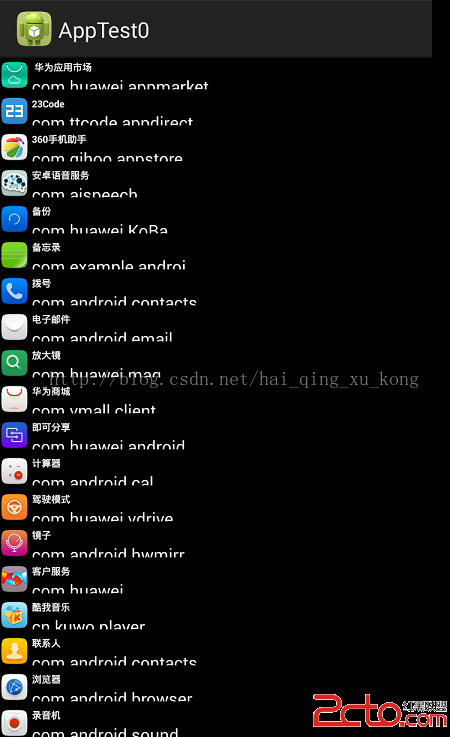
效果圖:程序列表:啟動程序,獲取程序信息: 代碼如下:創建一個AppInfo類來表示應用程序 public cla
 Android編程獲取GPS數據的方法詳解
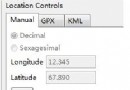
本文實例講述了Android編程獲取GPS數據的方法。分享給大家供大家參考,具體如下:GPS是Android系統中重要的組成部分,通過它可以衍生出眾多的與位置相關的應用。