編輯:關於Android編程
前言:
在日常的Android開發中會經常和控件打交道,有時Android提供的控件未必能滿足業務的需求,這個時候就需要我們實現自定義一些控件,今天先大致了解一下自定義控件的要求和實現的基本原理。
自定義控件要求:
1. 應當遵守Android標准的規范(命名,可配置,事件處理等)。
2. 在XML布局中科配置控件的屬性。
3. 對交互應當有合適的反饋,比如按下,點擊等。
4. 具有兼容性, Android版本很多,應該具有廣泛的適用性。
自定義控件學習步驟:
1 .View的工作原理
2 .編寫View類
3.為View類增加屬性
4 .繪制屏幕
5. 響應用戶消息
6 .自定義回調函數
自定義控件兩種方式:
1. 繼承ViewGroup
例如:ViewGroup、LinearLayout、FrameLayout、RelativeLayout等。
2. 繼承View
例如:View、TextView、ImageView、Button等。
自定義控件基本繪制原理:
View的繪制基本上由measure()、layout()、draw()這個三個函數完成
1.)測量-Measure過程是計算視圖大小,View measure過程相關方法主要有三個:
public final void measure(int widthMeasureSpec, int heightMeasureSpec)
protected final void setMeasuredDimension(int measuredWidth, int measuredHeight)
protected void onMeasure(int widthMeasureSpec, int heightMeasureSpec)
measure調用onMeasure,onMeasure測量寬度、高度然後調用setMeasureDimension保存測量結果,measure,setMeasureDimension是final類型,view的子類不需要重寫,onMeasure在view的子類中重寫。
關於MeasureSpec:
(1)UPSPECIFIED :父容器對於子容器沒有任何限制,子容器想要多大就多大.
(2) EXACTLY父容器已經為子容器設置了尺寸,子容器應當服從這些邊界,不論子容器想要多大的空間.
(3) AT_MOST子容器可以是聲明大小內的任意大小.
2.)布局-Layout過程用於設置視圖在屏幕中顯示的位置,View layout過程相關方法主要要三個:
public void layout(int l, int t, int r, int b)
protected boolean setFrame(int left, int top, int right, int bottom)
protected void onLayout(boolean changed, int left, int top, int right, int bottom)
layout通過調用setFrame(l,t,r,b),l,t,r,b即子視圖在父視圖中的具體位置,onLayout一般只會在自定義ViewGroup中才會使用
3.)繪制-draw過程主要用於利用前兩步得到的參數,將視圖顯示在屏幕上,到這裡也就完成了整個的視圖繪制工作。
public void draw(Canvas canvas)
protected void onDraw(Canvas canvas)
通過調用draw函數進行視圖繪制,在View類中onDraw函數是個空函數,最終的繪制需求需要在自定義的onDraw函數中進行實現,比如ImageView完成圖片的繪制,如果自定義ViewGroup這個函數則不需要重載。
自定義控件示例:
這裡先介紹繼承View的方式為例,其實ViewGroup最終的繼承的也是View。這裡 模擬一個需求場景,需要一個圓形顯示百分比。
public class PercentView extends View {
 private final static String TAG = PercentView.class.getSimpleName();
 private Paint mPaint;

 public PercentView(Context context) {
 super(context);
 init();
 }

 public PercentView(Context context, AttributeSet attrs) {
 super(context, attrs);
 init();
 }

 public PercentView(Context context, AttributeSet attrs, int defStyleAttr) {
 super(context, attrs, defStyleAttr);
 init();
 }

 private void init(){
 mPaint = new Paint();
 mPaint.setAntiAlias(true);
 }
 @Override
 protected void onMeasure(int widthMeasureSpec, int heightMeasureSpec) {
 super.onMeasure(widthMeasureSpec, heightMeasureSpec);
 int widthMode = MeasureSpec.getMode(widthMeasureSpec);
 int widthSize = MeasureSpec.getSize(widthMeasureSpec);
 int heightMode = MeasureSpec.getMode(heightMeasureSpec);
 int heightSize = MeasureSpec.getSize(heightMeasureSpec);
 Log.e(TAG, "onMeasure--widthMode-->" + widthMode);
 switch (widthMode) {
 case MeasureSpec.EXACTLY:

 break;
 case MeasureSpec.AT_MOST:

 break;
 case MeasureSpec.UNSPECIFIED:

 break;
 }
 Log.e(TAG, "onMeasure--widthSize-->" + widthSize);
 Log.e(TAG, "onMeasure--heightMode-->" + heightMode);
 Log.e(TAG, "onMeasure--heightSize-->" + heightSize);
 }

 @Override
 protected void onLayout(boolean changed, int left, int top, int right, int bottom) {
 super.onLayout(changed, left, top, right, bottom);
 Log.e(TAG, "onLayout");
 }

 @Override
 protected void onDraw(Canvas canvas) {
 super.onDraw(canvas);
 mPaint.setColor(Color.GRAY);
 // FILL填充, STROKE描邊,FILL_AND_STROKE填充和描邊
 mPaint.setStyle(Paint.Style.FILL_AND_STROKE);
 int with = getWidth();
 int height = getHeight();
 Log.e(TAG, "onDraw---->" + with + "*" + height);
 float radius = with / 4;
 canvas.drawCircle(with / 2, with / 2, radius, mPaint);
 mPaint.setColor(Color.BLUE);
 RectF oval = new RectF(with / 2 - radius, with / 2 - radius, with / 2
 + radius, with / 2 + radius); //用於定義的圓弧的形狀和大小的界限
 canvas.drawArc(oval, 270, 120, true, mPaint); //根據進度畫圓弧
 }
}
在布局中如何使用
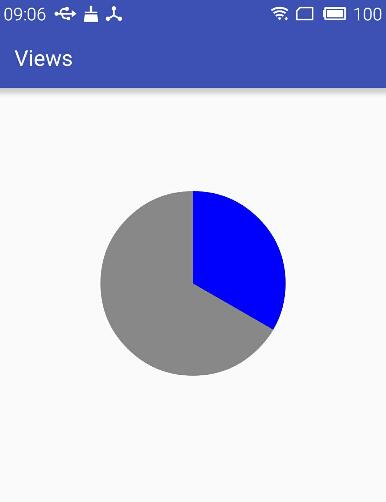
<LinearLayout xmlns:android="http://schemas.android.com/apk/res/android"
 xmlns:tools="http://schemas.android.com/tools"
 android:layout_width="match_parent"
 android:layout_height="match_parent"
 android:orientation="vertical">

 <com.whoislcj.views.PercentView
 android:layout_width="wrap_content"
 android:layout_height="wrap_content"
 android:layout_margin="10dp" />

</LinearLayout>
顯示效果:
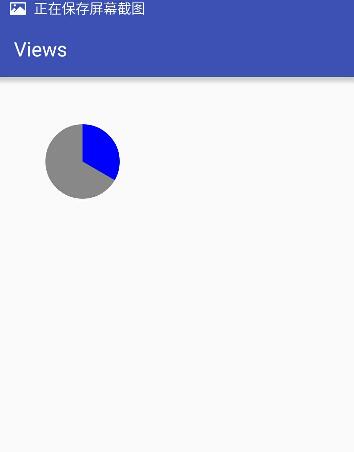
如果布局文件改成
<?xml version="1.0" encoding="utf-8"?>
<LinearLayout xmlns:android="http://schemas.android.com/apk/res/android"
 xmlns:tools="http://schemas.android.com/tools"
 android:layout_width="match_parent"
 android:layout_height="match_parent"
 android:orientation="vertical">

 <com.whoislcj.views.PercentView
 android:layout_width="150dp"
 android:layout_height="150dp"
 android:layout_margin="10dp" />

</LinearLayout>
顯示效果變成
總結:
本篇主要介紹Android自定義控件的基本繪制原理,會在下一篇中介紹如何自定義屬性,點擊查看。
以上就是本文的全部內容,希望對大家的學習有所幫助,也希望大家多多支持本站。
 Android 中ListView點擊Item無響應問題的解決辦法
如果listitem裡面包括button或者checkbox等控件,默認情況下listitem會失去焦點,導致無法響應item的事件,最常用的解決辦法是在listitem
 android設備終端與藍牙模塊(HC-06)的通訊編程思路
藍牙模塊(HC-06): private BluetoothAdapter mBtAdapter = BluetoothAdapter.getDefaultAdapter
 Android 開發:繪制多條線,帶緩存,帶觸控的圖表(基金圖表的實現)
對之前的幾篇文章裡的model進行補充後期會把這個功能類,添加到這個框架裡,有興趣的可以下載下來看,這個框架會經常更新:public class BaseFundChar
 Android自定義View之圖形圖像工具類Path的特殊用法
概述:沒什麼好說的。Demo新建一個自定義Viewpublic class MyPathView extends View { private int width;