編輯:關於Android編程
之前寫了兩篇關於自定義view的文章,本篇講講自定義ViewGroup的實現。
我們知道ViewGroup就是View的容器類,我們經常用的LinearLayout,RelativeLayout等都是ViewGroup的子類。並且我們在寫布局xml的時候,會告訴容器(凡是以layout為開頭的屬性,都是為用於告訴容器的),我們的寬度(layout_width)、高度(layout_height)、對齊方式(layout_gravity)等;於是乎,ViewGroup的職能為:給childView計算出建議的寬和高和測量模式 ;決定childView的位置;為什麼只是建議的寬和高,而不是直接確定呢,別忘了childView寬和高可以設置為wrap_content,這樣只有childView才能計算出自己的寬和高。
View的根據ViewGroup傳入的測量值和模式,對自己寬高進行確定(onMeasure中完成),然後在onDraw中完成對自己的繪制。ViewGroup需要給View傳入view的測量值和模式(onMeasure中完成),而且對於此ViewGroup的父布局,自己也需要在onMeasure中完成對自己寬和高的確定。此外,需要在onLayout中完成對其childView的位置的指定。
因為ViewGroup有很多子View,所以它的整個繪制過程相對於View會復雜一點,但是還是遵循三個步驟measure,layout,draw,我們依次說明。
本文我們來寫一個類似於GridView的網格容器吧,姑且叫做CustomGridView。
自定義屬性/獲取屬性值
<?xml version="1.0" encoding="utf-8"?>
<resources>
 <declare-styleable name="CustomGridView">
 <attr name="numColumns" format="integer" />
 <attr name="hSpace" format="integer" />
 <attr name="vSpace" format="integer" />
 </declare-styleable>
</resources>
 public CustomGridView(Context context, AttributeSet attrs, int defStyle) {
 super(context, attrs, defStyle);
 if (attrs != null) {
  TypedArray a = getContext().obtainStyledAttributes(attrs,
   R.styleable.CustomGridView);
  colums = a.getInteger(R.styleable.CustomGridLayout_numColumns, 3);
  hSpace = a.getInteger(R.styleable.CustomGridLayout_hSpace, 10);
  vSpace = a.getInteger(R.styleable.CustomGridLayout_vSpace, 10);
  a.recycle();
 }
 }

 public MyGridLayout(Context context, AttributeSet attrs) {
 this(context, attrs, 0);
 }

 public MyGridLayout(Context context) {
 this(context, null);
 }
LayoutParams
ViewGroup還有一個很重要的知識LayoutParams,LayoutParams存儲了子View在加入ViewGroup中時的一些參數信息,在繼承ViewGroup類時,一般也需要新建一個新的LayoutParams類,就像SDK中我們熟悉的LinearLayout.LayoutParams,RelativeLayout.LayoutParams類等一樣,那麼可以這樣做,在你定義的ViewGroup子類中,新建一個LayoutParams類繼承與ViewGroup.LayoutParams。
public static class LayoutParams extends ViewGroup.LayoutParams {
  public int left = 0;
  public int top = 0;

  public LayoutParams(Context arg0, AttributeSet arg1) {
  super(arg0, arg1);
  }

  public LayoutParams(int arg0, int arg1) {
  super(arg0, arg1);
  }

  public LayoutParams(android.view.ViewGroup.LayoutParams arg0) {
  super(arg0);
  }
 }
那麼現在新的LayoutParams類已經有了,如何讓我們自定義的ViewGroup使用我們自定義的LayoutParams類來添加子View呢,ViewGroup同樣提供了下面這幾個方法供我們重寫,我們重寫返回我們自定義的LayoutParams對象即可。
 @Override
 public ViewGroup.LayoutParams generateLayoutParams(AttributeSet attrs) {
 return new CustomGridLayout.LayoutParams(getContext(), attrs);
 }

 @Override
 protected ViewGroup.LayoutParams generateDefaultLayoutParams() {
 return new LayoutParams(LayoutParams.WRAP_CONTENT, LayoutParams.WRAP_CONTENT);
 }

 @Override
 protected ViewGroup.LayoutParams generateLayoutParams(ViewGroup.LayoutParams p) {
 return new LayoutParams(p);
 }

 @Override
 protected boolean checkLayoutParams(ViewGroup.LayoutParams p) {
 return p instanceof CustomGridLayout.LayoutParams;
 }
measure
在onMeasure中需要做兩件事:
•計算childView的測量值以及模式
measureChildren(widthMeasureSpec, heightMeasureSpec);
measureChild(child, widthMeasureSpec, heightMeasureSpec);
child.measure(WidthMeasureSpec, HeightMeasureSpec);
•設置ViewGroup自己的寬和高
測量ViewGroup的大小,如果layout_width和layout_height是match_parent或具體的xxxdp,就很簡答了,直接調用setMeasuredDimension()方法,設置ViewGroup的寬高即可,如果是wrap_content,就比較麻煩了,我們需要遍歷所有的子View,然後對每個子View進行測量,然後根據子View的排列規則,計算出最終ViewGroup的大小。
注意:在自定義View第一篇講SpecMode時,曾說到UNSPECIFIED一般都是父控件是AdapterView,通過measure方法傳入的模式。在這裡恰好就用到了。
@Override
 protected void onMeasure(int widthMeasureSpec, int heightMeasureSpec) {
 int widthMode = MeasureSpec.getMode(widthMeasureSpec);
 int heightMode = MeasureSpec.getMode(heightMeasureSpec);
 int sizeWidth = MeasureSpec.getSize(widthMeasureSpec);
 int sizeHeight = MeasureSpec.getSize(heightMeasureSpec);

 //UNSPECIFIED一般都是父控件是AdapterView,通過measure方法傳入的模式
 final int childWidthMeasureSpec = MeasureSpec.makeMeasureSpec(sizeWidth, MeasureSpec.UNSPECIFIED);
 final int childHeightMeasureSpec = MeasureSpec.makeMeasureSpec(sizeHeight, MeasureSpec.UNSPECIFIED);
 measureChildren(childWidthMeasureSpec, childHeightMeasureSpec);

 int childCount = this.getChildCount();
 int line = childCount % colums == 0 ? childCount / colums : (childCount + colums) / colums;

 //寬布局為wrap_content時,childWidth取childView寬的最大值,否則動態計算
 if (widthMode == MeasureSpec.AT_MOST) {
  for (int i = 0; i < childCount; i++) {
  View child = this.getChildAt(i);
  childWidth = Math.max(childWidth, child.getMeasuredWidth());
  }
 } else if (widthMode == MeasureSpec.EXACTLY) {
  childWidth = (sizeWidth - (colums - 1) * hSpace) / colums;
 }
 //高布局為wrap_content時,childHeight取childView高的最大值,否則動態計算
 if (heightMode == MeasureSpec.AT_MOST) {
  for (int i = 0; i < childCount; i++) {
  View child = this.getChildAt(i);
  childHeight = Math.max(childHeight, child.getMeasuredHeight());
  }
 } else if (heightMode == MeasureSpec.EXACTLY) {
  childHeight = (sizeHeight - (line - 1) * vSpace) / line;
 }

 //遍歷每個子view,將它們左上角坐標保存在它們的LayoutParams中,為後面onLayout服務
 for (int i = 0; i < childCount; i++) {
  View child = this.getChildAt(i);
  LayoutParams lParams = (LayoutParams) child.getLayoutParams();
  lParams.left = (i % colums) * (childWidth + hSpace);
  lParams.top = (i / colums) * (childHeight + vSpace);
 }
 //當寬高為wrap_content時,分別計算出的viewGroup寬高
 int wrapWidth;
 int wrapHeight;
 if (childCount < colums) {
  wrapWidth = childCount * childWidth + (childCount - 1) * hSpace;
 } else {
  wrapWidth = colums * childWidth + (colums - 1) * hSpace;
 }
 wrapHeight = line * childHeight + (line - 1) * vSpace;
 setMeasuredDimension(widthMode == MeasureSpec.AT_MOST? wrapWidth:sizeWidth,heightMode == MeasureSpec.AT_MOST? wrapHeight:sizeHeight);
 }
layout
最核心的就是調用layout方法,根據我們measure階段獲得的LayoutParams中的left和top字段,也很好對每個子View進行位置排列。
@Override
 protected void onLayout(boolean changed, int l, int t, int r, int b) {
 int childCount = this.getChildCount();
 for (int i = 0; i < childCount; i++) {
  View child = this.getChildAt(i);
  LayoutParams lParams = (LayoutParams) child.getLayoutParams();
  child.layout(lParams.left, lParams.top, lParams.left + childWidth, lParams.top + childHeight);
 }
 }
draw
ViewGroup在draw階段,其實就是按照子類的排列順序,調用子類的onDraw方法,因為我們只是View的容器,本身一般不需要draw額外的修飾,所以往往在onDraw方法裡面,只需要調用ViewGroup的onDraw默認實現方法即可。不需要重寫。
最後,在自定義ViewGroup中定義GridAdatper接口,以便在外部可以為ViewGroup設置適配器。
 public interface GridAdatper {
 View getView(int index);
 int getCount();
 }

 /** 設置適配器 */
 public void setGridAdapter(GridAdatper adapter) {
 this.adapter = adapter;
 // 動態添加視圖
 int size = adapter.getCount();
 for (int i = 0; i < size; i++) {
  addView(adapter.getView(i));
 }
 }
並且在自定義ViewGroup中定義OnItemClickListener接口,以便在外部可以獲取到childView的點擊事件。
public interface OnItemClickListener {
 void onItemClick(View v, int index);
 }

 public void setOnItemClickListener(final OnItemClickListener listener) {
 if (this.adapter == null)
  return;
 for (int i = 0; i < adapter.getCount(); i++) {
  final int index = i;
  View view = getChildAt(i);
  view.setOnClickListener(new OnClickListener() {
  @Override
  public void onClick(View v) {
   listener.onItemClick(v, index);
  }
  });
 }
 }
使用自定義的CustomViewGroup
布局文件:
<?xml version="1.0" encoding="utf-8"?>
<LinearLayout xmlns:android="http://schemas.android.com/apk/res/android" xmlns:app="http://schemas.android.com/apk/res/com.hx.customgridview"
 android:layout_width="match_parent"
 android:layout_height="match_parent"
 android:background="#303030"
 android:orientation="vertical" >

 <com.hx.customgridview.CustomGridLayout
 android:id="@+id/gridview"
 android:layout_width="200dp"
 android:layout_height="300dp"
 android:background="#1e1d1d"
 app:hSpace="10"
 app:vSpace="10"
 app:numColumns="3"/>
</LinearLayout>
grid_item:
<?xml version="1.0" encoding="utf-8"?>
<LinearLayout xmlns:android="http://schemas.android.com/apk/res/android"
 android:layout_width="match_parent"
 android:layout_height="match_parent"
 android:gravity="center"
 android:orientation="vertical" >
 <ImageView
 android:id="@+id/iv"
 android:layout_width="match_parent"
 android:layout_height="match_parent"
 android:scaleType="fitXY"/>
</LinearLayout>
Java文件:
protected void onCreate(Bundle savedInstanceState) {
 super.onCreate(savedInstanceState);
 setContentView(R.layout.activity_main);
 grid = (CustomGridLayout) findViewById(R.id.gridview);
 grid.setGridAdapter(new GridAdatper() {
  @Override
  public View getView(int index) {
  View view = getLayoutInflater().inflate(R.layout.grid_item, null);
  ImageView iv = (ImageView) view.findViewById(R.id.iv);
  iv.setImageResource(srcs[index]);
  return view;
  }

  @Override
  public int getCount() {
  return srcs.length;
  }
 });
 grid.setOnItemClickListener(new OnItemClickListener() {
  @Override
  public void onItemClick(View v, int index) {
  Toast.makeText(MainActivity.this, "item="+index, Toast.LENGTH_SHORT).show();
  }
 });
 }
}
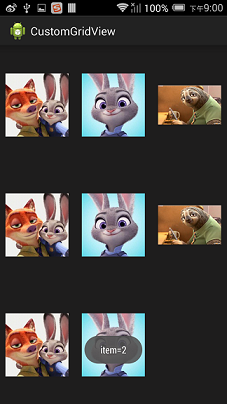
運行後效果圖如下:
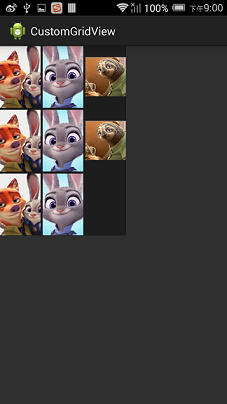
改變一下布局:
<com.hx.customgridview.CustomGridLayout
  android:id="@+id/gridview"
  android:layout_width="wrap_content"
  android:layout_height="wrap_content"
  android:background="#1e1d1d"
  app:hSpace="10"
  app:vSpace="10"
  app:numColumns="3"/>
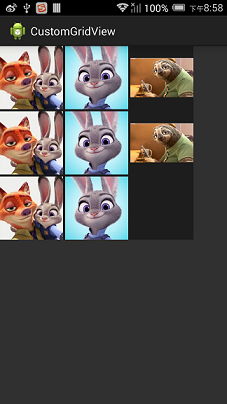
再改變
<com.hx.customgridview.CustomGridLayout
  android:id="@+id/gridview"
  android:layout_width="match_parent"
  android:layout_height="match_parent"
  android:background="#1e1d1d"
  app:hSpace="10"
  app:vSpace="10"
  app:numColumns="3"/>
再變
<com.hx.customgridview.CustomGridLayout
  android:id="@+id/gridview"
  android:layout_width="wrap_content"

  android:layout_height="wrap_content"
  android:background="#1e1d1d"
  app:hSpace="10"
  app:vSpace="10"
  app:numColumns="4"/>

Demo下載地址:http://xiazai.jb51.net/201609/yuanma/CustomGridLayout(jb51.net).rar
以上就是本文的全部內容,希望對大家的學習有所幫助,也希望大家多多支持本站。
 Android support library支持包常用控件介紹(二)
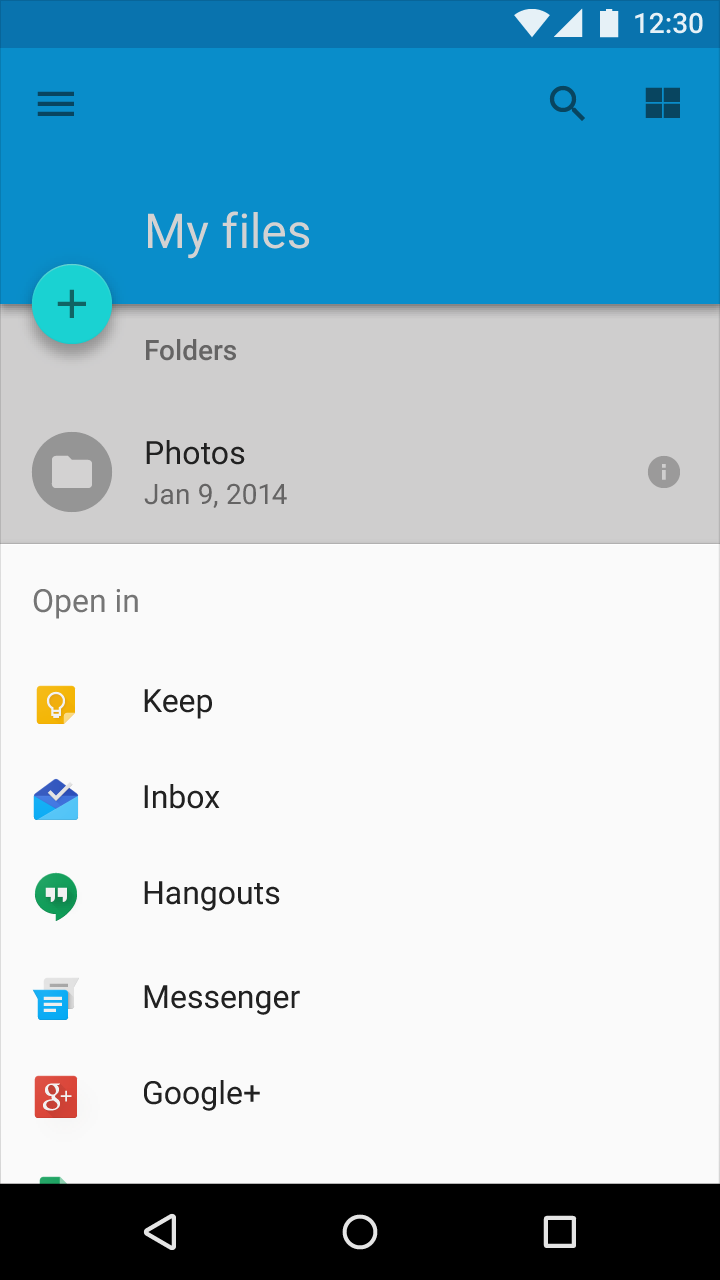
谷歌官方推出Material Design 設計理念已經有段時間了,為支持更方便的實現Material Design設計效果,官方給出了Android support d
 Android中獲得正在運行的程序和系統服務的方法
ActivityManager.RunningAppProcessInfo類與獲取正在運行的應用程序每一個應用程序都會運行在它獨立的進程裡,但是為了節省資源或者這些應用程
 AndroidStudio-Parcelable自動生成代碼插件安裝和使用
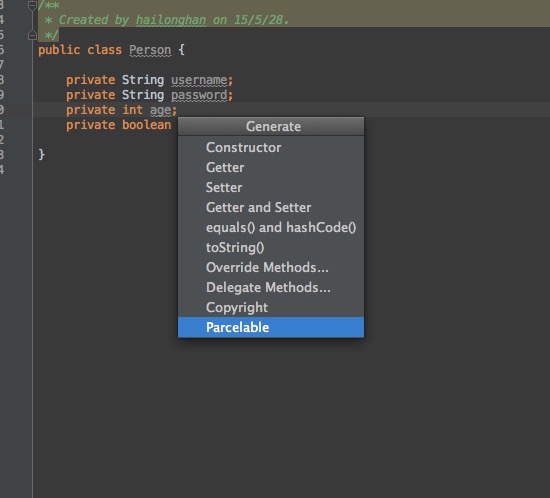
這裡用的mac版本的AndroidStudio1. 執行組合快捷鍵command+”,”,打開AS偏好設置頁面,找到plugin選項,輸入Parc
 Android UI:ListView - SimpleAdapter實例詳解
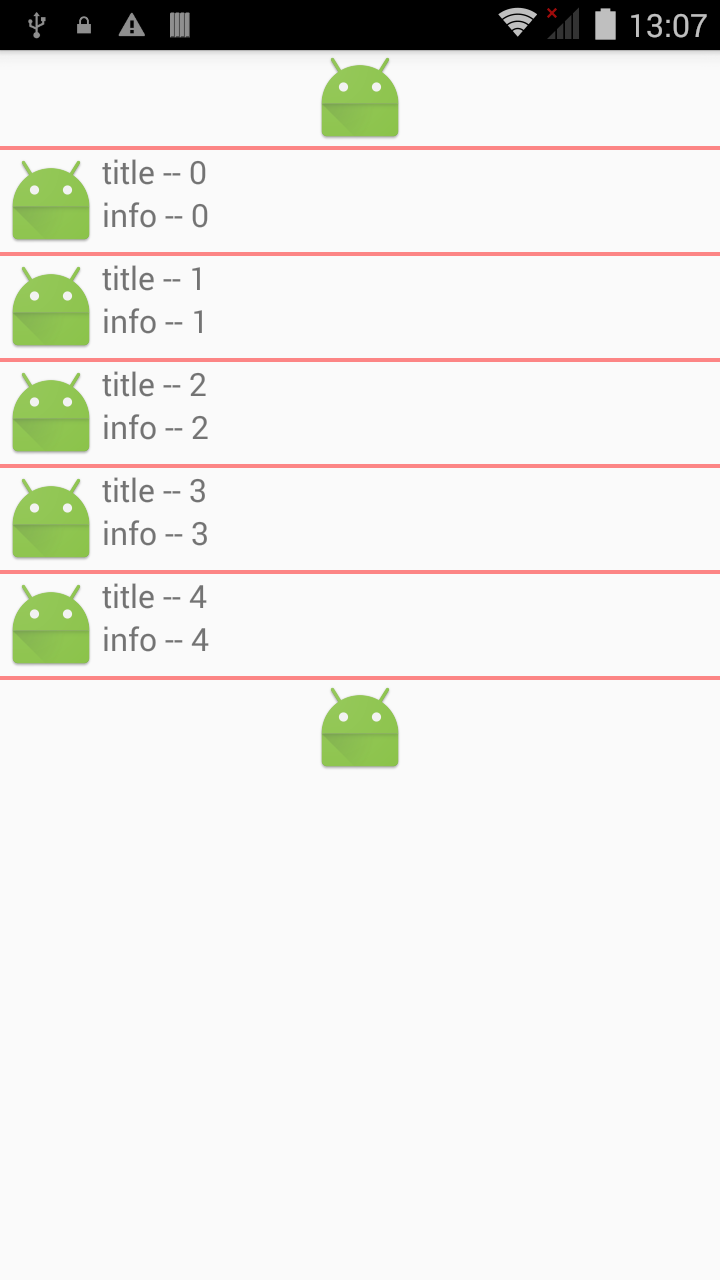
Android UI:ListView -- SimpleAdapterSimpleAdapter是擴展性最好的適配器,可以定義各種你想要的布局,而且使用很方便。layo