編輯:關於Android編程
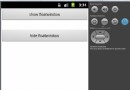
先來看看效果圖

當你點擊菜單可以更改圖標,例如點擊happy,首頁就會變一個笑臉,這個實現的過程超級簡單
你需要使用ToolBar與DrawableLayout兩個比較新的控件
首先要寫三個xml布局文件,我這裡的布局文件是使用了include標簽嵌入的,代碼如下
headbar_toolbar.xml
<?xml version="1.0" encoding="utf-8"?>
<android.support.v7.widget.Toolbar xmlns:android="http://schemas.android.com/apk/res/android"
 android:id="@+id/tbHeadBar"
 android:layout_width="match_parent"
 android:layout_height="50dp"
 android:background="@color/red">

 <TextView
  android:layout_width="wrap_content"
  android:layout_height="wrap_content"
  android:layout_gravity="center"
  android:text="@string/emotion"
  android:textColor="@color/white"
  android:textSize="16sp" />

</android.support.v7.widget.Toolbar>
my_drawablelayout.xml
<?xml version="1.0" encoding="utf-8"?>
<android.support.v4.widget.DrawerLayout xmlns:android="http://schemas.android.com/apk/res/android"
 android:id="@+id/dlMenu"
 android:layout_width="match_parent"
 android:layout_height="match_parent">

 <LinearLayout
  android:id="@+id/llContent"
  android:layout_width="match_parent"
  android:layout_height="match_parent"
  android:background="@color/white"
  android:gravity="center"
  android:orientation="vertical">

  <ImageView
   android:id="@+id/ivContent"
   android:layout_width="100dp"
   android:layout_height="100dp"
   android:src="@drawable/angry" />

 </LinearLayout>

 <!--android:layout_gravity="start"屬性使這部分作為側滑部分-->
 <!--一定要放在下面!!!關於控件的層次性如果不知道的同學去百度!哦不去谷歌-->
 <LinearLayout
  android:id="@+id/llMenu"
  android:layout_width="match_parent"
  android:layout_height="match_parent"
  android:layout_gravity="start"
  android:background="@color/white"
  android:orientation="vertical">

  <!--用於設置菜單項-->
  <ListView
   android:id="@+id/lvMenu"
   android:layout_width="match_parent"
   android:layout_height="match_parent"
   android:divider="@null" />

 </LinearLayout>

</android.support.v4.widget.DrawerLayout>
main_activity.xml
<?xml version="1.0" encoding="utf-8"?>
<LinearLayout xmlns:android="http://schemas.android.com/apk/res/android"
 xmlns:tools="http://schemas.android.com/tools"
 android:layout_width="match_parent"
 android:layout_height="match_parent"
 android:orientation="vertical"
 tools:context="com.demo.usher.demo_slidingmenu.MainActivity">

 <!--頭部-->
 <include layout="@layout/headbar_toolbar" />

 <!--主布局-->
 <include layout="@layout/my_drawablelayout" />

</LinearLayout>
如何應用在java文件中【一個文件搞定】
package com.demo.usher.demo_slidingmenu;

import android.os.Bundle;
import android.support.v4.widget.DrawerLayout;
import android.support.v7.app.ActionBarDrawerToggle;
import android.support.v7.app.AppCompatActivity;
import android.support.v7.widget.Toolbar;
import android.view.View;
import android.widget.AdapterView;
import android.widget.ArrayAdapter;
import android.widget.ImageView;
import android.widget.LinearLayout;
import android.widget.ListView;

import java.util.ArrayList;
import java.util.List;

import butterknife.BindView;
import butterknife.ButterKnife;

public class MainActivity extends AppCompatActivity {

 @BindView(R.id.tbHeadBar)
 Toolbar mTbHeadBar;

 /*側滑菜單布局*/
 @BindView(R.id.llMenu)
 LinearLayout mLlMenu;

 /*側滑菜單ListView放置菜單項*/
 @BindView(R.id.lvMenu)
 ListView mLvMenu;

 @BindView(R.id.ivContent)
 ImageView mIvContent;

 @BindView(R.id.dlMenu)
 DrawerLayout mMyDrawable;

 ActionBarDrawerToggle mToggle;

 private List<String> lvMenuList = new ArrayList<String>() {{
  add("angry");
  add("happy");
  add("sad");
  add("embarrassed");
 }};

 private List<Integer> imageList = new ArrayList<Integer>() {{
  add(R.drawable.angry);
  add(R.drawable.happy);
  add(R.drawable.sad);
  add(R.drawable.embarrassed);
 }};

 @Override
 protected void onCreate(Bundle savedInstanceState) {
  super.onCreate(savedInstanceState);
  setContentView(R.layout.activity_main);
  ButterKnife.bind(this);

  /*初始化Toolbar與DrawableLayout*/
  initToolBarAndDrawableLayout();

  mLvMenu.setAdapter(new ArrayAdapter(this, android.R.layout.simple_expandable_list_item_1, lvMenuList));
  mLvMenu.setOnItemClickListener(new AdapterView.OnItemClickListener() {
   @Override
   public void onItemClick(AdapterView<?> parent, View view, int position, long id) {
    mIvContent.setImageResource(imageList.get(position));
    mMyDrawable.closeDrawers();/*收起抽屜*/
   }
  });
 }

 private void initToolBarAndDrawableLayout() {
  setSupportActionBar(mTbHeadBar);
  /*以下倆方法設置返回鍵可用*/
  getSupportActionBar().setHomeButtonEnabled(true);
  getSupportActionBar().setDisplayHomeAsUpEnabled(true);
  /*設置標題文字不可顯示*/
  getSupportActionBar().setDisplayShowTitleEnabled(false);

  mToggle = new ActionBarDrawerToggle(this, mMyDrawable, mTbHeadBar, R.string.open, R.string.close) {
   @Override
   public void onDrawerOpened(View drawerView) {
    super.onDrawerOpened(drawerView);
    //Toast.makeText(MainActivity.this, R.string.open, Toast.LENGTH_SHORT).show();
   }

   @Override
   public void onDrawerClosed(View drawerView) {
    super.onDrawerClosed(drawerView);
    //Toast.makeText(MainActivity.this, R.string.close, Toast.LENGTH_SHORT).show();
   }
  };
  /*mMyDrawable.setDrawerListener(mToggle);不推薦*/
  mMyDrawable.addDrawerListener(mToggle);
  mToggle.syncState();/*同步狀態*/
 }
}
關於butterknife注解與樣式
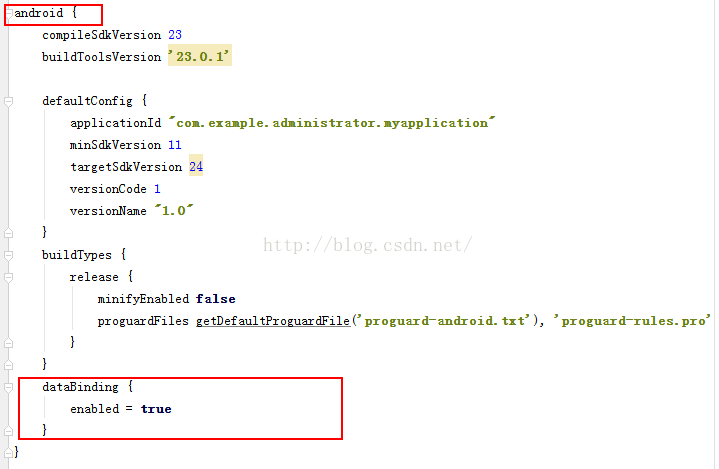
butterknife直接在gradle文件中配置好如下【缺什麼就補什麼】
apply plugin: 'com.android.application'
apply plugin: 'android-apt'

android {
 compileSdkVersion 24
 buildToolsVersion "24.0.2"

 defaultConfig {
  applicationId "com.demo.usher.demo_slidingmenu"
  minSdkVersion 15
  targetSdkVersion 24
  versionCode 1
  versionName "1.0"
 }
 buildTypes {
  release {
   minifyEnabled false
   proguardFiles getDefaultProguardFile('proguard-android.txt'), 'proguard-rules.pro'
  }
 }

}

buildscript {
 repositories {
  mavenCentral()
 }
 dependencies {
  classpath 'com.neenbedankt.gradle.plugins:android-apt:1.8'
 }
}

dependencies {
 compile fileTree(include: ['*.jar'], dir: 'libs')
 testCompile 'junit:junit:4.12'
 compile 'com.android.support:appcompat-v7:24.2.0'
 compile 'com.jakewharton:butterknife:8.4.0'
 /*butterknife相關*/
 apt 'com.jakewharton:butterknife-compiler:8.4.0'
 compile 'com.android.support:support-v4:24.2.0'
}
style【關於返回鍵的顏色樣式等在style文件中修改】
<resources>

 <style name="AppTheme" parent="Theme.AppCompat.Light.NoActionBar">
  <item name="drawerArrowStyle">@style/AppTheme.DrawerArrowToggle</item>
 </style>

 <style name="AppTheme.DrawerArrowToggle" parent="Base.Widget.AppCompat.DrawerArrowToggle">
  <item name="color">@android:color/white</item>
 </style>

</resources>
總結
其實很多時候我們在使用第三方控件的時候往往不知道背後是怎麼實現的,使用原生控件可以讓我們更好的理解一個交互或者說實現一個功能的原理,有利於做出性能與交互都非常優秀的APP,以上就是這篇文章的全部內容,希望對大家的工作或學習帶來一定的幫助。
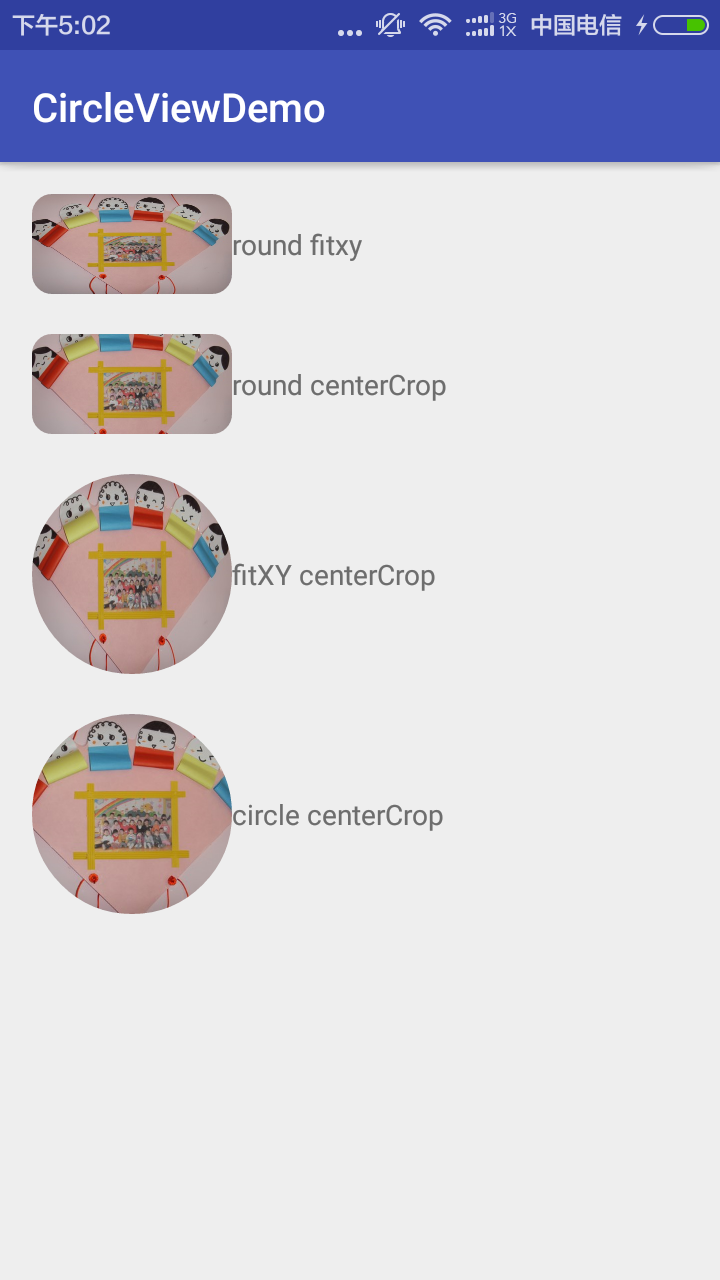 Android圓角圓形圖(支持各種scaleType 一)
看了看以前的項目,發現用了一個叫RoundImageView的類,當時直接從網上copy的(^__^) 嘻嘻……,今天偶爾看到了,覺得不能一直
 Android TextView 橫向滾動(跑馬燈效果)
Android TextView 中當文字比較多時希望它橫向滾動顯示,下面是一種親測可行的方法。效果圖:1.自定義TextView,重寫isFocused()方法返回tr
 Android 對話框 Dialog
對話框 Dialog什麼是對話框對話框是在當前的頁面之上彈出的小窗口, 用於顯示一些重要的提示信息, 提示用戶的輸入,確認信息,或顯示某種狀態.如 : 顯示進度條對話框,
 Android 三大圖片緩存原理、特性對比
這是我在 MDCC 上分享的內容(略微改動),也是源碼解析第一期發布時介紹的源碼解析後續會慢慢做的事。從總體設計和原理上對幾個圖片緩存進行對比,沒用到他們的朋友也可以了解