編輯:關於Android編程
准備了一陣子,一直想寫一篇事件分發的文章總結一下,這個知識點實在是太重要了。
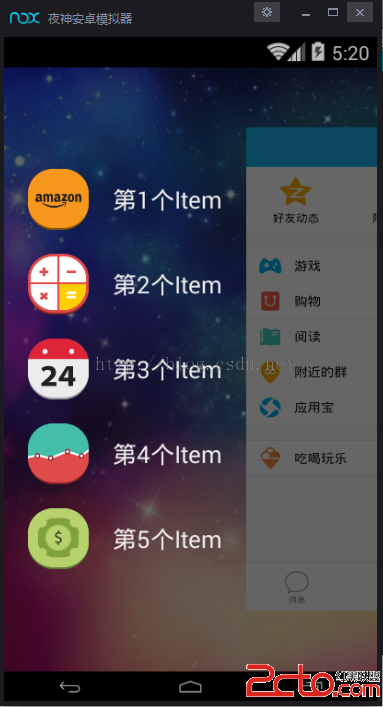
一個應用的布局是豐富的,有TextView,ImageView,Button等,這些子View的外層還有ViewGroup,如RelativeLayout,LinearLayout。作為一個開發者,我們會思考,當點擊一個按鈕,Android系統是怎樣確定我點的就是按鈕而不是TextView的?然後還正確的響應了按鈕的點擊事件。內部經過了一系列什麼過程呢?
先鋪墊一些知識能更加清晰的理解事件分發機制:
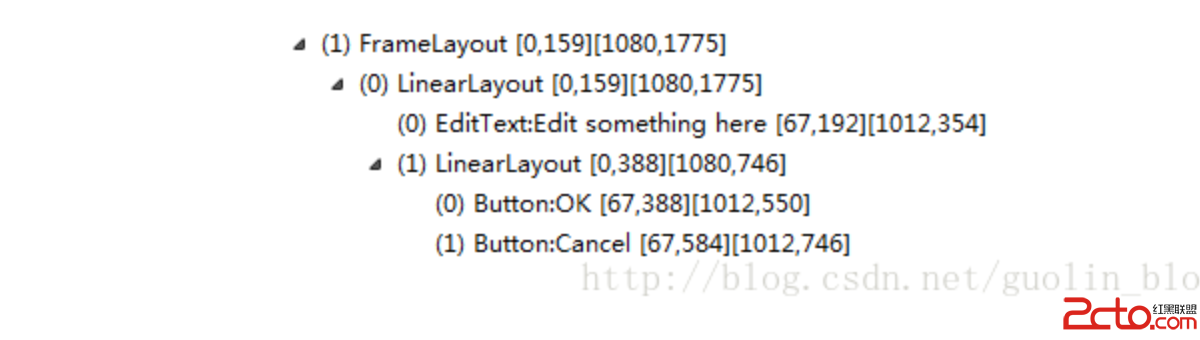
1. 通過setContentView設置的View就是DecorView的子view,即DecorView是父容器。
2. 點擊屏幕時,在手指按下和抬起間,會產生很多事件,down…move…move…up,中間會有很多的move事件,這一系列的事件為一個事件序列
3. dispatchTouchEvent方法用於分發事件
4. onInterceptTouchEvent方法用於攔截事件
5. onTouchEvent方法用於處理事件
當一個點擊事件(MotionEvent)產生後,事件最先傳遞給當前的界面(Activity),這點是很好理解的。 Activity再將事件傳遞給窗口(Window),然後Window將事件傳遞給頂級View(DecorView)。此時,事件已經到達了View了。之後頂級View就會按照事件分發機制去分發事件。具體是這樣的:
對於一個根ViewGroup來說,點擊事件產生後,首先會傳遞給它,這時它的 dispatchTouchEvent 方法就會被調用,如果這個ViewGroup的onInterceptTouchEvent方法返回true就表示它要攔截當前事件,接著事件就會交給這個ViewGroup處理,即它的onTouchEvent方法就會被調用。如果這個ViewGroup的onInterceptTouchEvent方法返回false,就表示它不攔截當前事件,這時當前事件就會繼續傳遞給它的子元素,接著子元素的dispatchTouchEvent方法就會被調用,如此反復直到事件被最終處理。
如果一個View的onTouchEvent方法返回false,那麼它的父容器的onTouchEvent方法會被調用,如果它的父容器的onTouchEvent方法還是返回false,那就繼續往上拋,當所有的元素都不處理這個事件,那麼這個事件會最終傳遞給Activity處理,即Activity的onTouchEvent方法會被調用。
好了,現在已經鋪墊了基礎,那麼接下來就從源碼的角度來分析事件分發機制。
當然是從Activity的dispatchTouchEvent方法開始分析。源碼如下:
public boolean dispatchTouchEvent(MotionEvent ev) {
  if (ev.getAction() == MotionEvent.ACTION_DOWN) {
    onUserInteraction();
  }
  if (getWindow().superDispatchTouchEvent(ev)) {
    return true;
  }
  return onTouchEvent(ev);
}
如果當前事件是down的話,就調用onUserInteraction方法,onUserInteraction是一個空方法,我們可以暫時不搭理。然後調用getWindow方法獲取到當前Activity關聯的Window,Window再調用superDispatchTouchEvent方法將事件傳入進行分發。
如果superDispatchTouchEvent方法返回true的話, view已經處理了事件。整個事件循環結束。如果返回false,沒有view處理這個事件。事件往上拋,那就Activity自己處理了,即Activity的onTouchEvent方法會被調用。
因為想要知道事件的整個分發過程,現在關注的是Window的superDispatchTouchEvent方法,那麼就跟進去看看:
public abstract boolean superDispatchTouchEvent(MotionEvent event);
Window是一個抽象類,superDispatchTouchEvent是一個抽象的方法,那麼我們必須要找到window的實現類才行,可是茫茫人海怎麼找呢?看到window類的說明就明白了
* <p>The only existing implementation of this abstract class is
 * android.view.PhoneWindow, which you should instantiate when needing a
 * Window.
 */
public abstract class Window
意思是Window存在唯一的實現是android.view.PhoneWindow
那麼PhoneWindow裡的superDispatchTouchEvent方法就是我們要找的信息,如下:
@Override
public boolean superDispatchTouchEvent(MotionEvent event) {
  return mDecor.superDispatchTouchEvent(event);
}
直接將事件傳遞給了DecorView。這時事件已經是到達View了哦。
那麼跟進DecorView的superDispatchTouchEvent方法看看,如下:
public boolean superDispatchTouchEvent(MotionEvent event) {
  return super.dispatchTouchEvent(event);
}
內部調用了父類的dispatchTouchEvent方法,那麼DecorView的父類是什麼呢?DecorView肯定是View的,那麼剛才開篇提到,我們通過setContentView設置的View,是DecorView的子View。那麼更加准確的說DecorView是一個ViewGroup。
private final class DecorView extends FrameLayout implements RootViewSurfaceTaker
可以看到DecorView是繼承自FrameLayout,FrameLayout是ViewGroup,也就是說DecorView是一個ViewGroup。
那麼現在只需要關注ViewGroup的dispatchTouchEvent方法。繼續前進
ViewGroup的事件分發
ViewGroup的dispatchTouchEvent方法如下:
@Override
public boolean dispatchTouchEvent(MotionEvent ev) {

    //代碼省略

    // Check for interception.
    final boolean intercepted;
    if (actionMasked == MotionEvent.ACTION_DOWN
        || mFirstTouchTarget != null) {
      final boolean disallowIntercept = (mGroupFlags & FLAG_DISALLOW_INTERCEPT) != 0;
      if (!disallowIntercept) {
        intercepted = onInterceptTouchEvent(ev);
        ev.setAction(action); // restore action in case it was changed
      } else {
        intercepted = false;
      }
    } else {
      // There are no touch targets and this action is not an initial down
      // so this view group continues to intercept touches.
      intercepted = true;
    }

    //代碼省略

    if (!canceled && !intercepted) {

    //代碼省略

        final int childrenCount = mChildrenCount;
        if (newTouchTarget == null && childrenCount != 0) {
          final float x = ev.getX(actionIndex);
          final float y = ev.getY(actionIndex);
          // Find a child that can receive the event.
          // Scan children from front to back.
          final ArrayList<View> preorderedList = buildOrderedChildList();
          final boolean customOrder = preorderedList == null
              && isChildrenDrawingOrderEnabled();
          final View[] children = mChildren;
          for (int i = childrenCount - 1; i >= 0; i--) {
            final int childIndex = customOrder
                ? getChildDrawingOrder(childrenCount, i) : i;
            final View child = (preorderedList == null)
                ? children[childIndex] : preorderedList.get(childIndex);

            // If there is a view that has accessibility focus we want it
            // to get the event first and if not handled we will perform a
            // normal dispatch. We may do a double iteration but this is
            // safer given the timeframe.
            if (childWithAccessibilityFocus != null) {
              if (childWithAccessibilityFocus != child) {
                continue;
              }
              childWithAccessibilityFocus = null;
              i = childrenCount - 1;
            }

            if (!canViewReceivePointerEvents(child)
                || !isTransformedTouchPointInView(x, y, child, null)) {
              ev.setTargetAccessibilityFocus(false);
              continue;
            }

            newTouchTarget = getTouchTarget(child);
            if (newTouchTarget != null) {
              // Child is already receiving touch within its bounds.
              // Give it the new pointer in addition to the ones it is handling.
              newTouchTarget.pointerIdBits |= idBitsToAssign;
              break;
            }

            resetCancelNextUpFlag(child);
            if (dispatchTransformedTouchEvent(ev, false, child, idBitsToAssign)) {
              // Child wants to receive touch within its bounds.
              mLastTouchDownTime = ev.getDownTime();
              if (preorderedList != null) {
                // childIndex points into presorted list, find original index
                for (int j = 0; j < childrenCount; j++) {
                  if (children[childIndex] == mChildren[j]) {
                    mLastTouchDownIndex = j;
                    break;
                  }
                }
              } else {
                mLastTouchDownIndex = childIndex;
              }
              mLastTouchDownX = ev.getX();
              mLastTouchDownY = ev.getY();
              newTouchTarget = addTouchTarget(child, idBitsToAssign);
              alreadyDispatchedToNewTouchTarget = true;
              break;
            }

            // The accessibility focus didn't handle the event, so clear
            // the flag and do a normal dispatch to all children.
            ev.setTargetAccessibilityFocus(false);
          }
          if (preorderedList != null) preorderedList.clear();
        }

        if (newTouchTarget == null && mFirstTouchTarget != null) {
          // Did not find a child to receive the event.
          // Assign the pointer to the least recently added target.
          newTouchTarget = mFirstTouchTarget;
          while (newTouchTarget.next != null) {
            newTouchTarget = newTouchTarget.next;
          }
          newTouchTarget.pointerIdBits |= idBitsToAssign;
        }
      }
    }

    // Dispatch to touch targets.
    if (mFirstTouchTarget == null) {
      // No touch targets so treat this as an ordinary view.
      handled = dispatchTransformedTouchEvent(ev, canceled, null,
          TouchTarget.ALL_POINTER_IDS);
    }

    //代碼省略

    return handled;
}
代碼比較長,一點一點分析,先看到一開始的判斷
if (actionMasked == MotionEvent.ACTION_DOWN || mFirstTouchTarget != null)
mFirstTouchTarget != null的意義是ViewGroup不攔截事件並將事件交由子元素處理,先這樣記著,這從後面的addTouchTarget方法可以得出結論的。
然後又會來到這個if判斷。
if (!disallowIntercept) {
  intercepted = onInterceptTouchEvent(ev);
  ev.setAction(action); // restore action in case it was changed
}
那我們看看disallowIntercept。而disallowIntercept的賦值過程中,有一個 FLAG_DISALLOW_INTERCEPT 標記位
final boolean disallowIntercept = (mGroupFlags & FLAG_DISALLOW_INTERCEPT) != 0;
這個 FLAG_DISALLOW_INTERCEPT 標記位是可以通過requestDisallowInterceptTouchEvent方法來設置的。
回到if (!disallowIntercept)的判斷,進入這個if判斷後,就會來到
intercepted = onInterceptTouchEvent(ev);
調用onInterceptTouchEvent方法,詢問ViewGroup是否攔截事件。
讀到這裡,可以回憶下開篇時鋪墊的結論,對於ViewGroup,點擊事件產生後,首先會傳遞給它,這時它的 dispatchTouchEvent 方法就會被調用,接著會調用它的onInterceptTouchEvent方法,如果這個ViewGroup的onInterceptTouchEvent方法返回true就表示它要攔截當前事件,接著事件就會交給這個ViewGroup處理,即它的onTouchEvent方法就會被調用。如果返回false表示不攔截,通常ViewGroup也是不攔截事件的。
那現在先分析不攔截的情況,不攔截那就好辦了的。經過一系列的判斷,就會來到一個for循環遍歷。
for (int i = childrenCount - 1; i >= 0; i--)
這時ViewGroup開始分發傳遞事件,遍歷子元素了。
首先肯定需要過濾掉一些無關點擊事件的子元素的,判斷子元素是否能夠接收點擊事件,點擊事件的坐標是否落在子元素區域內。
if (!canViewReceivePointerEvents(child)
    || !isTransformedTouchPointInView(x, y, child, null)) {
  ev.setTargetAccessibilityFocus(false);
  continue;
}
如果不能夠接收點擊事件或者點擊事件的坐標沒有落在子元素區域,就會跳出當前循環,繼續遍歷下一個子元素。這下就知道了Android系統為什麼能夠知道點擊的是Button而不是TextView,其實內部就只是做了一個判斷嘛。
那麼繼續分析,子元素符合以上兩個條件後,就將事件傳遞給這個子元素。會來到了這個判斷。
if (dispatchTransformedTouchEvent(ev, false, child, idBitsToAssign))
執行dispatchTransformedTouchEvent方法,將子元素傳進去。這個方法很重要,那麼跟進看看
/**
 * Transforms a motion event into the coordinate space of a particular child view,
 * filters out irrelevant pointer ids, and overrides its action if necessary.
 * If child is null, assumes the MotionEvent will be sent to this ViewGroup instead.
 */
private boolean dispatchTransformedTouchEvent(MotionEvent event, boolean cancel,
    View child, int desiredPointerIdBits) {
  final boolean handled;

  // Canceling motions is a special case. We don't need to perform any transformations
  // or filtering. The important part is the action, not the contents.
  final int oldAction = event.getAction();
  if (cancel || oldAction == MotionEvent.ACTION_CANCEL) {
    event.setAction(MotionEvent.ACTION_CANCEL);
    if (child == null) {
      handled = super.dispatchTouchEvent(event);
    } else {
      handled = child.dispatchTouchEvent(event);
    }
    event.setAction(oldAction);
    return handled;
  }

  //代碼省略
}
我們看到child!=null的情況,如果子元素不為空,調用子元素的dispatchTouchEvent方法繼續分發事件,同時返回處理結果布爾值,這時就將事件傳遞到了子View處理。完成了一輪的事件分發。這個方法先到這裡就好。
再看回ViewGroup的dispatchTouchEvent方法,如果dispatchTransformedTouchEvent方法返回true的話,這時事件已經傳遞給子元素處理,ViewGroup已經不管這個事件了。
那麼就會進入if語句,最後會來到addTouchTarget方法,這個方法之前是提到過的,用於mFirstTouchTarget標記位的賦值。
那跟進這個方法看看
/**
 * Adds a touch target for specified child to the beginning of the list.
 * Assumes the target child is not already present.
 */
private TouchTarget addTouchTarget(View child, int pointerIdBits) {
  TouchTarget target = TouchTarget.obtain(child, pointerIdBits);
  target.next = mFirstTouchTarget;
  mFirstTouchTarget = target;
  return target;
}
其實就是讓mFirstTouchTarget指向子元素。
執行完這個addTouchTarget方法後,最終會到break語句,那麼就會跳出整個for循環體。ViewGroup結束分發過程!
又回到dispatchTransformedTouchEvent方法,如果dispatchTransformedTouchEvent方法返回false,那麼if語句的一大段代碼都不執行了,而是回到for循環繼續遍歷子元素進行分發。如此重復完成事件的傳遞過程。
現在分析ViewGroup攔截事件的情況,如果ViewGroup攔截事件的話,那麼就會進入以下這個判斷
if (mFirstTouchTarget == null) {
  // No touch targets so treat this as an ordinary view.
  handled = dispatchTransformedTouchEvent(ev, canceled, null,
  TouchTarget.ALL_POINTER_IDS);
}
注意到dispatchTransformedTouchEvent方法的第三個參數child傳入的是null,那麼就是在dispatchTransformedTouchEvent方法中走以下的語句
if (child == null) {
  handled = super.dispatchTouchEvent(event);
}
而ViewGroup是繼承自View的,那麼就是ViewGroup自己處理事件了。這點我們以下分析了View的事件分發過程就能搞明白了。
以上就是ViewGroup的事件分發
那麼現在分析已經將事件傳遞給了子View的情況,View繼續調用dispatchTouchEvent方法,那我們看看View的dispatchTouchEvent方法。
View的事件分發
View的dispatchTouchEvent方法源碼如下:
/**
 * Pass the touch screen motion event down to the target view, or this
 * view if it is the target.
 *
 * @param event The motion event to be dispatched.
 * @return True if the event was handled by the view, false otherwise.
 */
public boolean dispatchTouchEvent(MotionEvent event) {

//代碼省略

  if (onFilterTouchEventForSecurity(event)) {
    //noinspection SimplifiableIfStatement
    ListenerInfo li = mListenerInfo;
    if (li != null && li.mOnTouchListener != null
        && (mViewFlags & ENABLED_MASK) == ENABLED
        && li.mOnTouchListener.onTouch(this, event)) {
      result = true;
    }

    if (!result && onTouchEvent(event)) {
      result = true;
    }
  }

  if (!result && mInputEventConsistencyVerifier != null) {
    mInputEventConsistencyVerifier.onUnhandledEvent(event, 0);
  }

  // Clean up after nested scrolls if this is the end of a gesture;
  // also cancel it if we tried an ACTION_DOWN but we didn't want the rest
  // of the gesture.
  if (actionMasked == MotionEvent.ACTION_UP ||
      actionMasked == MotionEvent.ACTION_CANCEL ||
      (actionMasked == MotionEvent.ACTION_DOWN && !result)) {
    stopNestedScroll();
  }

  return result;
}
相比於ViewGroup的dispatchTouchEvent方法,View的dispatchTouchEvent方法代碼量少了。也相對簡單些了。
首先會來到如下判斷:
if (li != null && li.mOnTouchListener != null
    && (mViewFlags & ENABLED_MASK) == ENABLED
    && li.mOnTouchListener.onTouch(this, event))
li變量在哪裡被賦值的呢?通常是在setOnClickListener方法或setOnTouchListener方法的時候。
public void setOnClickListener(@Nullable OnClickListener l) {
  if (!isClickable()) {
    setClickable(true);
  }
  getListenerInfo().mOnClickListener = l;
}

public void setOnTouchListener(OnTouchListener l) {
  getListenerInfo().mOnTouchListener = l;
}
而這個getListenerInfo()如下:
ListenerInfo getListenerInfo() {
  if (mListenerInfo != null) {
    return mListenerInfo;
  }
  mListenerInfo = new ListenerInfo();
  return mListenerInfo;
}
ListenerInfo是一個內部類,裡面存放的是各種監聽事件的引用。
之後會判斷如下條件:
li.mOnTouchListener != null
同理只要setOnTouchListener方法設置了,這個引用就不空。這些都是好理解的。那關鍵到了,
li.mOnTouchListener.onTouch(this, event)
到了最後一個條件。這個onTouch方法是我們去實現的,它也返回一個布爾值,如果返回true的話,那麼就會進入這個if判斷最終返回true,跳出整個方法,那麼我們可以看到接下來的onTouchEvent方法是不會得到執行的。
也就是onTouch的執行在onTouchEvent之前。那麼如果我們也調用了setOnClickListener方法監聽點擊事件的話,onClick方法是在哪裡調用的呢?我們有理由相信是在onTouchEvent方法裡調用的。那麼就跟進看看。
public boolean onTouchEvent(MotionEvent event) {

  //代碼省略

  if (((viewFlags & CLICKABLE) == CLICKABLE ||
      (viewFlags & LONG_CLICKABLE) == LONG_CLICKABLE) ||
      (viewFlags & CONTEXT_CLICKABLE) == CONTEXT_CLICKABLE) {
    switch (action) {
      case MotionEvent.ACTION_UP:
        boolean prepressed = (mPrivateFlags & PFLAG_PREPRESSED) != 0;

  //代碼省略

            if (!focusTaken) {
              // Use a Runnable and post this rather than calling
              // performClick directly. This lets other visual state
              // of the view update before click actions start.
              if (mPerformClick == null) {
                mPerformClick = new PerformClick();
              }
              if (!post(mPerformClick)) {
                performClick();
              }
            }
          }

       //代碼省略

        break;
    }

    return true;
  }

  return false;
}
只要CLICKABLE或LONG_CLICKABLE不空, 就會處理這個事件,然而怎麼保證CLICKABLE或LONG_CLICKABLE不空呢?其實細心的你會發現,剛才上面貼出的setOnClickListener源代碼中,會將CLICKABL屬性設置會true
public void setOnClickListener(@Nullable OnClickListener l) {
  if (!isClickable()) {
    setClickable(true);
  }
  getListenerInfo().mOnClickListener = l;
}
這樣就能進入if判斷去處理這個事件了,之後就會來到performClick()方法,應該就是它了,跟進去看看吧。
public boolean performClick() {
  final boolean result;
  final ListenerInfo li = mListenerInfo;
  if (li != null && li.mOnClickListener != null) {
    playSoundEffect(SoundEffectConstants.CLICK);
    li.mOnClickListener.onClick(this);
    result = true;
  } else {
    result = false;
  }

  sendAccessibilityEvent(AccessibilityEvent.TYPE_VIEW_CLICKED);
  return result;
}
熟悉接口回調機制的你,一定也讀懂了performClick()方法的源碼,
li.mOnClickListener.onClick(this);
是在執行這行代碼時,調用了我們熟悉的onClick方法
以上就是View的事件分發機制。
此時已經將事件分發機制分析完了,由於我的技術的原因,駕馭的不好,有些關鍵點還是沒分析清楚,但我相信學完了這篇文章能讓我和你都對事件分發機制的實現有一個大致的認識,有這個已經可以了,之後還可以一點點去強化鍛煉,深入理解事件分發機制。才能為自定義控件鋪墊良好的基礎。
以上就是本文的全部內容,希望對大家的學習有所幫助,也希望大家多多支持本站。
 android應用程序優化之布局優化
在我們開發APP時不僅要在代碼實現上,做到對App的優化,而在我們的界面布局也有許多要優化的地方,如果布局寫的很low的話,系統加載布局的速度會十分的慢,使得用戶的體驗非
 Android 自定義View 實現刮刮卡效果
主要思想:將一個view設計成多層:背景層,含中獎信息等;遮蓋層,用於刮獎,使用關聯一個Bitmap的Canvas在該Bitmap上,使用它的canvas.drawPat
 Android彈幕框架 黑暗火焰使基本使用方法
今天我將分享由BiliBili開源的Android彈幕框架(DanmakuFlameMaster)的學習經驗。我是將整個框架以model的形式引入項目中的,這樣更方便的觀
 Android編程滑動效果之Gallery仿圖像集浏覽實現方法
本文實例講述了Android編程滑動效果之Gallery仿圖像集浏覽實現方法。分享給大家供大家參考,具體如下:Android系統自帶一個Gallery浏覽圖片的應用,通過