編輯:關於Android編程
關於IPC應該不用多介紹了,Android系統中的進程之間不能共享內存,那麼如果兩個不同的應用程序之間需要通訊怎麼辦呢?比如公司的一個項目要更新,產品的需求是依附於當前項目開發一個插件,但是呢這個插件功能以及界面比較復雜,不能和當前項目在一個進程中,同時呢,還要用到當前項目中已經寫好了的一些東西,那麼因為新開發的依附於當前項目的插件和當前項目不是一個進程,因此不能共享內存,就出現了問題,於是,需要提供一些機制在不同進程之間進行數據通信,這個機制就是AIDL了。
一、一個android中AIDL的簡單例子
假如是這樣,現在有一個項目中提供了比較成熟的計算的方法,而現在我想開發一款軟件其中一個模塊想用到一個計算類,而我又不想重新寫了,那麼就可以通過AIDL實現啦。假設,已經開發完成的那個已經提供了比較成熟的計算類的程序叫AIDLCalculateDemoServer(相當於服務器),而我要寫的程序叫AIDLCalculateDemoClient(相當於客戶端),類似與客戶端服務器模式。首先至關的看下工程結構圖: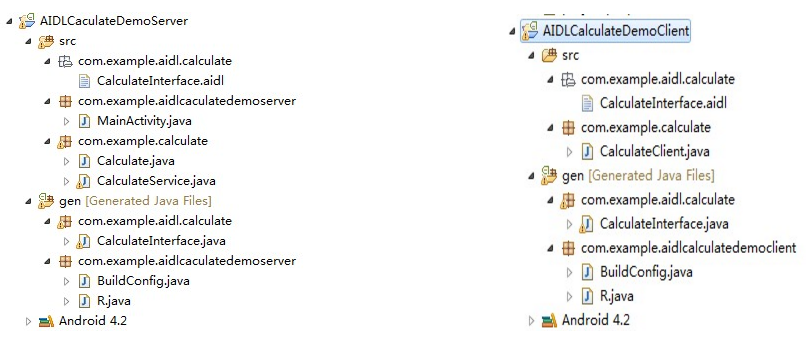
圖1-1 服務器 圖1-2 客戶端
現在假設自己寫的程序要調用服務端的運算界面,輸入num1和num2,進行遠程運算,調用服務端的接口,服務端運算好之後,返回結果給客戶端,效果圖如下: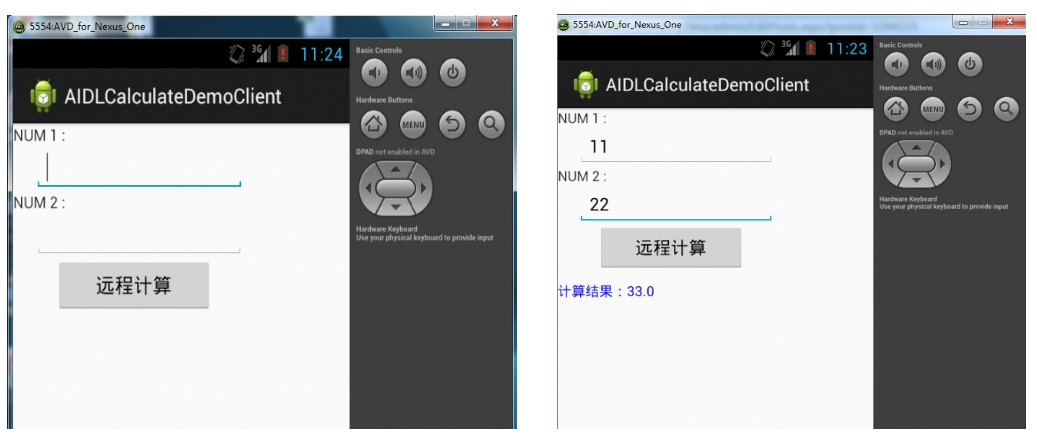
然後來看看實現,首先需要定義AIDL接口,客戶端和服務器端都要定義,並且要在同一包中,也就是圖1-1和圖1-2 com.example.aidl.calculate中的CalculateInterface,其中的代碼如下:
package com.example.aidl.calculate;

interface CalculateInterface {
  double doCalculate(double a, double b);
 }
編譯發現,目錄結構如圖1-1和圖1-2中gen/com.example.aidl.calculate中多了CalculateInterface.java文件,內容如下:
 package com.example.aidl.calculate;

interface CalculateInterface {
   double doCalculate(double a, double b);
 }
定義好接口就是要看服務端和客戶端的代碼啦,其中服務端主要看CalculateService代碼,這個一個繼承Service的類,在其中對AIDL中的接口進行賦予實際意義,如下:
 package com.example.calculate;

import com.example.aidl.calculate.CalculateInterface;
import com.example.aidl.calculate.CalculateInterface.Stub;

import android.app.Service;
import android.content.Intent;
import android.os.IBinder;
import android.os.RemoteException;
import android.util.Log;

public class CalculateService extends Service {

  private static final String              TAG            =  "CalculateService";

  @Override
  public IBinder onBind(Intent arg0) {
    // TODO Auto-generated method stub
    logE("onBind()");
    return mBinder;
  }

  @Override
  public void onCreate() {
    // TODO Auto-generated method stub
    logE("onCreate()");
    super.onCreate();
  }

  @Override
  public void onStart(Intent intent, int startId) {
    // TODO Auto-generated method stub
    logE("onStart()");
    super.onStart(intent, startId);
  }

  @Override
  public boolean onUnbind(Intent intent) {
    // TODO Auto-generated method stub
    logE("onUnbind()");
    return super.onUnbind(intent);
  }

  @Override
  public void onDestroy() {
    // TODO Auto-generated method stub
    logE("onDestroy()");
    super.onDestroy();
  }

  private static void logE(String str) {
    Log.e(TAG, "--------" + str + "--------");
  }

  private final CalculateInterface.Stub mBinder = new CalculateInterface.Stub() {

    @Override
    public double doCalculate(double a, double b) throws RemoteException {
      // TODO Auto-generated method stub
      Log.e("Calculate", "遠程計算中");
      Calculate calculate = new Calculate();
      double answer = calculate.calculateSum(a, b);
      return answer;
    }
  };
}
然後可以看看,關鍵的服務都提供完畢,那麼在客戶端是怎麼訪問的呢,要進行綁定服務和一個ServiceConnection類完成,如下:
package com.example.calculate;

import android.app.Activity;
import android.content.ComponentName;
import android.content.Context;
import android.content.Intent;
import android.content.ServiceConnection;
import android.graphics.Color;
import android.os.Bundle;
import android.os.IBinder;
import android.os.RemoteException;
import android.util.Log;
import android.view.View;
import android.widget.Button;
import android.widget.EditText;
import android.widget.TextView;

import com.example.aidl.calculate.CalculateInterface;
import com.example.aidlcalculatedemoclient.R;

public class CalculateClient extends Activity {
  private static final String         TAG            =      "CalculateClient";

  private       Button         btnCalculate;

  private       EditText        etNum1;

  private         EditText        etNum2;

  private       TextView        tvResult;

  private        CalculateInterface   mService;

  private       ServiceConnection    mServiceConnection = new ServiceConnection() {

    @Override
    public void onServiceDisconnected(ComponentName name) {
      // TODO Auto-generated method stub
      logE("disconnect service");
      mService = null;
    }

    @Override
    public void onServiceConnected(ComponentName name, IBinder service) {
      // TODO Auto-generated method stub
      logE("connect service");
      mService = CalculateInterface.Stub.asInterface(service);
    }
  };

  @Override
  protected void onCreate(Bundle savedInstanceState) {
    // TODO Auto-generated method stub
    super.onCreate(savedInstanceState);
    setContentView(R.layout.main);

    Bundle args = new Bundle();
    Intent intent = new Intent("com.example.calculate.CalculateService");
    intent.putExtras(args);
    bindService(intent, mServiceConnection, Context.BIND_AUTO_CREATE);

    etNum1 = (EditText) findViewById(R.id.et_num_one);
    etNum2 = (EditText) findViewById(R.id.et_num_two);

    tvResult = (TextView) findViewById(R.id.tv_result);

    btnCalculate = (Button) findViewById(R.id.btn_cal);

    btnCalculate.setOnClickListener(new View.OnClickListener() {

      @Override
      public void onClick(View v) {
        // TODO Auto-generated method stub

        logE("開始遠程運算");
        try {
          double num1 = Double.parseDouble(etNum1.getText().toString());
          double num2 = Double.parseDouble(etNum2.getText().toString());
          String answer = "計算結果:" + mService.doCalculate(num1, num2);
          tvResult.setTextColor(Color.BLUE);
          tvResult.setText(answer);

        } catch (RemoteException e) {
        }
      }
    });
  }

  private void logE(String str) {
    Log.e(TAG, "--------" + str + "--------");
  }
}
如此一來,大功已經基本告成,最後,我們在來看看服務端的配置文件吧:
<?xml version="1.0" encoding="utf-8"?>
<manifest xmlns:android="http://schemas.android.com/apk/res/android"
  package="com.example.aidlcaculatedemoserver"
  android:versionCode="1"
  android:versionName="1.0" >

  <uses-sdk
    android:minSdkVersion="8"
    android:targetSdkVersion="17" />

  <application
    android:allowBackup="true"
    android:icon="@drawable/ic_launcher"
    android:label="@string/app_name"
    android:theme="@style/AppTheme" >
    <activity
      android:name="com.example.aidlcaculatedemoserver.MainActivity"
      android:label="@string/app_name" >
      <intent-filter>
        <action android:name="android.intent.action.MAIN" />

        <category android:name="android.intent.category.LAUNCHER" />
      </intent-filter>
    </activity>
    <service android:name="com.example.calculate.CalculateService">
      <intent-filter>
        <action android:name="com.example.calculate.CalculateService" />
      </intent-filter>
    </service>
  </application>

</manifest>
二、寫AIDL注意事項
1. 客戶端和服務端的AIDL接口文件所在的包必須相同
2. 需要一個Service類的配合
以上就是本文的全部內容,希望對大家的學習有所幫助,也希望大家多多支持本站。
 Android App開發中ViewPager組件的入門使用教程
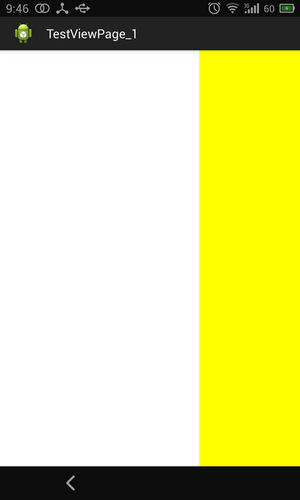
首先讓大家有個全局的認識,直接上個項目,看看僅僅通過這幾行代碼,竟然就能完成如此強悍的功能。下篇再仔細講講為什麼要這麼寫。效果圖:實現了三個view間的相互滑動第一個VI
 Android網絡編程 HttpUrlConnection HttpClient AsyncTask
1,HttpUrlConnection一個UrlConnection常用來通過網絡發送和獲取數據,數據可以使任何類型任何長度,HttpUrlConnecti
 Android開發實例之多點觸控程序
智能終端設備的多點觸控操作為我們帶來了種種炫酷體驗,這也使得很多Android開發者都對多點觸控
 Android自定義可編輯、刪除的側滑LisitView
最近由於項目的需要,自定義了一個具有側滑功能的listview,側滑後可以點擊編輯、刪除。好了,大家先看一下效果圖,畢竟是看臉的世界。 好了,我要先講一下思路,