編輯:關於Android編程
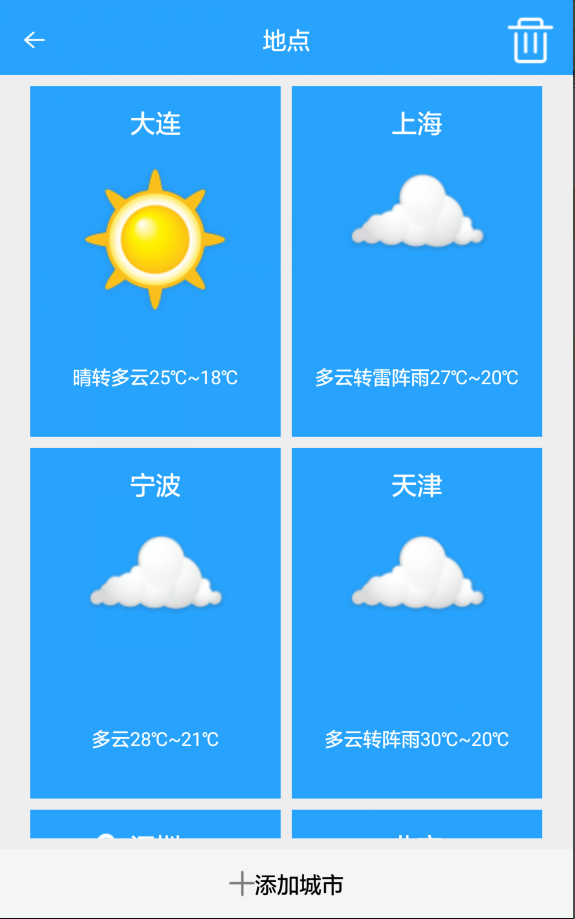
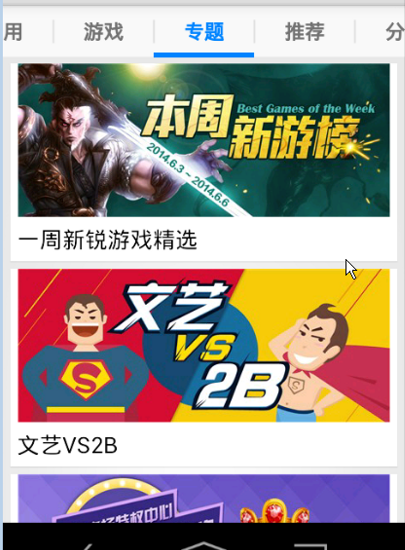
本文會實現一個類似網易新聞(不說網易新聞大家可能不知道大概是什麼樣子)點擊超多選項卡,選項卡動態滑動的效果。
首先來看看布局,就是用HorizontalScrollView控件來實現滑動的效果,裡面包含了一個布局。
接下來我們在onCreat方法中加載布局和構建我們需要顯示的數據
<code class="hljs avrasm"> @Override
protected void onCreate(Bundle savedInstanceState) {
super.onCreate(savedInstanceState);
setContentView(R.layout.activity_tabbar);
tv_tabname= (TextView) this.findViewById(R.id.tv_tabname);
titleList = new ArrayList<string>();
titleList.add("推薦");
titleList.add("熱點");
titleList.add("北京");
titleList.add("體育");
titleList.add("娛樂");
titleList.add("足球");
titleList.add("巴薩");
titleList.add("汽車");
}</string></code>
加載布局,用RadioGroup動態的加載多個自定義的RadioButton
<code class="hljs avrasm">hs_activity_tabbar= (HorizontalScrollView) this.findViewById(R.id.hs_activity_tabbar);
ll_activity_tabbar_content= (LinearLayout) this.findViewById(R.id.ll_activity_tabbar_content);
//選項卡布局
myRadioGroup = new RadioGroup(this);
myRadioGroup.setLayoutParams(new ViewGroup.LayoutParams(ViewGroup.LayoutParams.MATCH_PARENT, ViewGroup.LayoutParams.MATCH_PARENT));
myRadioGroup.setOrientation(LinearLayout.HORIZONTAL);
ll_activity_tabbar_content.addView(myRadioGroup);
for (int i = 0; i < titleList.size(); i++) {
String channel = titleList.get(i);
RadioButton radio = new RadioButton(this);
radio.setButtonDrawable(android.R.color.transparent);
radio.setBackgroundResource(R.drawable.radiobtn_selector);
ColorStateList csl = getResources().getColorStateList(R.color.radiobtn_text_color);
radio.setTextColor(csl);
LinearLayout.LayoutParams l = new LinearLayout.LayoutParams((int) SizeHelper.dp2px(this, 80), ViewGroup.LayoutParams.MATCH_PARENT, Gravity.CENTER);
radio.setLayoutParams(l);
radio.setTextSize(15);
radio.setGravity(Gravity.CENTER);
radio.setText(channel);
radio.setTag(channel);
myRadioGroup.addView(radio);
}</code>
最後也就點擊選項卡的時候會有一個動態滑動的效果,其實就是利用HorizontalScrollView的smoothScrollTo方法來實現的
<code class="hljs cs"> myRadioGroup.setOnCheckedChangeListener(new RadioGroup.OnCheckedChangeListener() {
@Override
public void onCheckedChanged(RadioGroup group, int checkedId) {
int radioButtonId = group.getCheckedRadioButtonId();
//根據ID獲取RadioButton的實例
RadioButton rb = (RadioButton) findViewById(radioButtonId);
channel = (String) rb.getTag();
mCurrentCheckedRadioLeft = rb.getLeft();//更新當前按鈕距離左邊的距離
int width=(int) SizeHelper.dp2px(TabbarActivity.this, 140);
hs_activity_tabbar.smoothScrollTo((int) mCurrentCheckedRadioLeft - width, 0);
tv_tabname.setText(channel);
}
});
//設定默認被選中的選項卡為第一項
if (!titleList.isEmpty()) {
myRadioGroup.check(myRadioGroup.getChildAt(0).getId());
}</code>
dp2px方法如下用來將dp轉換為px:
<code class="hljs java"> public static float dp2px(Context context, float dp) {
final float scale = context.getResources().getDisplayMetrics().density;
return (dp * scale);
}</code>
全部代碼為:
<code class="hljs avrasm">package com.example.liuwangshu.myslidetabbar;
import android.content.res.ColorStateList;
import android.support.v7.app.AppCompatActivity;
import android.os.Bundle;
import android.view.Gravity;
import android.view.ViewGroup;
import android.widget.HorizontalScrollView;
import android.widget.LinearLayout;
import android.widget.RadioButton;
import android.widget.RadioGroup;
import android.widget.TextView;
import java.util.ArrayList;
import java.util.List;
public class TabbarActivity extends AppCompatActivity {
private HorizontalScrollView hs_activity_tabbar;
private RadioGroup myRadioGroup;
private List<string> titleList;
private LinearLayout ll_activity_tabbar_content;
private float mCurrentCheckedRadioLeft;//當前被選中的RadioButton距離左側的距離
private String channel;
private TextView tv_tabname;
@Override
protected void onCreate(Bundle savedInstanceState) {
super.onCreate(savedInstanceState);
setContentView(R.layout.activity_tabbar);
tv_tabname= (TextView) this.findViewById(R.id.tv_tabname);
titleList = new ArrayList<string>();
titleList.add("推薦");
titleList.add("熱點");
titleList.add("北京");
titleList.add("體育");
titleList.add("娛樂");
titleList.add("足球");
titleList.add("巴薩");
titleList.add("汽車");
initGroup();
}
private void initGroup() {
hs_activity_tabbar= (HorizontalScrollView) this.findViewById(R.id.hs_activity_tabbar);
ll_activity_tabbar_content= (LinearLayout) this.findViewById(R.id.ll_activity_tabbar_content);
//選項卡布局
myRadioGroup = new RadioGroup(this);
myRadioGroup.setLayoutParams(new ViewGroup.LayoutParams(ViewGroup.LayoutParams.MATCH_PARENT, ViewGroup.LayoutParams.MATCH_PARENT));
myRadioGroup.setOrientation(LinearLayout.HORIZONTAL);
ll_activity_tabbar_content.addView(myRadioGroup);
for (int i = 0; i < titleList.size(); i++) {
String channel = titleList.get(i);
RadioButton radio = new RadioButton(this);
radio.setButtonDrawable(android.R.color.transparent);
radio.setBackgroundResource(R.drawable.radiobtn_selector);
ColorStateList csl = getResources().getColorStateList(R.color.radiobtn_text_color);
radio.setTextColor(csl);
LinearLayout.LayoutParams l = new LinearLayout.LayoutParams((int) SizeHelper.dp2px(this, 80), ViewGroup.LayoutParams.MATCH_PARENT, Gravity.CENTER);
radio.setLayoutParams(l);
radio.setTextSize(15);
radio.setGravity(Gravity.CENTER);
radio.setText(channel);
radio.setTag(channel);
myRadioGroup.addView(radio);
}
myRadioGroup.setOnCheckedChangeListener(new RadioGroup.OnCheckedChangeListener() {
@Override
public void onCheckedChanged(RadioGroup group, int checkedId) {
int radioButtonId = group.getCheckedRadioButtonId();
//根據ID獲取RadioButton的實例
RadioButton rb = (RadioButton) findViewById(radioButtonId);
channel = (String) rb.getTag();
mCurrentCheckedRadioLeft = rb.getLeft();//更新當前按鈕距離左邊的距離
int width=(int) SizeHelper.dp2px(TabbarActivity.this, 140);
hs_activity_tabbar.smoothScrollTo((int) mCurrentCheckedRadioLeft - width, 0);
tv_tabname.setText(channel);
}
});
//設定默認被選中的選項卡為第一項
if (!titleList.isEmpty()) {
myRadioGroup.check(myRadioGroup.getChildAt(0).getId());
}
}
}
</string></string></code>
來看看效果
以上所述是小編給大家介紹的Android實現類似網易新聞選項卡動態滑動效果,希望對大家有所幫助,如果大家有任何疑問歡迎給我留言,小編會及時回復大家的,在此也非常感謝大家對本站網站的支持!
 Android學習筆記之數據的Sdcard存儲方法及操作sdcard的工具類
(1)文件的目錄 (2)各文件的代碼: FileService.java也就是操作sdcard的工具類: pa
 Android自定義控件:圖片比例適配,解決圖片白邊(詳解View中onMeasure方法)
當App中涉及到布局需要展示大量圖片時,你就應該考慮到“圖片比例適配“的問題。當圖片的寬高規格不同時,你設置展示的ImageView一. 自定義
 Android自定義控件之仿優酷菜單
去年的優酷HD版有過這樣一種菜單,如下圖:應用打開之後,先是三個弧形的三級菜單,點擊實體鍵menu之後,這三個菜單依次旋轉退出,再點擊實體鍵menu之後,一級菜單會旋轉進
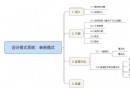 最易懂的設計模式解析:單例模式(Singleton)
前言今天我來全面總結一下Android開發中最常用的設計模式 - 單例模式。目錄1. 引入1.1 解決的是什麼問題之前說過,設計模式 = 某類特定問題的解決方案,那麼單例