編輯:關於Android編程
本文實例講述了Android編程實現調用系統圖庫與裁剪圖片功能。分享給大家供大家參考,具體如下:
在Android開發中,調用系統圖庫和裁剪照片是很常見的需求。相對於自己實現這種功能,直接調用系統具有諸多優點,如不用考慮屏幕適配,不用擔心性能問題,等等。因此,對於一般的需求,建議直接調用系統的功能,簡便高效!
首先上效果圖:
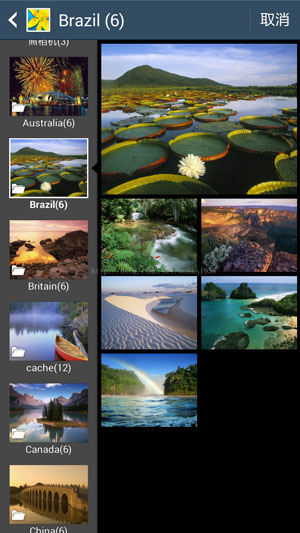
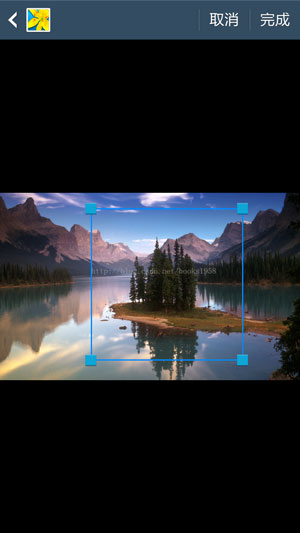
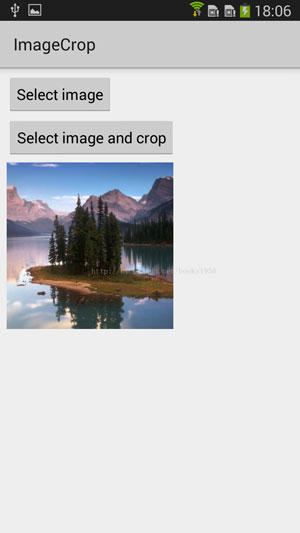
一、只調用系統圖庫(不裁剪),返回用戶選擇的圖片。(只支持單選,如需多選則需要自己實現,可參考Android編程實現仿QQ照片選擇器(按相冊分類顯示,多選添加)源碼。)
1.跳轉至系統圖庫頁面:
Intent i = new Intent(Intent.ACTION_PICK, MediaStore.Images.Media.EXTERNAL_CONTENT_URI);
startActivityForResult(i, SELECT_IMAGE);
2.在onActivityResult中接收系統圖庫返回的信息(也就是用戶選擇的照片)。
@Override
protected void onActivityResult(int requestCode, int resultCode, Intent data) {
    super.onActivityResult(requestCode, resultCode, data);
    if (resultCode != RESULT_OK || data == null) {
      return;
    }
    //select an image
    if (requestCode == SELECT_IMAGE) {
      //get image path from uri
      String imagePath = getImagePath(data.getData());
      return;
    }
}
private String getImagePath(Uri selectedImage) {
    String[] filePathColumn = {MediaStore.Images.Media.DATA};
    Cursor cursor = getContentResolver().query(selectedImage, filePathColumn, null, null, null);
    cursor.moveToFirst();
    int columnIndex = cursor.getColumnIndex(filePathColumn[0]);
    String imagePath = cursor.getString(columnIndex);
    cursor.close();
    System.out.println("image path:" + imagePath);
    return imagePath;
}
二、跳轉至系統圖庫,選擇照片,並裁剪。
1.跳轉至系統圖庫:
//select image via system gallery, crop and save the new image file.
public void selectImageAndCrop(View view) {
    //After cropping, the image file will be stored here!
    cacheFile = imageCacheFolder + File.separator + "cache_" + System.currentTimeMillis() + ".jpg";
    Intent intent = new Intent(Intent.ACTION_GET_CONTENT);
    intent.setType("image/*");
    intent.putExtra("crop", "true");
    //width:height
    intent.putExtra("aspectX", 1);
    intent.putExtra("aspectY", 1);
    intent.putExtra("output", Uri.fromFile(new File(cacheFile)));
    intent.putExtra("outputFormat", "JPEG");
    startActivityForResult(Intent.createChooser(intent, "Choose Image"), SELECT_IMAGE_CROP);
}
跳轉之前需要傳遞的數據:
(1)crop:傳遞一個true,告訴系統需要裁剪。
(2)aspectX和aspectY:裁剪框的寬高比。
(3)output:需要傳遞一個由文件路徑cacheFile構建的uri,用戶在圖庫頁面選擇照片之後會自動進入裁剪頁面,裁剪之後圖片會被保存在cacheFile這個位置。
裁剪完成之後,同樣會回調onActivityResult方法(resultCode為RESULT_OK),並且圖片會被保存在cacheFile這個位置,因此可以直接使用這個文件,例如將其設置為ImageView的資源。
@Override
protected void onActivityResult(int requestCode, int resultCode, Intent data) {
    super.onActivityResult(requestCode, resultCode, data);
    if (resultCode != RESULT_OK) {
      return;
    }
    //select an image and crop
    if (requestCode == SELECT_IMAGE_CROP) {
       //compress the original image to save memory.
      BitmapFactory.Options opt = new BitmapFactory.Options();
      opt.inSampleSize = 4;
      imageView.setImageBitmap(BitmapFactory.decodeFile(cacheFile, opt));
    }
}
更多關於Android相關內容感興趣的讀者可查看本站專題:《Android圖形與圖像處理技巧總結》、《Android開發入門與進階教程》、《Android調試技巧與常見問題解決方法匯總》、《Android基本組件用法總結》、《Android視圖View技巧總結》、《Android布局layout技巧總結》及《Android控件用法總結》
希望本文所述對大家Android程序設計有所幫助。
 Android 4.4(KitKat)中apk包的安裝過程
其實對於apk包的安裝,4.4和之前版本沒大的差別。Android中app安裝主要有以下幾種情況:系統啟動時安裝,adb命令安裝,Google
 Android自定義view進階-- 神奇的貝塞爾曲線
今天給大家介紹一個非常神奇的曲線,貝塞爾曲線。相信大家之前都有耳聞。很久之前就久聞該線大名,但是一直不是很了解,在經過一番谷歌之後,有了初步的概念:三點確定一條曲線:起點
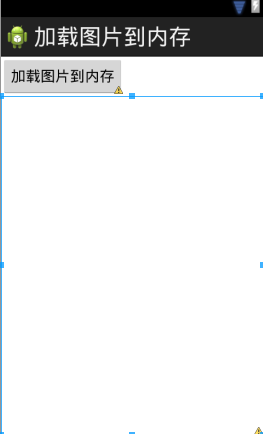 android中圖片加載到內存的實例代碼
本文演示android中圖片加載到內存首先設計界面:代碼如下:<LinearLayout xmlns:android=http://schemas.android.
 Android BLE藍牙通訊學習
在app應用的開發過程中,一般和藍牙接觸的不多,但是隨著智能穿戴設備的發展,穿戴設備和手機關聯的app越來越多,之前也是沒怎麼接觸過這一塊的東西,正好最近需要做一個和藍牙