編輯:Android資訊
Gallery能夠水平顯示其內容,一般用來浏覽圖片,被選中的選項位於中間,並且可以相應事件顯示信息。下面結合ImageSwitcher組件來實現一個通過縮略圖來浏覽圖片的程序,具體步驟如下
第一步:
創建一個Andorid工程”GalleryTest”,該工程的入口是Activity類GalleryTest繼承Activity並實現OnItemSelectedListener和ViewFactory接口,來實現圖片和視圖的創建
package org.hualang.Gallery;

import android.app.Activity;
import android.os.Bundle;
import android.view.View;
import android.widget.AdapterView;
import android.widget.AdapterView.OnItemSelectedListener;
import android.widget.ViewSwitcher.ViewFactory;
//繼承Activity,實現onItemSelectedListener和ViewFactory接口
public class GalleryTest extends Activity implements OnItemSelectedListener,ViewFactory{
    /** Called when the activity is first created. */
    @Override
    public void onCreate(Bundle savedInstanceState) {
        super.onCreate(savedInstanceState);
        setContentView(R.layout.main);
    }

        @Override
        public View makeView() {
                // TODO Auto-generated method stub
                return null;
        }

        @Override
        public void onItemSelected(AdapterView<?> arg0, View arg1, int arg2,
                        long arg3) {
                // TODO Auto-generated method stub

        }

        @Override
        public void onNothingSelected(AdapterView<?> arg0) {
                // TODO Auto-generated method stub

        }
}
第二步:
在工程的res\drawable\目錄下添加7張圖片和對應的縮略圖
第三步:
在工程res\layout\目錄下創建一個布局文件main.xml,在其中那個添加一個Gallery組件和一個ImageSwitcher組件,並設置相應的屬性
<?xml version="1.0" encoding="utf-8"?>
<LinearLayout xmlns:android="http://schemas.android.com/apk/res/android"
    android:orientation="vertical"
    android:layout_width="fill_parent"
    android:layout_height="fill_parent"
    >
<ImageSwitcher android:id="@+id/switcher"
        android:layout_width="fill_parent"
        android:layout_height="fill_parent"
        android:layout_alignParentTop="true"
        android:layout_alignParentLeft="true"
    />

    <Gallery android:id="@+id/gallery"
        android:background="#55000000"
        android:layout_width="fill_parent"
        android:layout_height="60dp"
        android:layout_alignParentBottom="true"
        android:layout_alignParentLeft="true"
        android:gravity="center_vertical"
        android:spacing="16dp"
    />
</LinearLayout>
第四步:在GalleryTest頂部聲明使用到的ImageSwitcher實例圖片資源Integer數組
public class GalleryTest extends Activity implements OnItemSelectedListener,ViewFactory{
    /** Called when the activity is first created. */
        //聲明ImageSwitcher
        private ImageSwitcher switcher;
        //縮略圖片id數組
        private Integer[] thumbids={
                        R.drawable.thumb0,
                        R.drawable.thumb1,
                        R.drawable.thumb2,
                        R.drawable.thumb3,
                        R.drawable.thumb4,
                        R.drawable.thumb5,
                        R.drawable.thumb6,
                        R.drawable.thumb7
        };
        //圖片id數組
        private Integer[] imgids={
                        R.drawable.img0,
                        R.drawable.img1,
                        R.drawable.img2,
                        R.drawable.img3,
                        R.drawable.img4,
                        R.drawable.img5,
                        R.drawable.img6,
                        R.drawable.img7
        };
第五步:
在GalleryTest的onCreate()方法中,將窗口樣式設置為無標題,設置當前布局視圖,獲得ImageSwitcher實例,並設置漸進漸出動畫,獲得Gallery實例
public void onCreate(Bundle savedInstanceState) {
        super.onCreate(savedInstanceState);
        //設置窗口特征無標題
        requestWindowFeature(Window.FEATURE_NO_TITLE);
        setContentView(R.layout.main);
        //通過findViewById方法獲得ImageSwitcher對象
        switcher=(ImageSwitcher)findViewById(R.id.switcher);
        //為ImageSwitcher設置工廠
        switcher.setFactory(this);
        //設置動畫漸入效果
        switcher.setInAnimation(AnimationUtils.loadAnimation(this, android.R.anim.fade_in));
        //設置動畫漸出效果
        switcher.setOutAnimation(AnimationUtils.loadAnimation(this, android.R.anim.fade_out));
        //通過findViewById方法獲得Gallery對象
        Gallery g=(Gallery)findViewById(R.id.gallery);
    }
第六步:
創建內部類ImageAdapter,該類繼承BaseAdapter,為Gallery設置Adapter實例
public class ImageAdapter extends BaseAdapter {
            //構造方法
                public ImageAdapter(Context c) {
                        mContext = c;
                }
                //獲得數量
                public int getCount() {
                        return thumbids.length;
                }
                //獲得當前選項
                public Object getItem(int position) {
                        return position;
                }
                //獲得當前選項ID
                public long getItemId(int position) {
                        return position;
                }
                //獲得View對象
                public View getView(int position, View convertView, ViewGroup parent) {
                        //實例化ImageView對象
                        ImageView i = new ImageView(mContext);
                        //設置縮略圖片資源
                        i.setImageResource(thumbids[position]);
                        //設置邊界對齊
                        i.setAdjustViewBounds(true);
                        //設置布局參數
                        i.setLayoutParams(new Gallery.LayoutParams(
                                        LayoutParams.WRAP_CONTENT, LayoutParams.WRAP_CONTENT));
                        //設置背景資源
                        i.setBackgroundResource(R.drawable.picturefrom);
                        return i;
                }
                private Context mContext;
        }
第七步:
實現onItemSelected()方法,更換圖片
@Override
        public void onItemSelected(AdapterView<?> adapter, View v, int position,
                        long id) {
                switcher.setImageResource(imgids[position]);
        }
第八步:
實現makeView()方法,為ImageView設置布局格式
@Override
        public View makeView() {
                // TODO Auto-generated method stub
                //創建ImageView
                ImageView i=new ImageView(this);
                //設置背景顏色
                i.setBackgroundColor(0xFF000000);
                //設置精度類型
                i.setScaleType(ImageView.ScaleType.FIT_CENTER);
                //設置布局參數
                i.setLayoutParams(new ImageSwitcher.LayoutParams(
                                LayoutParams.FILL_PARENT,LayoutParams.FILL_PARENT));
                return i;
        }
第九步:
為Gallery添加Adapter並添加OnItemSelectedListener監聽器
g.setAdapter(new ImageAdapter(this));
                g.setOnItemSelectedListener(this);
至此,全部,結束,運行結果如下
完整源代碼:
package org.hualang.Gallery;

import android.app.Activity;
import android.content.Context;
import android.os.Bundle;
import android.view.View;
import android.view.ViewGroup;
import android.view.Window;
import android.view.animation.AnimationUtils;
import android.widget.AdapterView;
import android.widget.BaseAdapter;
import android.widget.Gallery;
import android.widget.ImageSwitcher;
import android.widget.ImageView;
import android.widget.AdapterView.OnItemSelectedListener;
import android.widget.Gallery.LayoutParams;
import android.widget.ViewSwitcher.ViewFactory;

public class GalleryTest extends Activity implements OnItemSelectedListener,
                ViewFactory {

        private ImageSwitcher mSwitcher;

        private Integer[] mThumbIds = { R.drawable.thumb0,
                        R.drawable.thumb1, R.drawable.thumb2,
                        R.drawable.thumb3, R.drawable.thumb4,
                        R.drawable.thumb5, R.drawable.thumb6,
                        R.drawable.thumb7 };

        private Integer[] mImageIds = { R.drawable.img0, R.drawable.img1,
                        R.drawable.img2, R.drawable.img3, R.drawable.img4,
                        R.drawable.img5, R.drawable.img6, R.drawable.img7 };

        @Override
        public void onCreate(Bundle savedInstanceState) {
                super.onCreate(savedInstanceState);

                requestWindowFeature(Window.FEATURE_NO_TITLE);
                setContentView(R.layout.main);
                mSwitcher = (ImageSwitcher) findViewById(R.id.switcher);
                mSwitcher.setFactory(this);
                mSwitcher.setInAnimation(AnimationUtils.loadAnimation(this,
                                android.R.anim.fade_in));
                mSwitcher.setOutAnimation(AnimationUtils.loadAnimation(this,
                                android.R.anim.fade_out));

                Gallery g = (Gallery) findViewById(R.id.gallery);

                g.setAdapter(new ImageAdapter(this));
                g.setOnItemSelectedListener(this);

        }

        public class ImageAdapter extends BaseAdapter {
                public ImageAdapter(Context c) {
                        mContext = c;
                }
                public int getCount() {
                        return mThumbIds.length;
                }
                public Object getItem(int position) {
                        return position;
                }
                public long getItemId(int position) {
                        return position;
                }
                public View getView(int position, View convertView, ViewGroup parent) {
                        ImageView i = new ImageView(mContext);

                        i.setImageResource(mThumbIds[position]);
                        i.setAdjustViewBounds(true);
                        i.setLayoutParams(new Gallery.LayoutParams(
                                        LayoutParams.WRAP_CONTENT, LayoutParams.WRAP_CONTENT));
                        i.setBackgroundResource(R.drawable.picturefrom);
                        return i;
                }
                private Context mContext;
        }

        @Override
        public void onItemSelected(AdapterView<?> adapter, View v, int position,
                        long id) {
                mSwitcher.setImageResource(mImageIds[position]);
        }

        @Override
        public void onNothingSelected(AdapterView<?> arg0) {

        }

        @Override
        public View makeView() {
                ImageView i = new ImageView(this);
                i.setBackgroundColor(0xFF000000);
                i.setScaleType(ImageView.ScaleType.FIT_CENTER);
                i.setLayoutParams(new ImageSwitcher.LayoutParams(
                                LayoutParams.FILL_PARENT, LayoutParams.FILL_PARENT));
                return i;
        }
}
<?xml version="1.0" encoding="utf-8"?>
 <RelativeLayout xmlns:android="http://schemas.android.com/apk/res/android"
 android:layout_width="fill_parent"
 android:layout_height="fill_parent">
<ImageSwitcher android:id="@+id/switcher"
 android:layout_width="fill_parent"
 android:layout_height="fill_parent"
 android:layout_alignParentTop="true"
 android:layout_alignParentLeft="true"
 />
<Gallery android:id="@+id/gallery"
 android:background="#55000000"
 android:layout_width="fill_parent"
 android:layout_height="60dp"
 android:layout_alignParentBottom="true"
 android:layout_alignParentLeft="true"
 android:gravity="center_vertical"
 android:spacing="16dp"
 />
</RelativeLayout>
 Android SharedPreferences存儲數據使用實例分析
在Android開發中,存儲數據的方式有很多種,本文將通過一個簡單的實例來分析如何用Android SharedPreferences數據存儲方式來進行輕量級數據
 Google 發布的15個 Android 性能優化典范
2015年伊始,Google發布了關於Android性能優化典范的專題, 一共16個短視頻,每個3-5分鐘,幫助開發者創建更快更優秀的Android App。課程
 Android的官司打贏了 屬於Android社區的勝利
BI 中文站 5 月 27 日報道 美國陪審團裁決剛剛揭曉,根據此次最新的裁決,甲骨文在控訴谷歌侵權之爭中敗訴。陪審團認為,谷歌使用有爭議的代碼程序是“公平使用(
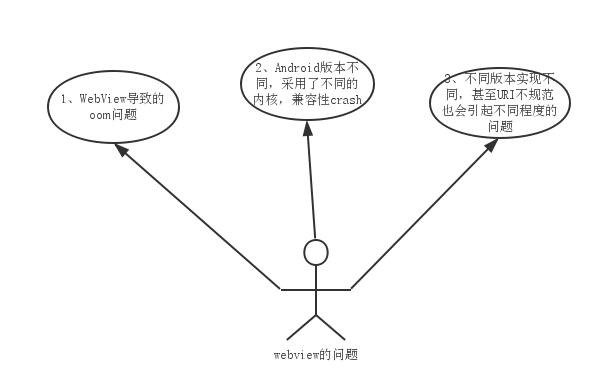 Android WebView 優化之路
前言 隨著app的迭代,嵌入的html5界面越來越多了,WebView這個強大組件引起的問題越發的多起來,例如: 1、WebView導致的oom問題 2、And