編輯:Android資訊
本文介紹了如何使用緩存來提高UI的載入輸入和滑動的流暢性。使用內存緩存、使用磁盤緩存、處理配置改變事件等方法將會有效的解決這個問題。
在您的UI中顯示單個圖片是非常簡單的,如果您需要一次顯示很多圖片就有點復雜了。在很多情況下(例如使用 ListView, GridView 或者 ViewPager控件),顯示在屏幕上的圖片以及即將顯示在屏幕上的圖片數量是非常大的(例如在圖庫中浏覽大量圖片)。
在這些控件中,當一個子控件不顯示的時候,系統會重用該控件來循環顯示 以便減少對內存的消耗。同時垃圾回收機制還會釋放那些已經載入內存中的Bitmap資源(假設您沒有強引用這些Bitmap)。一般來說這樣都是不錯的,但是在用戶來回滑動屏幕的時候,為了保證UI的流暢性和載入圖片的效率,您需要避免重復的處理這些需要顯示的圖片。 使用內存緩存和磁盤緩存可以解決這個問題,使用緩存可以讓控件快速的加載已經處理過的圖片。
本文介紹如何使用緩存來提高UI的載入輸入和滑動的流暢性。
使用內存緩存
內存緩存提高了訪問圖片的速度,但是要占用不少內存。 LruCache
類(在API 4之前可以使用Support Library 中的類 )特別適合緩存Bitmap, 把最近使用到的
Bitmap對象用強引用保存起來(保存到LinkedHashMap中),當緩存數量達到預定的值的時候,把
不經常使用的對象刪除。
注意: 過去,實現內存緩存的常用做法是使用
SoftReference 或者
WeakReference bitmap 緩存,
但是不推薦使用這種方式。從Android 2.3 (API Level 9) 開始,垃圾回收開始強制的回收掉 soft/weak 引用 從而導致這些緩存沒有任何效率的提升。
另外,在 Android 3.0 (API Level 11)之前,這些緩存的Bitmap數據保存在底層內存(native memory)中,並且達到預定條件後也不會釋放這些對象,從而可能導致
程序超過內存限制並崩潰。
在使用 LruCache 的時候,需要考慮如下一些因素來選擇一個合適的緩存數量參數:
這裡沒有萬能配方可以適合所有的程序,您需要分析您的使用情況並在指定自己的緩存策略。使用太小的緩存並不能起到應有的效果,而使用太大的緩存會消耗更多
的內存從而有可能導致 java.lang.OutOfMemory 異常或者留下很少的內存供您的程序其他功能使用。
下面是一個使用 LruCache 緩存的示例:
private LruCache<string, bitmap=""> mMemoryCache;

@Override
protected void onCreate(Bundle savedInstanceState) {
    ...
    // Get memory class of this device, exceeding this amount will throw an
    // OutOfMemory exception.
    final int memClass = ((ActivityManager) context.getSystemService(
            Context.ACTIVITY_SERVICE)).getMemoryClass();

    // Use 1/8th of the available memory for this memory cache.
    final int cacheSize = 1024 * 1024 * memClass / 8;

    mMemoryCache = new LruCache<string, bitmap="">(cacheSize) {
        @Override
        protected int sizeOf(String key, Bitmap bitmap) {
            // The cache size will be measured in bytes rather than number of items.
            return bitmap.getByteCount();
        }
    };
    ...
}
public void addBitmapToMemoryCache(String key, Bitmap bitmap) {
    if (getBitmapFromMemCache(key) == null) {
        mMemoryCache.put(key, bitmap);
    }
}
public Bitmap getBitmapFromMemCache(String key) {
    return mMemoryCache.get(key);
}
注意: 在這個示例中,該程序的1/8內存都用來做緩存用了。在一個normal/hdpi設備中,這至少有4MB(32/8)內存。
在一個分辨率為 800×480的設備中,滿屏的GridView全部填充上圖片將會使用差不多1.5MB(800*480*4 bytes)
的內存,所以這樣差不多在內存中緩存了2.5頁的圖片。
當在 ImageView 中顯示圖片的時候,
先檢查LruCache 中是否存在。如果存在就使用緩存後的圖片,如果不存在就啟動後台線程去載入圖片並緩存:
public void loadBitmap(int resId, ImageView imageView) {
    final String imageKey = String.valueOf(resId);
    final Bitmap bitmap = getBitmapFromMemCache(imageKey);
    if (bitmap != null) {
        mImageView.setImageBitmap(bitmap);
    } else {
        mImageView.setImageResource(R.drawable.image_placeholder);
        BitmapWorkerTask task = new BitmapWorkerTask(mImageView);
        task.execute(resId);
    }
}
BitmapWorkerTask 需要把新的圖片添加到緩存中:
class BitmapWorkerTask extends AsyncTask<integer, void,="" bitmap=""> {
    ...
    // Decode image in background.
    @Override
    protected Bitmap doInBackground(Integer... params) {
        final Bitmap bitmap = decodeSampledBitmapFromResource(
                getResources(), params[0], 100, 100));
        addBitmapToMemoryCache(String.valueOf(params[0]), bitmap);
        return bitmap;
    }
    ...
}
下頁將為您介紹其它兩種方法使用磁盤緩存和處理配置改變事件
使用磁盤緩存
在訪問最近使用過的圖片中,內存緩存速度很快,但是您無法確定圖片是否在緩存中存在。像
GridView 這種控件可能具有很多圖片需要顯示,很快圖片數據就填滿了緩存容量。
同時您的程序還可能被其他任務打斷,比如打進的電話 — 當您的程序位於後台的時候,系統可能會清楚到這些圖片緩存。一旦用戶恢復使用您的程序,您還需要重新處理這些圖片。
在這種情況下,可以使用磁盤緩存來保存這些已經處理過的圖片,當這些圖片在內存緩存中不可用的時候,可以從磁盤緩存中加載從而省略了圖片處理過程。
當然, 從磁盤載入圖片要比從內存讀取慢很多,並且應該在非UI線程中載入磁盤圖片。
注意: 如果緩存的圖片經常被使用的話,可以考慮使用
ContentProvider ,例如在圖庫程序中就是這樣干滴。
在示例代碼中有個簡單的 DiskLruCache 實現。然後,在Android 4.0中包含了一個更加可靠和推薦使用的DiskLruCache(libcore/luni/src/main/java/libcore/io/DiskLruCache.java)
。您可以很容易的把這個實現移植到4.0之前的版本中使用(來 href=”http://www.google.com/search?q=disklrucache”>Google一下 看看其他人是否已經這樣干了!)。
這裡是一個更新版本的 DiskLruCache :
private DiskLruCache mDiskCache;
private static final int DISK_CACHE_SIZE = 1024 * 1024 * 10; // 10MB
private static final String DISK_CACHE_SUBDIR = "thumbnails";

@Override
protected void onCreate(Bundle savedInstanceState) {
    ...
    // Initialize memory cache
    ...
    File cacheDir = getCacheDir(this, DISK_CACHE_SUBDIR);
    mDiskCache = DiskLruCache.openCache(this, cacheDir, DISK_CACHE_SIZE);
    ...
}
class BitmapWorkerTask extends AsyncTask<integer, void,="" bitmap=""> {
    ...
    // Decode image in background.
    @Override
    protected Bitmap doInBackground(Integer... params) {
        final String imageKey = String.valueOf(params[0]);

        // Check disk cache in background thread
        Bitmap bitmap = getBitmapFromDiskCache(imageKey);

        if (bitmap == null) { // Not found in disk cache
            // Process as normal
            final Bitmap bitmap = decodeSampledBitmapFromResource(
                    getResources(), params[0], 100, 100));
        }
        // Add final bitmap to caches
        addBitmapToCache(String.valueOf(imageKey, bitmap);

        return bitmap;
    }
    ...
}
public void addBitmapToCache(String key, Bitmap bitmap) {
    // Add to memory cache as before
    if (getBitmapFromMemCache(key) == null) {
        mMemoryCache.put(key, bitmap);
    }
    // Also add to disk cache
    if (!mDiskCache.containsKey(key)) {
        mDiskCache.put(key, bitmap);
    }
}
public Bitmap getBitmapFromDiskCache(String key) {
    return mDiskCache.get(key);
}
// Creates a unique subdirectory of the designated app cache directory. Tries to use external
// but if not mounted, falls back on internal storage.
public static File getCacheDir(Context context, String uniqueName) {
    // Check if media is mounted or storage is built-in, if so, try and use external cache dir
    // otherwise use internal cache dir
    final String cachePath = Environment.getExternalStorageState() == Environment.MEDIA_MOUNTED
            || !Environment.isExternalStorageRemovable() ?
                    context.getExternalCacheDir().getPath() : context.getCacheDir().getPath();
    return new File(cachePath + File.separator + uniqueName);
}
在UI線程中檢測內存緩存,在後台線程中檢測磁盤緩存。磁盤操作從來不應該在UI線程中實現。當圖片處理完畢後,最終的結果會同時添加到
內存緩存和磁盤緩存中以便將來使用。
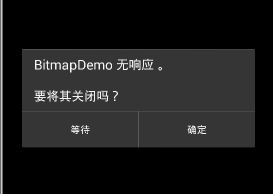
處理配置改變事件
運行時的配置變更 — 例如 屏幕方向改變 — 導致Android摧毀正在運行的Activity,然後使用
新的配置從新啟動該Activity (詳情,參考這裡 Handling Runtime Changes)。
您需要注意避免在配置改變的時候導致重新處理所有的圖片,從而提高用戶體驗。
幸運的是,您在 使用內存緩存 部分已經有一個很好的圖片緩存了。該緩存可以通過
Fragment (Fragment會通過setRetainInstance(true)函數保存起來)來傳遞給新的Activity
當Activity重新啟動 後,Fragment 被重新附加到Activity中,您可以通過該Fragment來獲取緩存對象。
下面是一個在 Fragment中保存緩存的示例:
private LruCache<string, bitmap=""> mMemoryCache;
@Override
protected void onCreate(Bundle savedInstanceState) {
    ...
    RetainFragment mRetainFragment =            RetainFragment.findOrCreateRetainFragment(getFragmentManager());
    mMemoryCache = RetainFragment.mRetainedCache;
    if (mMemoryCache == null) {
        mMemoryCache = new LruCache<string, bitmap="">(cacheSize) {
            ... // Initialize cache here as usual
        }
        mRetainFragment.mRetainedCache = mMemoryCache;
    }
    ...
}
class RetainFragment extends Fragment {
    private static final String TAG = "RetainFragment";
    public LruCache<string, bitmap=""> mRetainedCache;

    public RetainFragment() {}
    public static RetainFragment findOrCreateRetainFragment(FragmentManager fm) {
        RetainFragment fragment = (RetainFragment) fm.findFragmentByTag(TAG);
        if (fragment == null) {
            fragment = new RetainFragment();
        }
        return fragment;
    }
    @Override
    public void onCreate(Bundle savedInstanceState) {
        super.onCreate(savedInstanceState);
        <strong>setRetainInstance(true);</strong>
    }
}
此外您可以嘗試分別使用和不使用Fragment來旋轉設備的屏幕方向來查看具體的圖片載入情況。
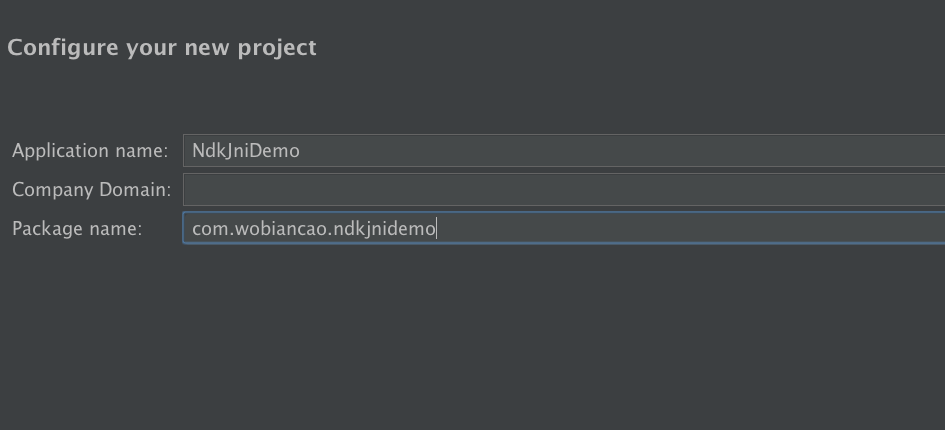 Android Studio ndk-Jni開發詳解
Java Native Interface (JNI)標准是java平台的一部分,它允許Java代碼和其他語言寫的代碼進行交互。JNI 是本地編程接口,它使得在
 為什麼 Android 中不建議使用 Enums
關於Android性能優化中一個常見的建議是不要在你的代碼中使用Enums,就連 Android官網 上都強烈建議不要使用。 Why Android中當你的Ap
 22 個 Android Studio 優秀插件匯總
第一部分 插件的介紹 Google 在2013年5月的I/O開發者大會推出了基於IntelliJ IDEA java ide上的Android Studio。An
 2016年Android平台最佳黑客工具匯總
免責聲明:此份清單僅供學習之用。知悉黑客軟件能做到哪些。我們不支持讀者利用其中的任何工具進行任何不道德的惡意攻擊行為。 根據業界的一系列評測以及親身經驗,我們整