本文以及後續文章,將一步步完善功能列表:
要點擊九宮格中的條目,需要注冊點擊事件
Java代碼
- // 注冊九宮格單個條目的點擊事件
- gv_home.setOnItemClickListener(new OnItemClickListener() {
- // 點中列表條目索引 position
- @Override
- public void onItemClick(AdapterView<?> parent, View view,
- int position, long id) {
- switch (position) {
- case 0:
-
- break;
- case 8:
- Intent intent = new Intent(getApplicationContext(), SettingActivity.class);
- startActivity(intent);
- break;
-
- default:
- break;
- }
-
- }
- });
毫無疑問需要新建SettingActivity.java
Java代碼
- package com.wuyudong.mobilesafe.activity;
-
- import com.wuyudong.mobilesafe.R;
-
- import android.app.Activity;
- import android.os.Bundle;
-
- public class SettingActivity extends Activity {
- @Override
- protected void onCreate(Bundle savedInstanceState) {
- // TODO Auto-generated method stub
- super.onCreate(savedInstanceState);
- setContentView(R.layout.activity_setting);
- }
-
- }
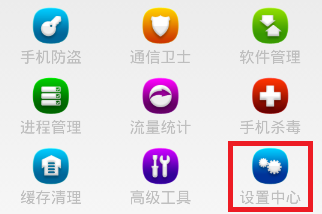
在點擊相應的條目後,跳轉到“設置中心”,於是新建activity_setting.xml布局文件
XML/HTML代碼
- <?xml version="1.0" encoding="utf-8"?>
- <LinearLayout xmlns:android="http://schemas.android.com/apk/res/android"
- android:layout_width="match_parent"
- android:layout_height="match_parent"
- android:orientation="vertical" >
-
- <RelativeLayout
- android:layout_width="match_parent"
- android:layout_height="wrap_content"
- android:padding="5dp" >
-
- <TextView
- android:id="@+id/tv_title"
- android:layout_width="wrap_content"
- android:layout_height="wrap_content"
- android:text="自動更新設置"
- android:textColor="#000"
- android:textSize="18sp" />
-
- <TextView
- android:id="@+id/tv_des"
- android:layout_width="wrap_content"
- android:layout_height="wrap_content"
- android:layout_below="@id/tv_title"
- android:text="自動更新已關閉"
- android:textColor="#000"
- android:textSize="18sp" />
-
- <CheckBox
- android:id="@+id/cb_box"
- android:layout_alignParentRight="true"
- android:layout_centerVertical="true"
- android:layout_width="wrap_content"
- android:layout_height="wrap_content" />
- <View
- android:layout_below="@id/tv_des"
- android:background="#000"
- android:layout_width="match_parent"
- android:layout_height="1dp"
- />
-
- </RelativeLayout>
-
- </LinearLayout>
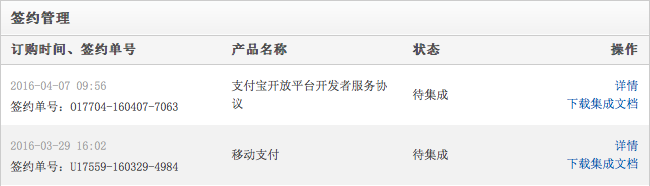
本文先實現設置中心選項的一個條目布局結構,如下紅色方框所示:

 Android支付寶支付開發實例
 Android登錄實例
 Android實現拍照、選擇圖片並裁剪圖片功能
 Android編程ProgressBar自定義樣式之動畫模式實現方法