由於設置中心條目中的布局都很類似,所以可以考慮使用自定義組合控件來簡化實現
自定義組合控件
1.將已經編寫好的布局文件,抽取到一個類中去做管理,下次還需要使用此布局結構的時候,直接使用組合控件對應的對象.
2.將組合控件的布局,抽取到單獨的一個xml中
新建布局文件:setting_item_view.xml,將上篇文章中布局文件中的代碼放進去
XML/HTML代碼
- <?xml version="1.0" encoding="utf-8"?>
- <RelativeLayout xmlns:android="http://schemas.android.com/apk/res/android"
- android:layout_width="match_parent"
- android:layout_height="wrap_content" >
-
- <RelativeLayout
- android:layout_width="match_parent"
- android:layout_height="wrap_content"
- android:padding="5dp" >
-
- <TextView
- android:id="@+id/tv_title"
- android:layout_width="wrap_content"
- android:layout_height="wrap_content"
- android:text="自動更新設置"
- android:textColor="#000"
- android:textSize="18sp" />
-
- <TextView
- android:id="@+id/tv_des"
- android:layout_width="wrap_content"
- android:layout_height="wrap_content"
- android:layout_below="@id/tv_title"
- android:text="自動更新已關閉"
- android:textColor="#000"
- android:textSize="18sp" />
-
- <CheckBox
- android:id="@+id/cb_box"
- android:layout_width="wrap_content"
- android:layout_height="wrap_content"
- android:layout_alignParentRight="true"
- android:layout_centerVertical="true" />
-
- <View
- android:layout_width="match_parent"
- android:layout_height="1dp"
- android:layout_below="@id/tv_des"
- android:background="#000" />
- </RelativeLayout>
-
- </RelativeLayout>
3.通過一個單獨的類SettingItemView.java,去加載此段布局文件.
Java代碼
- package com.wuyudong.mobilesafe.view;
-
- import com.wuyudong.mobilesafe.R;
-
- import android.content.Context;
- import android.util.AttributeSet;
- import android.view.View;
- import android.widget.CheckBox;
- import android.widget.RelativeLayout;
- import android.widget.TextView;
-
- public class SettingItemView extends RelativeLayout {
-
- private TextView tv_des;
- private CheckBox cb_box;
-
- public SettingItemView(Context context) {
- this(context, null);
- }
-
- public SettingItemView(Context context, AttributeSet attrs) {
- this(context, attrs, 0);
- }
-
- public SettingItemView(Context context, AttributeSet attrs, int defStyle) {
- super(context, attrs, defStyle);
- // xml-->view 將設置界面的條目轉換成view對象
- View.inflate(context, R.layout.setting_item_view, this);
- // 等同於以下兩行代碼
- /*
- * View view = View.inflate(context, R.layout.setting_item_view, null);
- * this.addView(view);
- */
-
- //自定義組合控件中的標題描述
- TextView tv_title = (TextView) findViewById(R.id.tv_title);
- tv_des = (TextView) findViewById(R.id.tv_des);
- cb_box = (CheckBox) findViewById(R.id.cb_box);
- }
-
- }
這樣只需要簡單的幾行代碼就可以完成布局文件的調用
XML/HTML代碼
- <?xml version="1.0" encoding="utf-8"?>
- <LinearLayout xmlns:android="http://schemas.android.com/apk/res/android"
- android:layout_width="match_parent"
- android:layout_height="match_parent"
- android:orientation="vertical" >
-
- <TextView
- style="@style/TitleStyle"
- android:text="設置中心" />
-
- <!--
- <RelativeLayout
- android:layout_width="match_parent"
- android:layout_height="wrap_content"
- android:padding="5dp" >
-
- <TextView
- android:id="@+id/tv_title"
- android:layout_width="wrap_content"
- android:layout_height="wrap_content"
- android:text="自動更新設置"
- android:textColor="#000"
- android:textSize="18sp" />
-
- <TextView
- android:id="@+id/tv_des"
- android:layout_width="wrap_content"
- android:layout_height="wrap_content"
- android:layout_below="@id/tv_title"
- android:text="自動更新已關閉"
- android:textColor="#000"
- android:textSize="18sp" />
-
- <CheckBox
- android:id="@+id/cb_box"
- android:layout_alignParentRight="true"
- android:layout_centerVertical="true"
- android:layout_width="wrap_content"
- android:layout_height="wrap_content" />
- <View
- android:layout_below="@id/tv_des"
- android:background="#000"
- android:layout_width="match_parent"
- android:layout_height="1dp"
-
- />
- </RelativeLayout>
- -->
-
- <com.wuyudong.mobilesafe.view.SettingItemView
- android:layout_width="match_parent"
- android:layout_height="wrap_content" >
- </com.wuyudong.mobilesafe.view.SettingItemView>
-
- </LinearLayout>
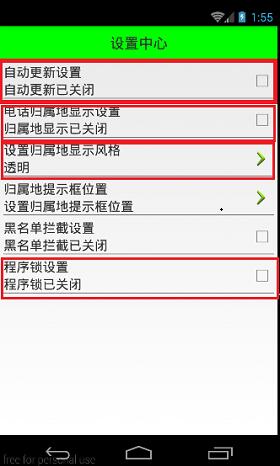
運行項目後,有如下效果:

 帶你實現開發者頭條(二) 實現左滑菜單
 android notification 的總結分析
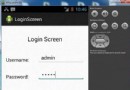 Android登錄實例
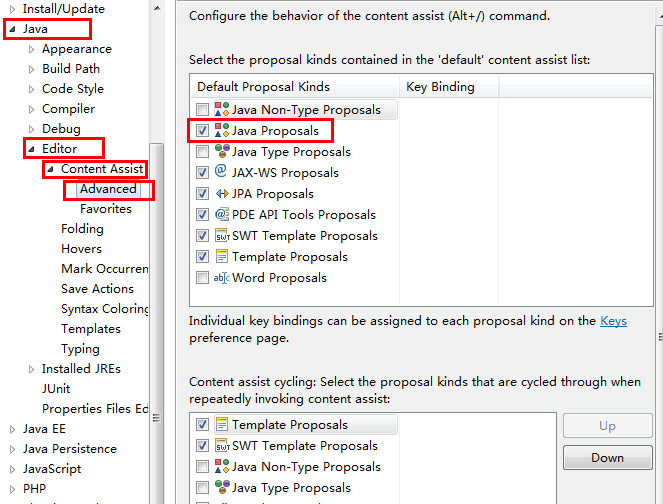 android開發 eclipse alt+”/”自動提示失效的解決方法