編輯:Android開發實例
因為我們專業,所以我們用Auto Build,所以我們用CI系統。
代碼管理使用SVN,自動編譯使用Ant,而持續集成使用Hudson,操作系統使用Ubuntu10.04。
sudo apt-get install sun-java6-jdk
sudo apt-get install ant-optional
sudo apt-get upgrade
wget -O /tmp/key http://hudson-ci.org/debian/hudson-ci.org.key
sudo apt-key add /tmp/key
wget -O /tmp/hudson.deb http://hudson-ci.org/latest/debian/hudson.deb
sudo dpkg --install /tmp/hudson.deb
http://androidappdocs.appspot.com/sdk/index.html
http://androidappdocs.appspot.com/guide/developing/other-ide.html
按照官方的做法,使用自動生成的build文件就可以了。
2.2 local.properties
這個配置文件定義了Android SDK的位置
sdk.dir=${tool.android.sdk}
這個文件裡面定義了App的Package,以及生成App簽名必須用的一些配置。
application.package=test.android
key.store=../test-android.keystore
key.alias=test-android
key.store.password=password
key.alias.password=password
系統配置很簡單,只需要配置JDK、Ant的位置就可以了。
比較有用的還有一項:E-mail Notification,如果你需要在build失敗發送郵件的話,那麼需要配置這一項。
1. 選擇Subversion,並且設置好SVN的地址以及用戶名、密碼
2. 把Use update和Revert勾選上
1. 勾選上Build Periodically,然後設置自動Build的時機,這裡語法跟cron的語法是一樣的。
例如:0 2 * * 1-6
2. 勾選上Poll SCM,設置每隔多長時間檢測SVN的變更。
例如:0,15,30,45 9-23 * * 1-5
Step1:刪除上次編譯的文件
rm –f test-android.keystore
rm –f –R ./test-android/gen
rm –f –R ./test-android/bin
Step2:生成Keystore
http://androidappdocs.appspot.com/guide/publishing/app-signing.html
例如:keytool -genkey -v -alias test-android -keyalg RSA -keysize 2048 -dname 'CN=xxx, OU=xxx, O=xxx, L=xxx, ST=xxx, C=xx' -validity 10000 -keypass password -storepass password -keystore 'test-android.keystore'
Step3:Invoke Ant
設置Targets:release –Dsdk.dir=$your-sdk-dir
例如:release –Dsdk.dir=/home/build/android-sdk-linux
1. 勾選上Archive the artifacts,設置Files to archive:test-android/bin/test-android-release.apk
2. 勾選上E-mail Notification,可以設置發送郵件的對象和時機
經過以上步驟的設置,大功告成了。
專業就是這麼簡單!!!
<?xml version="1.0" encoding="UTF-8"?>
<project name="test-android">

    <!-- The local.properties file is created and updated by the 'android' tool.
         It contains the path to the SDK. It should *NOT* be checked in in Version
         Control Systems. -->
    <property file="local.properties" />

    <!-- The build.properties file can be created by you and is never touched
         by the 'android' tool. This is the place to change some of the default property values
         used by the Ant rules.
         Here are some properties you may want to change/update:

         application.package
             the name of your application package as defined in the manifest. Used by the
             'uninstall' rule.
         source.dir
             the name of the source directory. Default is 'src'.
         out.dir
             the name of the output directory. Default is 'bin'.

         Properties related to the SDK location or the project target should be updated
          using the 'android' tool with the 'update' action.

         This file is an integral part of the build system for your application and
         should be checked in in Version Control Systems.

         -->
    <property file="build.properties" />

    <!-- The default.properties file is created and updated by the 'android' tool, as well
         as ADT.
         This file is an integral part of the build system for your application and
         should be checked in in Version Control Systems. -->
    <property file="default.properties" />

    <!-- Custom Android task to deal with the project target, and import the proper rules.
         This requires ant 1.6.0 or above. -->
    <path id="android.antlibs">
        <pathelement path="${sdk.dir}/tools/lib/anttasks.jar" />
        <pathelement path="${sdk.dir}/tools/lib/sdklib.jar" />
        <pathelement path="${sdk.dir}/tools/lib/androidprefs.jar" />
        <pathelement path="${sdk.dir}/tools/lib/apkbuilder.jar" />
        <pathelement path="${sdk.dir}/tools/lib/jarutils.jar" />
    </path>

    <taskdef name="setup" classname="com.android.ant.SetupTask" classpathref="android.antlibs" />

    <!-- Execute the Android Setup task that will setup some properties specific to the target,
         and import the build rules files.

         The rules file is imported from
            <SDK>/platforms/<target_platform>/templates/android_rules.xml

         To customize some build steps for your project:
         - copy the content of the main node <project> from android_rules.xml
         - paste it in this build.xml below the <setup /> task.
         - disable the import by changing the setup task below to <setup import="false" />

         This will ensure that the properties are setup correctly but that your customized
         build steps are used.
    -->
    <setup />

</project>
 Android MediaPlayer(多媒體播放)
Android提供了許多方法來控制播放的音頻/視頻文件和流。其中該方法是通過一類稱為MediaPlayer。Android是提供MediaPlayer類訪問內置的媒體播放
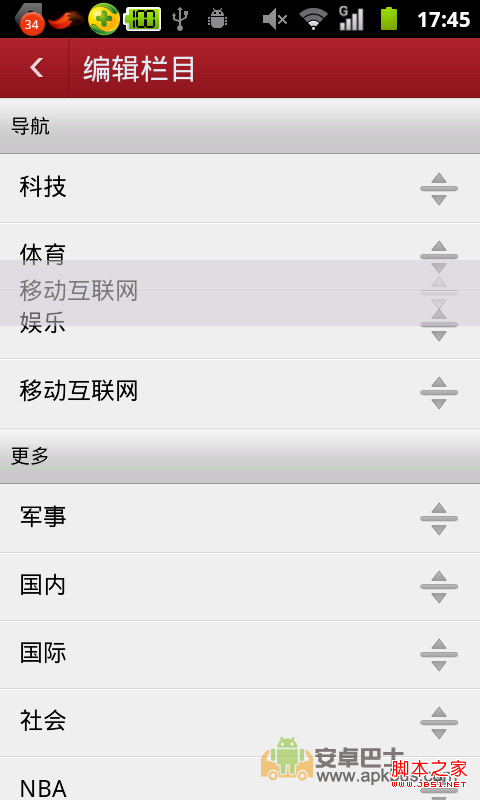 android ListView和GridView拖拽移位實現代碼
關於ListView拖拽移動位置,想必大家並不陌生,比較不錯的軟件都用到如此功能了.如:搜狐,網易,百度等,但是相比來說還是百度的用戶體驗較好,不偏心了,下面看幾
 Android本地化
Android應用程序可以在許多不同地區的許多設備上運行。為了使應用程序更具交互性,應用程序應該處理以適合應用程序將要使用的語言環境方面的文字,數字,文件等。在本章中,我
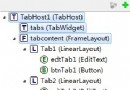 Android入門之TabHost與TabWidget實例解析
本文實例介紹的是Android的Tab控件,Tab控件可以達到分頁的效果,讓一個屏幕的內容盡量豐富,當然也會增加開發的復雜程度,在有必要的時候再使用。Androi