Windows Phone 7 可以把它看成是Android 的 ListView ,WP7 只是預先在XAML裡面為它的數據模板規定了格式,而Android 可以通過後期引入數據的方式為其添加數據模板。
Android 我們可以通過以下幾種方式為LISTVIEW 添加數據,用法極其簡單:
- 繼承ListActivity,使用SetListAdapter,參考下面的代碼。
setListAdapter(new ArrayAdapter<String>(this,
android.R.layout.simple_list_item_1, mStrings));
- 可自定義數據源,繼承BaseAdapter ,參考下面代碼。
自定義數據源
private class SlowAdapter extends BaseAdapter {
private LayoutInflater mInflater;
public SlowAdapter(Context context) {
mContext = context;
mInflater = (LayoutInflater)context.getSystemService(Context.LAYOUT_INFLATER_SERVICE);
}
/**
* The number of items in the list is determined by the number of speeches
* in our array.
*
* @see android.widget.ListAdapter#getCount()
*/
public int getCount() {
return mStrings.length;
}
/**
* Since the data comes from an array, just returning the index is
* sufficent to get at the data. If we were using a more complex data
* structure, we would return whatever object represents one row in the
* list.
*
* @see android.widget.ListAdapter#getItem(int)
*/
public Object getItem(int position) {
return position;
}
/**
* Use the array index as a unique id.
*
* @see android.widget.ListAdapter#getItemId(int)
*/
public long getItemId(int position) {
return position;
}
/**
* Make a view to hold each row.
*
* @see android.widget.ListAdapter#getView(int, android.view.View,
* android.view.ViewGroup)
*/
public View getView(int position, View convertView, ViewGroup parent) {
TextView text;
if (convertView == null) {
text = (TextView)mInflater.inflate(android.R.layout.simple_list_item_1, parent, false);
} else {
text = (TextView)convertView;
}
if (!mBusy) {
text.setText(mStrings[position]);
// Null tag means the view has the correct data
text.setTag(null);
} else {
text.setText("Loading...");
// Non-null tag means the view still needs to load it's data
text.setTag(this);
}
return text;
}
/**
* Remember our context so we can use it when constructing views.
*/
private Context mContext;
}
- 由於Android 默認提供了多種自定義數據源的格式模板給我們,所以用起來非常方便有多種可供選擇:
SimpleAdapter,SimpleCursorAdapter,ArrayAdapter<?>等,具體可在具體的項目上實施使用。
本篇將著重介紹WP7 的ListBox 一個我自認為非常簡單方便的數據綁定方法。並且通過Silverlight 特有的數據綁定方法在XAML綁定數據。本篇學習筆記將以一個呈現天氣列表的LISTBOX的例,效果如下:
實現這個功能我們需要編寫一個Model 己記錄這些實體信息,Model代碼如下:
public class weather
{
public string Conditions { get; set; }
public string ImageUrl { get; set; }
public string Low { get; set; }
public string High { get; set; }
public string Location { get; set; }
public weather(string conditins, string imageurl, string low, string high, string location)
{
this.Conditions = conditins;
this.ImageUrl = imageurl;
this.Low = low;
this.High = high;
this.Location = location;
}
}
並且我們還需要一個類來做為ListBox 的數據源,前篇有講過數據綁定的一篇文章提到過ObservableCollection 不知道大家還有沒有印象,本篇就是使用這個數據集合來做ListBox 數據源,該類代碼如下:
public class weathers:List<weather>
{
private const string imageUrl = "../images/";
public weathers()
{
BuildCollection();
}
public ObservableCollection<weather> DataCollection { get; set; }
public ObservableCollection<weather> BuildCollection()
{
DataCollection = new ObservableCollection<weather>();
DataCollection.Add(new weather("陰天", imageUrl + "19n.png", "10度", "20度", "廣州"));
DataCollection.Add(new weather("涼爽", imageUrl + "23d.png", "20度", "25度", "海南"));
DataCollection.Add(new weather("多雲", imageUrl + "26n.png", "10度", "18度", "深圳"));
DataCollection.Add(new weather("晴轉多雲", imageUrl + "27d.png", "20度", "23度", "三亞"));
DataCollection.Add(new weather("陰轉多雲", imageUrl + "27n.png", "22度", "23度", "揭陽"));
DataCollection.Add(new weather("晴天", imageUrl + "31d.png", "22度", "25度", "汕頭"));
return DataCollection;
}
}
實體類和數據源代碼編寫完成後,接下來打開mainPage.xaml,添加一個命名空間:
xmlns:data="clr-namespace:ListBoxDatBind"
Tip:這裡指定的是你的數據源所在的命名空間。
之後,添加一個頁面的資源KEY
<phone:PhoneApplicationPage.Resources>
<data:weathers x:Key="weatherCollection"/>
</phone:PhoneApplicationPage.Resources>
准備工作准備完成,為ListBox 綁定數據:
<ListBox Name="listBox1"
ItemsSource="{Binding Source={StaticResource weatherCollection},Path=DataCollection}">
<ListBox.ItemTemplate>
<DataTemplate>
<StackPanel Orientation="Horizontal">
<Image Source="{Binding Path=ImageUrl}"/>
<StackPanel Orientation="Vertical">
<TextBlock Text="{Binding Conditions}"/>
<TextBlock Text="{Binding Low}"/>
<TextBlock Text="{Binding High}"/>
<TextBlock Text="{Binding Location}"/>
</StackPanel>
</StackPanel>
</DataTemplate>
</ListBox.ItemTemplate>
</ListBox>
運行的效果如上圖。
個人覺得,要論數據綁定的話,還是Android 的 ListView 來得靈活一點,不過Wp 7 的數據綁定卻在微軟的封裝下來得方便許多。
源碼下載:
數據綁定
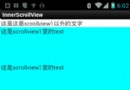 在android中ScrollView嵌套ScrollView解決方案
 Android加載Spinner
 Android本地化
 Android本地化