新浪微博跟update相關的api已經掛了很多天了一直沒有恢復正常,返回錯誤:40070 Error limited application access api!,新浪開放平台的論壇裡n多的人都在等這個恢復,新浪官方也相當的惡心出問題了連個公告都沒有,既不說什麼原因又不說什麼時候能恢復,。還是有版主說是api正在升級禮拜1恢復正常今天都禮拜2了還是不行。基於這個原因我的android版的新浪微博客戶端已經停工好幾天了,剛好是跟update相關的一些功能。
客戶端開發不成了,就自己做做服務端程序,提供類似新浪微博rest api服務, api其實說簡單也很簡單了,無法是通過鏈接對外提供json或者xml格式的數據和接收外部提供的數據進去相應的存儲、刪除、更新等操作。過程中碰到的最麻煩的問題就是OAuth認證功能了,在做android版的新浪微博客戶端時候也花了蠻長的時間對OAuth認證進行研究,在客戶端原先是采用了oauth-signpost開源項目,後來由於某些原因就放棄了這個開源類庫,自己重新寫了OAuth認證部分的實現, 現在做服務端的OAuth認證,其實有過做客戶端的經驗做服務端也差不多,簡單的說無非是客戶端對參數字符串進行簽名然後把簽名值傳輸到服務端,服務端也對同樣對參數字符串進行簽名,把從客戶端傳過來的簽名值進去比較,簡單的說就這麼個過程,具體實現肯定比這個要復雜多了,不明真相的同學可以google一下OAuth進行深入的學習研究了。
服務端程序用asp.net和C#編寫了而非java,理由很簡單本人對.net更加熟悉。由於想快速的實現效果采用了oauth-dot-net開源項目並沒有全部自己寫。
一、首先新建名為Rest Api的ASP.NET Web應用程序,然後添加 oauth-dot-net開源項目相關的幾個dll(Castle.Core.dll、Castle.MicroKernel.dll、Castle.Windsor.dll、CommonServiceLocator.WindsorAdapter.dll、Microsoft.Practices.ServiceLocation.dll、OAuth.Net.Common.dll、OAuth.Net.Components.dll、OAuth.Net.ServiceProvider.dll)。
二、在Web.config文件裡添加相應的配置,具體可以參考OAuth.Net.Examples.EchoServiceProvider項目,然後在Global.asax.cs添加如下代碼:
public override void Init()
{
IServiceLocator injector =
new WindsorServiceLocator(
new WindsorContainer(
new XmlInterpreter(
new ConfigResource("oauth.net.components"))));
ServiceLocator.SetLocatorProvider(() => injector);
}
接下來是比較重要,就是request_token、authorize、access_token的實現,OAuth認證實現的幾個過程,不理解可以看android開發我的新浪微博客戶端-OAuth篇(2.1) ,具體代碼實現很多是參考OAuth.Net.Examples.EchoServiceProvider示例項目。
三、 首先新建ConsumerStore.cs類,用來存儲Consumer信息,由於測試項目所以存儲在內存中並沒有考慮保存到數據庫,真實項目的時候請把相應的Consumer信息保存到數據庫中。Consumer信息對應新浪微博其實就是應用的App Key和App Secret,當開發者在新浪微博建一個新的應用獲取App Key和App Secret,所以完整的應該還需要一個開發一個提供給第三方開發者申請獲取App Key和App Secret的功能頁面,這裡就不具體實現,直接在代碼裡寫死了一個名為測試應用的Consumer,App Key:2433927322,App Secret:87f042c9e8183cbde0f005a00db1529f,這個提供給客戶端測試用。 具體代碼如下:
public sealed class ConsumerStore : InMemoryConsumerStore, IConsumerStore
{
internal static readonly IConsumer FixedConsumer = new OAuthConsumer("2433927322", "87f042c9e8183cbde0f005a00db1529f", "測試應用", ConsumerStatus.Valid);
public ConsumerStore()
{
this.ConsumerDictionary.Add(
ConsumerStore.FixedConsumer.Key,
ConsumerStore.FixedConsumer);
}
public override bool Add(IConsumer consumer)
{
throw new NotSupportedException("Consumers cannot be added to this store--it is fixed.");
}
public override bool Contains(string consumerKey)
{
return ConsumerStore.FixedConsumer.Key.Equals(consumerKey);
}
public override bool Update(IConsumer consumer)
{
throw new NotSupportedException("Consumers cannot be updated in this store--it is fixed.");
}
public override bool Remove(IConsumer consumer)
{
throw new NotSupportedException("Consumers cannot be removed from this store--it is fixed.");
}
}
四、接下來就是request_token功能,新建RequestTokenHandler.cs ,這個是OAuth.Net.ServiceProvider.RequestTokenHandler子類,並且是httpHandlers所以需要在Web.config中添加httpHandlers配置,這個用來接收客戶端程序的請求,返回給客戶端程序Request Token和Request Secret用,具體代碼如下:
public sealed class RequestTokenHandler : OAuth.Net.ServiceProvider.RequestTokenHandler
{
protected override void IssueRequestToken(HttpContext httpContext, OAuthRequestContext requestContext)
{
//產生RequestToken
IRequestToken token = this.GenerateRequestToken(httpContext, requestContext);
requestContext.RequestToken = token;
Uri callbackUri;
if (Uri.TryCreate(requestContext.Parameters.Callback, UriKind.Absolute, out callbackUri))
{
if (!ServiceProviderContext.CallbackStore.ContainsCallback(token))
{
//保存Callback地址了
ServiceProviderContext.CallbackStore.AddCallback(token, callbackUri);
}
}
else
OAuthRequestException.ThrowParametersRejected(new string[] { Constants.CallbackParameter }, "Not a valid Uri.");
//把token.Token和token.Secret輸出到客戶端,
requestContext.ResponseParameters[Constants.TokenParameter] = token.Token;
requestContext.ResponseParameters[Constants.TokenSecretParameter] = token.Secret;
}
protected override IRequestToken GenerateRequestToken(HttpContext httpContext, OAuthRequestContext requestContext)
{
return ServiceProviderContext.TokenGenerator.CreateRequestToken(requestContext.Consumer, requestContext.Parameters);
}
}
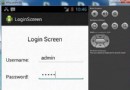
五、 接著是authorize功能,新建名為authorize.aspx的頁面,用來給用戶輸入賬號和密碼進行授權的頁面,這個頁面很簡單具體如下圖,在這個頁面中獲取用戶輸入的賬戶和密碼跟數據庫中存儲的用戶賬號和密碼進行驗證,如果驗證通過返回之前客戶端提供的callback地址,並且給這個地址添加一個校驗碼,具體代碼如下:
public partial class authorize : System.Web.UI.Page
{
protected void Page_Load(object sender, EventArgs e)
{
}
protected void Button1_Click(object sender, EventArgs e)
{
if (loginName.Text == "test" && password.Text == "123")
{
string toke = Request.Params["oauth_token"];
IRequestToken tk = ServiceProviderContext.TokenStore.GetRequestToken(toke);
Uri callback = ServiceProviderContext.CallbackStore.GetCalback(tk);
string oauth_verifier = ServiceProviderContext.VerificationProvider.Generate(tk);
Response.Redirect(callback.ToString() + "?oauth_verifier=" + oauth_verifier);
}
}
}
六、接下來就是access_token功能,新建AccessTokenHandler.cs , 這個是OAuth.Net.ServiceProvider.AccessTokenHandler子類,並且是httpHandlers所以需要在Web.config中添加httpHandlers配置,這個用來接收客戶端程序的請求,返回給客戶端程序Access Token和Access Secret用,具體代碼如下:
public sealed class AccessTokenHandler : OAuth.Net.ServiceProvider.AccessTokenHandler
{
protected override void IssueAccessToken(HttpContext httpContext, OAuthRequestContext requestContext)
{
//產生access token
IAccessToken accessToken = this.GenerateAccessToken(httpContext, requestContext);
accessToken.Status = TokenStatus.Authorized;
// 把accessToken和accessSecret輸出到客戶端,
requestContext.ResponseParameters[Constants.TokenParameter] = accessToken.Token;
requestContext.ResponseParameters[Constants.TokenSecretParameter] = accessToken.Secret;
}
protected override IAccessToken GenerateAccessToken(HttpContext httpContext, OAuthRequestContext requestContext)
{
return ServiceProviderContext.TokenGenerator.CreateAccessToken(requestContext.Consumer, requestContext.RequestToken);
}
}
public class TokenGenerator : ITokenGenerator
{
internal static readonly IRequestToken FixedRequestToken = new OAuthRequestToken("requestkey",
"requestsecret",
ConsumerStore.FixedConsumer,
TokenStatus.Authorized,
null,
ServiceProviderContext.DummyIdentity,
new string[] { });
internal static readonly IAccessToken FixedAccessToken = new OAuthAccessToken(
"accesskey",
"accesssecret",
ConsumerStore.FixedConsumer,
TokenStatus.Authorized,
TokenGenerator.FixedRequestToken);
public IRequestToken CreateRequestToken(IConsumer consumer, OAuthParameters parameters)
{
return TokenGenerator.FixedRequestToken;
}
public IAccessToken CreateAccessToken(IConsumer consumer, IRequestToken requestToken)
{
return TokenGenerator.FixedAccessToken;
}
}
public class TokenStore : InMemoryTokenStore, ITokenStore
{
public TokenStore()
{
this.RequestTokenDictionary.Add(
TokenGenerator.FixedRequestToken.Token,
TokenGenerator.FixedRequestToken);
this.AccessTokenDictionary.Add(
TokenGenerator.FixedAccessToken.Token,
TokenGenerator.FixedAccessToken);
}
public override bool Add(IRequestToken token)
{
throw new NotSupportedException("Tokens cannot be added to the token store--it is fixed.");
}
public override bool Add(IAccessToken token)
{
throw new NotSupportedException("Tokens cannot be added to the token store--it is fixed.");
}
public override bool Update(IRequestToken token)
{
throw new NotSupportedException("Tokens cannot be updated in the token store--it is fixed.");
}
public override bool Update(IAccessToken token)
{
throw new NotSupportedException("Tokens cannot be updated in the token store--it is fixed.");
}
public override bool Remove(IRequestToken token)
{
throw new NotSupportedException("Tokens cannot be removed from the token store--it is fixed.");
}
public override bool Remove(IAccessToken token)
{
throw new NotSupportedException("Tokens cannot be removed from the token store--it is fixed.");
}
}
這樣就完成了一個最最簡單小型的服務端OAuth認證,然後用android客戶端進行測試ok通過。
注意點:
一、android模擬器訪問本地服務地址為10.0.2.2,比如http://localhost:3423/authorize.aspx在模擬器中用http://10.0.2.2:3423/authorize.aspx。
二、OAuth.Net類庫的OAuth.Net.Common項目中的interface ICallbackStore 添加了一個Uri GetCalback(IRequestToken token);並且在具體的實現類InMemoryCallbackStore添加了實習代碼:
public Uri GetCalback(IRequestToken token)
{
lock (this.callbackStore)
{
if (this.callbackStore.ContainsKey(token))
{
return this.callbackStore[token];
}
else
{
return null;
}
}
}
三、為了能用我前面做的給新浪用的android客戶端,對於類庫源代碼AccessTokenHandler的ParseParameters方法做了如下修改,因為新浪請求api的時候都會加一個source的參數:
protected virtual void ParseParameters(HttpContext httpContext, OAuthRequestContext requestContext)
{
.......
parameters.AllowOnly(
Constants.ConsumerKeyParameter,
Constants.TokenParameter,
Constants.SignatureMethodParameter,
Constants.SignatureParameter,
Constants.TimestampParameter,
Constants.NonceParameter,
Constants.VerifierParameter,
Constants.VersionParameter, // (optional)
Constants.RealmParameter, // (optional)
"source");
......
}
 Android加載Spinner
 Android MediaPlayer(多媒體播放)
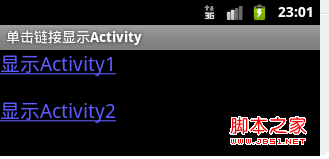 Android開發技巧之在a標簽或TextView控件中單擊鏈接彈出Activity(自定義動作)
 Android MediaPlayer(多媒體播放)