編輯:Android開發實例
這裡主要可學習有兩點,一點是定位的設計。
<?xml version="1.0" encoding="utf-8"?>
<LinearLayout xmlns:android="http://schemas.android.com/apk/res/android"
    android:layout_height="fill_parent" android:layout_width="fill_parent"
    android:orientation="horizontal">
    <LinearLayout android:layout_height="wrap_content"

        android:layout_width="wrap_content" android:orientation="vertical">
        <ImageView android:layout_height="wrap_content" android:id="@+id/UserPic"
            android:layout_marginTop="10px" android:src="@drawable/ic_search_user_gray"
            android:layout_width="wrap_content"></ImageView>
        <TextView android:layout_height="wrap_content" android:id="@+id/UserName"
            android:padding="5px" android:layout_width="wrap_content"
            android:text="Jinmn"></TextView>
    </LinearLayout>

    <LinearLayout android:layout_height="wrap_content"
        android:paddingLeft="10px" android:layout_width="fill_parent">
        <RelativeLayout android:layout_height="80px"
            android:background="@drawable/share_item_two_bg" android:paddingLeft="10px"
            android:id="@+id/ShareHollItem" android:layout_width="fill_parent">
            <TextView android:layout_width="wrap_content"
                android:layout_height="wrap_content"
                android:text=" false false false EN-US ZH-CN X-NONE Microsoft"
                android:maxWidth="150dip"
                android:layout_alignParentLeft="true" android:layout_alignParentTop="true"
                android:layout_marginTop="5px" android:layout_marginLeft="10px"
                android:textColor="#00ff00" android:id="@+id/ShareHollTitle"></TextView>
            <TextView android:layout_width="wrap_content"
                android:layout_height="wrap_content" android:text="This game is good!"
                android:layout_alignBottom="@+id/ShareHollTitle"
                android:layout_alignParentLeft="true"
                android:layout_alignParentBottom="true" android:layout_marginLeft="10px"
                android:padding="3px" android:id="@+id/ShareHollContent"></TextView>

            <TextView android:layout_width="wrap_content"
                android:layout_alignParentRight="true" android:layout_margin="3px"
                android:layout_alignParentTop="true" android:layout_height="wrap_content"
                android:text="12 minute" android:id="@+id/ShareHollTime"></TextView>
            <ImageView android:layout_height="wrap_content" android:id="@+id/CommentPic"
                android:layout_alignParentRight="true" android:layout_margin="5px"
                android:layout_alignParentBottom="true" android:src="@drawable/magic"
                android:padding="5px"
                android:layout_width="wrap_content"></ImageView>
        </RelativeLayout>
    </LinearLayout>
</LinearLayout>
黑色的部分就是定位的重點,剩余的就是配合上 layout_margin和padding 控制UI在layout顯示的位置
另一點是9宮格的設計(其實圖標的設計涉及的技巧很多,這裡我也只是提一提,更具體的可以上官網看,也可以下載eoe第11期的UI設計PDF看看)。
代碼中淺藍色部分是引用了一張9宮格的圖片(android:background="@drawable/share_item_two_bg ) 該圖片原樣如下:
截取網上一篇文章的內容
/****************************************************************************************************
這裡介紹一下9宮格的意思和使用,最後才介紹該圖片怎麼使用的效果
這個九宮格繪畫工具(draw9patch.bat)可以讓你很容易的通過一個所見即所得(WYS|WYG)的編輯器來創建一個九宮格NinePatch圖。
在做項目中發現圖片後面有.9.png ,但是復制進入資源文件裡就發生錯誤。
什麼是 .9.png?
9.png 格式的文件的特點
與傳統的png 格式圖片相比, 9.png 格式圖片在圖片四周有一圈一個像素點組成的邊沿,該邊沿用於對圖片的可擴展區和內容顯示區進行定義。
這種格式的圖片在android 環境下具有自適應調節大小的能力。
(1)允許開發人員定義可擴展區域,當需要延伸圖片以填充比圖片本身更大區域時,可擴展區的內容被延展。
(2)允許開發人員定義內容顯示區,用於顯示文字或其他內容
如下圖所示:
左側和上方的黑線交叉的部分即可擴展區域
右側和下方的黑線交叉的部分即內容顯示區
******************************************************************************************************/
其實從上面那張圖就可以看出圖片的左方和上方的黑線就是圖片向四周擴大的基本,總之凡是擴大出來的圖片那麼多出來的地方就是那兩條黑線相交後的紅色區域。
而下方和右方的黑線就是內容的顯示(即該背景上面UI的組件)。不過左方和上方的黑線也具有內容顯示的功能(這個我也不知道是不是,但是做實驗時又可以顯示.....)。
如果我將下方和右方的黑線都去掉,這樣做出來的效果就像這樣:
效果:
該背景上的內容都被遮住了,中間那條東東就是填充的內容的擴展。
就介紹到這裡。其實因為有了這樣的內容填充,所以我們可以利用它來做很多事件,如游戲的加載進度條。背景圖片就只給它一條中間的填充內容顯示,這樣就可以不用用太多時間去控制中間圖片的定位。
該項目只在320x480下測試,其他分辨率會發生定位偏移
項目原件
seaBackgroundQuestion.rar
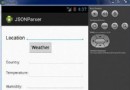
 android編程之XML文件解析方法詳解(附源碼)
本文實例講述了android編程之XML文件解析方法。分享給大家供大家參考,具體如下: 在android開發中,經常用到去解析xml文件,常見的解析xml的方式有
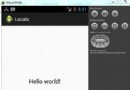
 Android本地化
Android應用程序可以在許多不同地區的許多設備上運行。為了使應用程序更具交互性,應用程序應該處理以適合應用程序將要使用的語言環境方面的文字,數字,文件等。在本章中,我
 Android編程之圖片顏色處理方法
本文實例講述了Android編程之圖片顏色處理方法。分享給大家供大家參考,具體如下: 你想做到跟美圖秀秀一樣可以處理自己的照片,美化自己的照片嗎?其實你也可以自己
 Android本地化
Android應用程序可以在許多不同地區的許多設備上運行。為了使應用程序更具交互性,應用程序應該處理以適合應用程序將要使用的語言環境方面的文字,數字,文件等。在本章中,我