編輯:Android開發實例
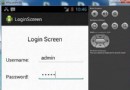
最近做一個頁面,仿制以下兩個圖,一個是橫屏,一個豎屏。這是一款名字叫IMDb的手機軟件,其中最上面中間是一個圖;然後下來是三個tab樣式的(Movies、TV、People)三個可以切換,切換是三個不同頁面;下面是一個橫排的圖片,圖片可以左右滑動顯示;下面是一個list列表,此列表每一行最左邊是一個圖片,中間是文字,最右邊是一個小箭頭圖標。
首先解決的是最上面圖片居中顯示,在LinearLayout標簽中加入android:gravity="center_horizontal",這個表示橫向居中顯示。這樣的話切換橫豎屏之後,圖片也是在中間的。
再次,解決三個(Movies、TV、People)三個可以切換的頁面。開始想到用tab標簽來實現,後來發現tab只能用在頭部而且最上面不能有圖片。所以嘗試了大概1-2個小時後,放棄使用tab,改用LinearLayout來控制,每點不同的LinearLayout時,頁面顯示不同,
具體代碼如下:在main.xml中,
<LinearLayout xmlns:android="http://schemas.android.com/apk/res/android"
android:orientation="vertical" android:layout_width="fill_parent"
android:layout_height="wrap_content" android:gravity="top">
<include layout="@layout/foot" />
</LinearLayout>
這裡用到了include標簽,是引用另外一個頁面的意思,類似與html中的include ,效果類似,將foot.xml文件中的頁面顯示在此LinearLayout中,
foot.xml文件如下:最外是一個橫排的LinearLayout ,裡面包裹三個LinearLayout,背景設置為灰色。代碼如下,其中一個
<?xml version="1.0" encoding="utf-8"?>
<LinearLayout xmlns:android="http://schemas.android.com/apk/res/android"
android:orientation="horizontal" android:layout_width="fill_parent"
android:layout_height="wrap_content">
<LinearLayout xmlns:android="http://schemas.android.com/apk/res/android"
android:orientation="vertical" android:layout_width="wrap_content"
android:layout_height="wrap_content" android:id="@+id/Movies"
android:background="@drawable/tab_one_normal" android:gravity="center_horizontal">
<TextView android:layout_width="wrap_content"
android:layout_height="wrap_content" android:text="Movies"
android:gravity="center" android:paddingTop="5px"
android:textColor="#FFFFFF" android:textSize="20px"
android:textStyle="bold"/>
</LinearLayout>
<ImageView android:layout_width="wrap_content"
android:layout_height="wrap_content" android:src="@drawable/line" />
在Java類中:默認movies為選中的LinearLayout,對每個LinearLayout進行監聽,點擊之後背景變化,原來被點中的LinearLayout則變為灰色,點中的變為黑色。
private LinearLayout movies, tv, people;
movies = (LinearLayout) findViewById(R.id.Movies);
tv = (LinearLayout) findViewById(R.id.TV);
people = (LinearLayout) findViewById(R.id.People);movies.setBackgroundResource(R.drawable.tab_two_highlight);//默認為選中的LinearLayout
movies.setOnClickListener(new OnClickListener() {
@Override
public void onClick(View v) {
movies.setBackgroundResource(R.drawable.tab_two_highlight);
tv.setBackgroundResource(R.drawable.tab_one_normal);
people.setBackgroundResourc(R.drawable.tab_one_normal);
}
});
這樣就完成了最上邊的兩部分,效果如下圖:
接下來,該橫向顯示圖片;這裡使用了android apidemo中的一個例子,大家也可以參考,在view-》Gallery1中。
這裡使用到了Gallery標簽,具體實現如下:
在main.xml中使用<include layout="@layout/imagegallery" />
imagegallery.xml文件中:
<LinearLayout xmlns:android="http://schemas.android.com/apk/res/android"
android:orientation="vertical" android:layout_width="fill_parent"
android:layout_height="wrap_content" android:background="#FFFFFF"
android:layout_marginBottom="10px">
<LinearLayout xmlns:android="http://schemas.android.com/apk/res/android"
android:orientation="vertical" android:layout_width="fill_parent"
android:layout_height="wrap_content" android:background="#FFFFFF"
android:paddingTop="10px" android:paddingLeft="7px">
<TextView android:layout_width="fill_parent"
android:layout_height="wrap_content" android:text="這是一個畫廊"
android:textColor="#000000" android:paddingLeft="5px"
android:id="@+id/iamge_text" />
</LinearLayout>
<Gallery android:id="@+id/myGallery" android:layout_width="fill_parent"
android:layout_height="wrap_content" />
</LinearLayout>
在value文件夾下新建attrs.xml(這裡apidemo中就是這麼使用的,所以照葫蘆畫瓢呗),文件內容如下:
<resources>
<!– These are the attributes that we want to retrieve from the theme
in view/Gallery1.java –>
<declare-styleable name="Gallery1">
<attr name="android:galleryItemBackground" />
</declare-styleable>
<declare-styleable name="LabelView">
<attr name="text" format="string" />
<attr name="textColor" format="color" />
<attr name="textSize" format="dimension" />
</declare-styleable>
</resources>
然後在ImageAdapter.java文件中:
繼承BaseAdapter,編寫它的四個方法,getCount得到圖片的個數,getItem和getItemId,得到圖片的id,getView(int position, View convertView, ViewGroup parent)得到視圖。
構造方法public ImageAdapter(Context context),
具體代碼如下:
public class ImageAdapter extends BaseAdapter{
int mGalleryItemBackground;
private Context mContext;
private Integer[] mImageIds = {
R.drawable.gallery_photo_1,
R.drawable.gallery_photo_2,
R.drawable.gallery_photo_3,
R.drawable.gallery_photo_4,
R.drawable.gallery_photo_5,
R.drawable.gallery_photo_6,
R.drawable.gallery_photo_7,
R.drawable.gallery_photo_8
};
public ImageAdapter(Context context){
mContext = context;
TypedArray typedArray = context.obtainStyledAttributes(R.styleable.Gallery1);
mGalleryItemBackground = typedArray.getResourceId(
R.styleable.Gallery1_android_galleryItemBackground, 0);
typedArray.recycle();
}
@Override
public int getCount() {
return mImageIds.length;
}
@Override
public Object getItem(int position) {
return position;
}
@Override
public long getItemId(int position) {
return position;
}
@Override
public View getView(int position, View convertView, ViewGroup parent) {
ImageView imageView = new ImageView(mContext);
imageView.setImageResource(mImageIds[position]);
imageView.setScaleType(ImageView.ScaleType.FIT_XY);
imageView.setLayoutParams(new Gallery.LayoutParams(138,100));
imageView.setPadding(0, 1, 15, 0);
imageView.setBackgroundResource(mGalleryItemBackground);
return imageView;
}
}
在IMDbDemo主類中加入:
private Gallery gallery;
oncreate方法中加入:
gallery = (Gallery)findViewById(R.id.myGallery);
gallery.setAdapter(new ImageAdapter(movies.getContext()));
gallery.setSelection(1);//圖片第二個被選中
默認是movies點中時,顯示movies下的橫排圖片,
另外建立兩個類,類似ImageAdapter,只需將Integer[] mImageIds下的圖片id 改變即可,然後在點擊的時候,使用下面兩個方法,將ImageAdapter改成具體的類名字,將movies.getContext()改成具體的tv或者是people的context即可。
gallery.setAdapter(new ImageAdapter(movies.getContext()));
gallery.setSelection(1);//圖片第二個被選中
嘗試一下,是否效果如原版?這裡有些濫竽充數的概念,首先,原版中圖片是頂在左側的,而我使用setSelection方法,讓它首次定義在第二個圖片上,這裡的圖片寬度是計算好了的,豎屏寬是320px,Gallery.LayoutParams(138,100));屬性是設置了一下選中的那個圖片的寬度和高度,所以,看起來顯示效果跟原版是一樣的,其實是賴於充數。如果切換成橫屏的話,則應該默認應該定義在第二個圖片上,這樣就跟原版的保持一致了。
效果圖如下:
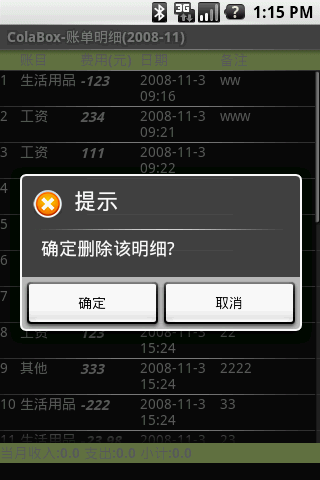
最後是最下面的list了,這裡主要說一下橫豎屏切換的問題。原版中那三個(Movies、TV、People)橫豎屏切換後長度隨之變化,而且下面的list,不能說是list,應該說是類似list的視圖中,每一行最右邊的小箭頭都是靠右的,但是我這裡每規定一個list的時候都是固定左邊的圖標,中間的文字,右邊的箭頭這三個所占用的寬度,都是規定死的,所以橫豎屏切換的時候,需要設置中間文字部分的LinearLayout 的寬度了。
首先得到是否是寬屏,
WindowManager windowManager = getWindowManager();
Display display = windowManager.getDefaultDisplay();
screenWidth = display.getWidth();
screenHeight = display.getHeight();
if(screenWidth>screenHeight)表示豎屏
使用下面的方法,設置LinearLayout的寬,高;第一個參數是寬,第二個參數是高。
movies.setLayoutParams(new LinearLayout.LayoutParams(189,40));
tv.setLayoutParams(new LinearLayout.LayoutParams(189,40));
people.setLayoutParams(new LinearLayout.LayoutParams(189,40));
這裡要提一點,getWindowManager();我一直沒有搞明白到底是什麼.getWindowManager();所以在我的list中,無法得到屏幕的寬和高,這裡,王老師教了一招,就是創建ListAdapter的時候直接告訴這個ListAdapter是橫屏還是豎屏,所以在ListAdapter類中,構造方法中,加入了一個布爾類型的參數,具體代碼如下:
public ListAdapter(Context context, int textViewResourceId,
List<String> list,Boolean bl) {
super(context, textViewResourceId,list);
item = list;
screen = bl;
}
然後再設置文字所在的LinearLayout的寬度和高度。這樣就解決了橫豎屏的所有的問題,效果圖如下:
最後遺留一個問題:
就是官方文檔中有說在ScollView中不要添加ListView,否則ListView是顯示不正常的,試驗過,確實如官方文檔所說,起碼2.1之前的都是這樣效果,ListView只顯示一個List那樣的高度。而原版中可以看到除了最上邊的無法滑動外,整個下邊的包括橫排的圖,整個都可以上下滑動的,這樣有利於在切換成橫屏的時候下面不至於太少的空間而看不全。我只有一種解釋這樣的效果,就是寫死了下面的內容,不使用ListView。因為我看了網上解決這個bug的方法在我這裡都沒見到效果。我也比較贊成網上最欠抽的方法,最好兩個不纏在一塊兒使用。
源代碼見:http://henzil.googlecode.com/svn/trunk/android.IMDbDemo/
 Android MediaPlayer(多媒體播放)
Android提供了許多方法來控制播放的音頻/視頻文件和流。其中該方法是通過一類稱為MediaPlayer。Android是提供MediaPlayer類訪問內置的媒體播放
 Android MediaPlayer(多媒體播放)
Android提供了許多方法來控制播放的音頻/視頻文件和流。其中該方法是通過一類稱為MediaPlayer。Android是提供MediaPlayer類訪問內置的媒體播放
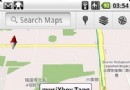 Android系統Google Maps開發實例淺析
Google Map(谷歌地圖)是Google公司提供的電子地圖服務。包括了三
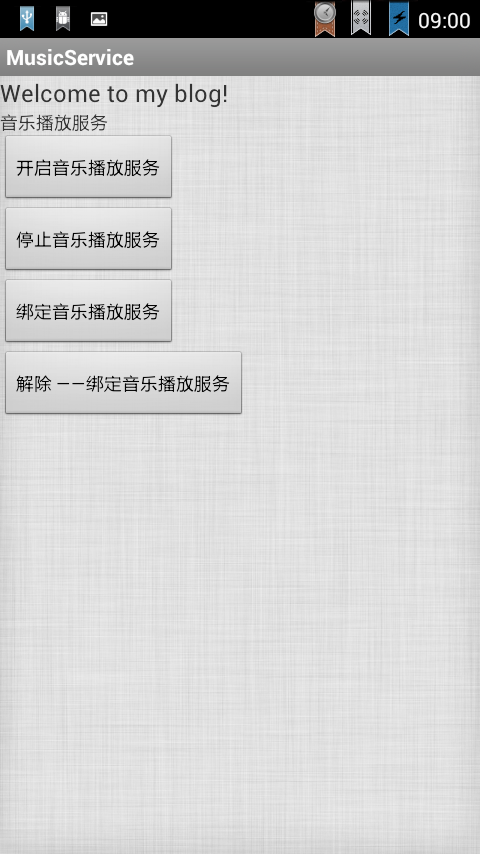 Android Service(不和用戶交互應用組件)案例分析
Service是在一段不定的時間運行在後台,不和用戶交互應用組件。每個Service必須在manifest中 通過<service>來聲明。可以通過c