編輯:Android開發實例
標准的Activity Actions
標准的廣播Actions
一、打電話、訪問浏覽器地圖的Activity Action應用
程序文件
/Chapter06_Intent_SystemAction/src/com/amaker/ch06/app/MainActivity.java
package com.amaker.ch06.app;

import android.app.ListActivity;
import android.content.Intent;
import android.net.Uri;
import android.os.Bundle;
import android.view.View;
import android.widget.ArrayAdapter;
import android.widget.ListView;

public class MainActivity extends ListActivity {
    @Override
    public void onCreate(Bundle savedInstanceState) {
        super.onCreate(savedInstanceState);
        // 菜單項數組
        String[] menus = { "查看電話信息", "編輯電話信息", "顯示撥打電話界面","直接打電話","訪問浏覽器","訪問地圖"};
        // 將菜單項數組設置為ListView的列表項展示
        setListAdapter(new ArrayAdapter<String>(this,
                android.R.layout.simple_list_item_1, menus));
        getListView().setTextFilterEnabled(true);
    }

    @Override
    protected void onListItemClick(ListView l, View v, int position, long id) {
        Intent intent = new Intent();
        Uri uri ;
        String data;
        switch (position) {
        // 查看_id 為1的用戶電話信息
        case 0:
            data = "content://contacts/people/1";
            uri = Uri.parse(data);
            intent.setAction(Intent.ACTION_VIEW);
            intent.setData(uri);
            startActivity(intent);
            break;
        // 編輯_id 為1的用戶電話信息
        case 1:
            data = "content://contacts/people/1";
            uri = Uri.parse(data);
            intent.setAction(Intent.ACTION_EDIT);
            intent.setData(uri);
            startActivity(intent);
            break;
        // 顯示撥打電話界面
        case 2:
            data = "tel:13800138000";
            uri = Uri.parse(data);
            intent.setAction(Intent.ACTION_DIAL);
            intent.setData(uri);
            startActivity(intent);
            break;
        // 直接打電話
        case 3:
            data = "tel:13800138000";
            uri = Uri.parse(data);
            intent.setAction(Intent.ACTION_CALL);
            intent.setData(uri);
            startActivity(intent);
            break;
        // 訪問浏覽器
        case 4:
            data = "http://www.google.com";
            uri = Uri.parse(data);
            intent.setAction(Intent.ACTION_VIEW);
            intent.setData(uri);
            startActivity(intent);
            break;
        // 訪問地圖
        case 5:
            data = "geo:39.92,116.46";
            uri = Uri.parse(data);
            intent = new Intent(Intent.ACTION_VIEW,uri);
            startActivity(intent);
            break;
        default:
            break;
        }
    }
}
布局文件
/Chapter06_Intent_SystemAction/res/layout/main.xml
<?xml version="1.0" encoding="utf-8"?>
<LinearLayout xmlns:android="http://schemas.android.com/apk/res/android"
    android:orientation="vertical" android:layout_width="fill_parent"
    android:layout_height="fill_parent">

<Button android:text="@+id/Button01" android:id="@+id/Button01" android:layout_width="wrap_content" android:layout_height="wrap_content"></Button>
</LinearLayout>
清單文件
/Chapter06_Intent_SystemAction/AndroidManifest.xml
<?xml version="1.0" encoding="utf-8"?>
<manifest xmlns:android="http://schemas.android.com/apk/res/android"
      package="com.amaker.ch06.app"
      android:versionCode="1"
      android:versionName="1.0">
    <application android:icon="@drawable/icon" android:label="@string/app_name">
        <activity android:name=".MainActivity"
                  android:label="@string/app_name">
            <intent-filter>
                <action android:name="android.intent.action.MAIN" />
                <category android:name="android.intent.category.LAUNCHER" />
            </intent-filter>
        </activity>

    </application>
    <uses-sdk android:minSdkVersion="3" />

<uses-permission android:name="android.permission.CALL_PHONE"></uses-permission>
</manifest>
 Android本地化
Android應用程序可以在許多不同地區的許多設備上運行。為了使應用程序更具交互性,應用程序應該處理以適合應用程序將要使用的語言環境方面的文字,數字,文件等。在本章中,我
 Android自定義ViewGroup打造各種風格的SlidingMenu
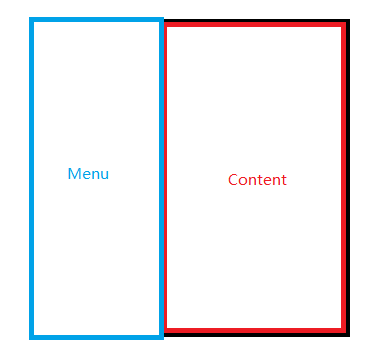
首先我們先來看一看效果圖,第一個效果圖是一個最普通的側滑菜單,我們一會兒會先做出這種側滑菜單,然後再在此基礎上實現另外兩個效果 第一種 第二種
 Android編程ProgressBar自定義樣式之動畫模式實現方法
本文實例講述了Android編程ProgressBar自定義樣式之動畫模式實現方法。分享給大家供大家參考,具體如下: 忘記在哪裡看到的那位仁兄寫的,就是通過用動畫
 基於Android設計模式之
策略模式其實特別簡單(聽到這句話,大家是不是心裡一下子放松了?)。比如排序,官方告訴大家我這裡有一個排序的接口ISort的sort()方法,然後民間各盡其能,實現