編輯:Android開發實例
記得在前面的文章中,我帶大家一起從源碼的角度分析了Android中View的事件分發機制,相信閱讀過的朋友對View的事件分發已經有比較深刻的理解了。
還未閱讀過的朋友,請先參考http://www.fengfly.com/plus/view-215095-1.html 。
那麼今天我們將繼續上次未完成的話題,從源碼的角度分析ViewGruop的事件分發。
首先我們來探討一下,什麼是ViewGroup?它和普通的View有什麼區別?
顧名思義,ViewGroup就是一組View的集合,它包含很多的子View和子VewGroup,是Android中所有布局的父類或間接父類,像LinearLayout、RelativeLayout等都是繼承自ViewGroup的。但ViewGroup實際上也是一個View,只不過比起View,它多了可以包含子View和定義布局參數的功能。ViewGroup繼承結構示意圖如下所示:
可以看到,我們平時項目裡經常用到的各種布局,全都屬於ViewGroup的子類。
簡單介紹完了ViewGroup,我們現在通過一個Demo來演示一下Android中VewGroup的事件分發流程吧。
首先我們來自定義一個布局,命名為MyLayout,繼承自LinearLayout,如下所示:
- public class MyLayout extends LinearLayout {
- public MyLayout(Context context, AttributeSet attrs) {
- super(context, attrs);
- }
- }
然後,打開主布局文件activity_main.xml,在其中加入我們自定義的布局:
- <com.example.viewgrouptouchevent.MyLayout xmlns:android="http://schemas.android.com/apk/res/android"
- xmlns:tools="http://schemas.android.com/tools"
- android:id="@+id/my_layout"
- android:layout_width="match_parent"
- android:layout_height="match_parent"
- android:orientation="vertical" >
- <Button
- android:id="@+id/button1"
- android:layout_width="match_parent"
- android:layout_height="wrap_content"
- android:text="Button1" />
- <Button
- android:id="@+id/button2"
- android:layout_width="match_parent"
- android:layout_height="wrap_content"
- android:text="Button2" />
- </com.example.viewgrouptouchevent.MyLayout>
可以看到,我們在MyLayout中添加了兩個按鈕,接著在MainActivity中為這兩個按鈕和MyLayout都注冊了監聽事件:
- myLayout.setOnTouchListener(new OnTouchListener() {
- @Override
- public boolean onTouch(View v, MotionEvent event) {
- Log.d("TAG", "myLayout on touch");
- return false;
- }
- });
- button1.setOnClickListener(new OnClickListener() {
- @Override
- public void onClick(View v) {
- Log.d("TAG", "You clicked button1");
- }
- });
- button2.setOnClickListener(new OnClickListener() {
- @Override
- public void onClick(View v) {
- Log.d("TAG", "You clicked button2");
- }
- });
我們在MyLayout的onTouch方法,和Button1、Button2的onClick方法中都打印了一句話。現在運行一下項目,效果圖如下所示:
分別點擊一下Button1、Button2和空白區域,打印結果如下所示:
你會發現,當點擊按鈕的時候,MyLayout注冊的onTouch方法並不會執行,只有點擊空白區域的時候才會執行該方法。你可以先理解成Button的onClick方法將事件消費掉了,因此事件不會再繼續向下傳遞。
那就說明Android中的touch事件是先傳遞到View,再傳遞到ViewGroup的?現在下結論還未免過早了,讓我們再來做一個實驗。
查閱文檔可以看到,ViewGroup中有一個onInterceptTouchEvent方法,我們來看一下這個方法的源碼:
- /**
- * Implement this method to intercept all touch screen motion events. This
- * allows you to watch events as they are dispatched to your children, and
- * take ownership of the current gesture at any point.
- *
- * <p>Using this function takes some care, as it has a fairly complicated
- * interaction with [email protected] View#onTouchEvent(MotionEvent)
- * View.onTouchEvent(MotionEvent)}, and using it requires implementing
- * that method as well as this one in the correct way. Events will be
- * received in the following order:
- *
- * <ol>
- * <li> You will receive the down event here.
- * <li> The down event will be handled either by a child of this view
- * group, or given to your own onTouchEvent() method to handle; this means
- * you should implement onTouchEvent() to return true, so you will
- * continue to see the rest of the gesture (instead of looking for
- * a parent view to handle it). Also, by returning true from
- * onTouchEvent(), you will not receive any following
- * events in onInterceptTouchEvent() and all touch processing must
- * happen in onTouchEvent() like normal.
- * <li> For as long as you return false from this function, each following
- * event (up to and including the final up) will be delivered first here
- * and then to the target's onTouchEvent().
- * <li> If you return true from here, you will not receive any
- * following events: the target view will receive the same event but
- * with the action [email protected] MotionEvent#ACTION_CANCEL}, and all further
- * events will be delivered to your onTouchEvent() method and no longer
- * appear here.
- * </ol>
- *
- * @param ev The motion event being dispatched down the hierarchy.
- * @return Return true to steal motion events from the children and have
- * them dispatched to this ViewGroup through onTouchEvent().
- * The current target will receive an ACTION_CANCEL event, and no further
- * messages will be delivered here.
- */
- public boolean onInterceptTouchEvent(MotionEvent ev) {
- return false;
- }
如果不看源碼你還真可能被這注釋嚇到了,這麼長的英文注釋看得頭都大了。可是源碼竟然如此簡單!只有一行代碼,返回了一個false!
好吧,既然是布爾型的返回,那麼只有兩種可能,我們在MyLayout中重寫這個方法,然後返回一個true試試,代碼如下所示:
- public class MyLayout extends LinearLayout {
- public MyLayout(Context context, AttributeSet attrs) {
- super(context, attrs);
- }
- @Override
- public boolean onInterceptTouchEvent(MotionEvent ev) {
- return true;
- }
- }
現在再次運行項目,然後分別Button1、Button2和空白區域,打印結果如下所示:
你會發現,不管你點擊哪裡,永遠都只會觸發MyLayout的touch事件了,按鈕的點擊事件完全被屏蔽掉了!這是為什麼呢?如果Android中的touch事件是先傳遞到View,再傳遞到ViewGroup的,那麼MyLayout又怎麼可能屏蔽掉Button的點擊事件呢?
看來只有通過閱讀源碼,搞清楚Android中ViewGroup的事件分發機制,才能解決我們心中的疑惑了,不過這裡我想先跟你透露一句,Android中touch事件的傳遞,絕對是先傳遞到ViewGroup,再傳遞到View的。記得在http://www.fengfly.com/plus/view-215095-1.html中我有說明過,只要你觸摸了任何控件,就一定會調用該控件的dispatchTouchEvent方法。這個說法沒錯,只不過還不完整而已。實際情況是,當你點擊了某個控件,首先會去調用該控件所在布局的dispatchTouchEvent方法,然後在布局的dispatchTouchEvent方法中找到被點擊的相應控件,再去調用該控件的dispatchTouchEvent方法。如果我們點擊了MyLayout中的按鈕,會先去調用MyLayout的dispatchTouchEvent方法,可是你會發現MyLayout中並沒有這個方法。那就再到它的父類LinearLayout中找一找,發現也沒有這個方法。那只好繼續再找LinearLayout的父類ViewGroup,你終於在ViewGroup中看到了這個方法,按鈕的dispatchTouchEvent方法就是在這裡調用的。修改後的示意圖如下所示:
那還等什麼?快去看一看ViewGroup中的dispatchTouchEvent方法的源碼吧!代碼如下所示:
- public boolean dispatchTouchEvent(MotionEvent ev) {
- final int action = ev.getAction();
- final float xf = ev.getX();
- final float yf = ev.getY();
- final float scrolledXFloat = xf + mScrollX;
- final float scrolledYFloat = yf + mScrollY;
- final Rect frame = mTempRect;
- boolean disallowIntercept = (mGroupFlags & FLAG_DISALLOW_INTERCEPT) != 0;
- if (action == MotionEvent.ACTION_DOWN) {
- if (mMotionTarget != null) {
- mMotionTarget = null;
- }
- if (disallowIntercept || !onInterceptTouchEvent(ev)) {
- ev.setAction(MotionEvent.ACTION_DOWN);
- final int scrolledXInt = (int) scrolledXFloat;
- final int scrolledYInt = (int) scrolledYFloat;
- final View[] children = mChildren;
- final int count = mChildrenCount;
- for (int I = count - 1; I >= 0; i--) {
- final View child = children[i];
- if ((child.mViewFlags & VISIBILITY_MASK) == VISIBLE
- || child.getAnimation() != null) {
- child.getHitRect(frame);
- if (frame.contains(scrolledXInt, scrolledYInt)) {
- final float xc = scrolledXFloat - child.mLeft;
- final float yc = scrolledYFloat - child.mTop;
- ev.setLocation(xc, yc);
- child.mPrivateFlags &= ~CANCEL_NEXT_UP_EVENT;
- if (child.dispatchTouchEvent(ev)) {
- mMotionTarget = child;
- return true;
- }
- }
- }
- }
- }
- }
- boolean isUpOrCancel = (action == MotionEvent.ACTION_UP) ||
- (action == MotionEvent.ACTION_CANCEL);
- if (isUpOrCancel) {
- mGroupFlags &= ~FLAG_DISALLOW_INTERCEPT;
- }
- final View target = mMotionTarget;
- if (target == null) {
- ev.setLocation(xf, yf);
- if ((mPrivateFlags & CANCEL_NEXT_UP_EVENT) != 0) {
- ev.setAction(MotionEvent.ACTION_CANCEL);
- mPrivateFlags &= ~CANCEL_NEXT_UP_EVENT;
- }
- return super.dispatchTouchEvent(ev);
- }
- if (!disallowIntercept && onInterceptTouchEvent(ev)) {
- final float xc = scrolledXFloat - (float) target.mLeft;
- final float yc = scrolledYFloat - (float) target.mTop;
- mPrivateFlags &= ~CANCEL_NEXT_UP_EVENT;
- ev.setAction(MotionEvent.ACTION_CANCEL);
- ev.setLocation(xc, yc);
- if (!target.dispatchTouchEvent(ev)) {
- }
- mMotionTarget = null;
- return true;
- }
- if (isUpOrCancel) {
- mMotionTarget = null;
- }
- final float xc = scrolledXFloat - (float) target.mLeft;
- final float yc = scrolledYFloat - (float) target.mTop;
- ev.setLocation(xc, yc);
- if ((target.mPrivateFlags & CANCEL_NEXT_UP_EVENT) != 0) {
- ev.setAction(MotionEvent.ACTION_CANCEL);
- target.mPrivateFlags &= ~CANCEL_NEXT_UP_EVENT;
- mMotionTarget = null;
- }
- return target.dispatchTouchEvent(ev);
- }
這個方法代碼比較長,我們只挑重點看。首先在第13行可以看到一個條件判斷,如果disallowIntercept和!onInterceptTouchEvent(ev)兩者有一個為true,就會進入到這個條件判斷中。disallowIntercept是指是否禁用掉事件攔截的功能,默認是false,也可以通過調用requestDisallowInterceptTouchEvent方法對這個值進行修改。那麼當第一個值為false的時候就會完全依賴第二個值來決定是否可以進入到條件判斷的內部,第二個值是什麼呢?竟然就是對onInterceptTouchEvent方法的返回值取反!也就是說如果我們在onInterceptTouchEvent方法中返回false,就會讓第二個值為true,從而進入到條件判斷的內部,如果我們在onInterceptTouchEvent方法中返回true,就會讓第二個值為false,從而跳出了這個條件判斷。
這個時候你就可以思考一下了,由於我們剛剛在MyLayout中重寫了onInterceptTouchEvent方法,讓這個方法返回true,導致所有按鈕的點擊事件都被屏蔽了,那我們就完全有理由相信,按鈕點擊事件的處理就是在第13行條件判斷的內部進行的!
那我們重點來看下條件判斷的內部是怎麼實現的。在第19行通過一個for循環,遍歷了當前ViewGroup下的所有子View,然後在第24行判斷當前遍歷的View是不是正在點擊的View,如果是的話就會進入到該條件判斷的內部,然後在第29行調用了該View的dispatchTouchEvent,之後的流程就和 http://www.fengfly.com/plus/view-215095-1.html中講解的是一樣的了。我們也因此證實了,按鈕點擊事件的處理確實就是在這裡進行的。
然後需要注意一下,調用子View的dispatchTouchEvent後是有返回值的。我們已經知道,如果一個控件是可點擊的,那麼點擊該控件時,dispatchTouchEvent的返回值必定是true。因此會導致第29行的條件判斷成立,於是在第31行給ViewGroup的dispatchTouchEvent方法直接返回了true。這樣就導致後面的代碼無法執行到了,也是印證了我們前面的Demo打印的結果,如果按鈕的點擊事件得到執行,就會把MyLayout的touch事件攔截掉。
那如果我們點擊的不是按鈕,而是空白區域呢?這種情況就一定不會在第31行返回true了,而是會繼續執行後面的代碼。那我們繼續往後看,在第44行,如果target等於null,就會進入到該條件判斷內部,這裡一般情況下target都會是null,因此會在第50行調用super.dispatchTouchEvent(ev)。這句代碼會調用到哪裡呢?當然是View中的dispatchTouchEvent方法了,因為ViewGroup的父類就是View。之後的處理邏輯又和前面所說的是一樣的了,也因此MyLayout中注冊的onTouch方法會得到執行。之後的代碼在一般情況下是走不到的了,我們也就不再繼續往下分析。
再看一下整個ViewGroup事件分發過程的流程圖吧,相信可以幫助大家更好地去理解:
現在整個ViewGroup的事件分發流程的分析也就到此結束了,我們最後再來簡單梳理一下吧。
1. Android事件分發是先傳遞到ViewGroup,再由ViewGroup傳遞到View的。
2. 在ViewGroup中可以通過onInterceptTouchEvent方法對事件傳遞進行攔截,onInterceptTouchEvent方法返回true代表不允許事件繼續向子View傳遞,返回false代表不對事件進行攔截,默認返回false。
3. 子View中如果將傳遞的事件消費掉,ViewGroup中將無法接收到任何事件。
好了,Android事件分發機制完全解析到此全部結束,結合上下兩篇,相信大家對事件分發的理解已經非常深刻了。
 Android編程使WebView支持HTML5 Video全屏播放的解決方法
本文實例講述了Android編程使WebView支持HTML5 Video全屏播放的解決方法。分享給大家供大家參考,具體如下: 1)需要在AndroidManif
 Android提高之BLE開發Android手機搜索iBeacon基站
前面文章講述了Android手機與BLE終端之間的通信,而最常見的BLE終端應該是蘋果公司倡導的iBeacon基站。iBeacon技術基於BLE,它的特點是通過廣
 實戰解析Android架構設計原則
經過一段時間收集了大量反饋意見後,我認為應該來說說這個話題了。我會在這裡給出我認為構建現代移動應用
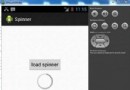
 Android加載Spinner
可以顯示在的Android任務,通過加載進度條的進展。進度條有兩種形狀。加載欄和加載微調(spinner)。在本章中,我們將討論微調(spinner)。Spinner 用