編輯:Android開發實例
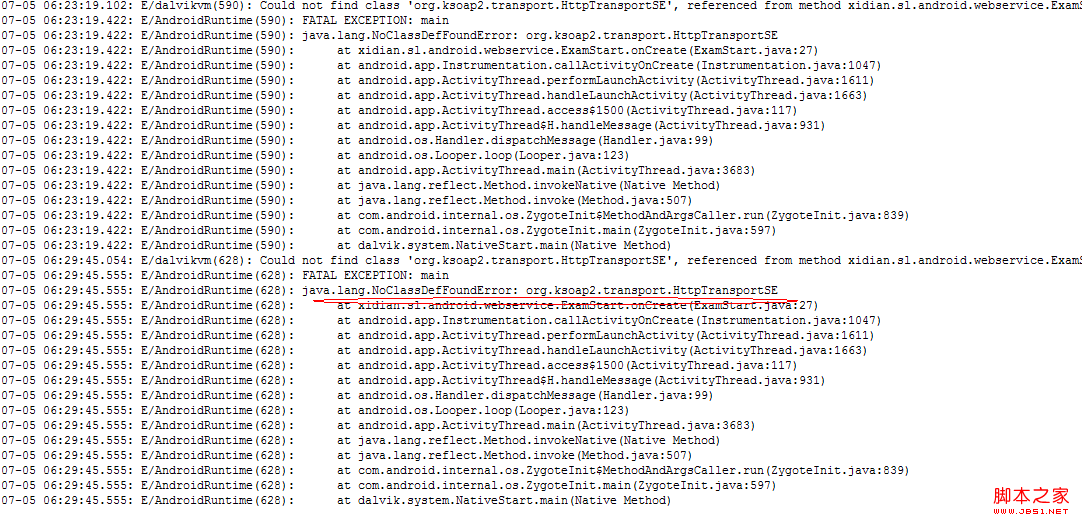
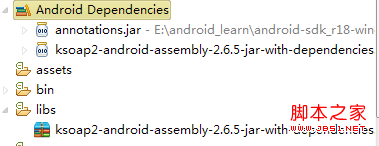
這樣就正確無誤了,不再會報類無法引用到了
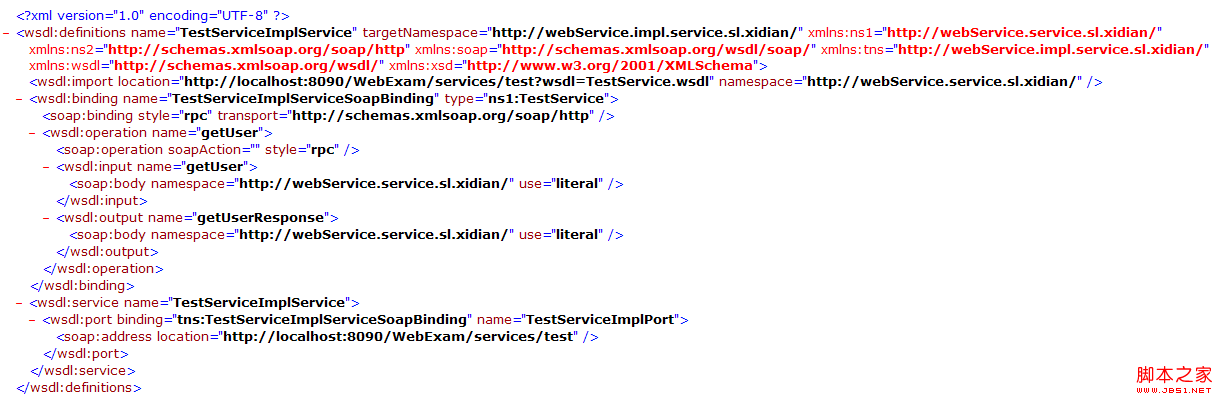
android中通過webservice調用服務器端其實還是很簡單的,只要按部就班的按照下面步驟進行即可:
(1)創建HttpTransportSE對象,該對象用於調用WebService操作
代碼如下:
HttpTransportSE ht = new HttpTransportSE(SERVICE_URL);
(2)創建SoapSerializationEnvelope對象
代碼如下:
SoapSerializationEnvelope envelope = new SoapSerializationEnvelope
(SoapEnvelope.VER11);
(3)創建SoapObject對象,創建該對象時需要傳入所要調用的Web Service的命名空間和WebService方法名
代碼如下:
SoapObject request = new SoapObject(SERVICE_NS, methodName);
(4)如果有參數傳給Web Service服務器端,調用SoapObject對象的addProperty(String name, Object value)方法來設置參數,該方法的name參數指定參數名
注意:參數名不一定要與服務端的方法中的參數名相同,只要對應順序相同即可;value參數指定參數值
代碼如下:
request.addProperty("name", "1006010054");
(5)調用SoapSerializationEnvelope的setOutputSoapObject()方法,或者直接對bodyOut屬性賦值,將前兩步創建的SoapObject對象設為SoapSerializationEnvelope的傳出SOAP消息體
代碼如下:
envelope.bodyOut = request;
(6)調用對象的call()方法,並以SoapSerializationEnvelope作為參數調用遠程的web service
代碼如下:
ht.call(null, envelope);
(7)掉用完成後,訪問SoapSerializationEnvelope對象的bodyIn屬性,該屬性返回一個SoapObject對象,該對象就代表Web service的返回消息,解析該對象,即可獲得調用web service的返回值
代碼如下:
SoapObject result = (SoapObject) envelope.bodyIn;
String name = result.getProperty(0).toString();
下面給書具體的實例:
mian.xml很簡單就是兩個編輯框:
代碼如下:
<?xml version="1.0" encoding="utf-8"?>
<LinearLayout xmlns:android="http://schemas.android.com/apk/res/android"
android:layout_width="fill_parent"
android:layout_height="fill_parent"
android:orientation="vertical" >
<TextView
android:layout_width="fill_parent"
android:layout_height="wrap_content"
android:text="@string/hello" />
<EditText
android:id="@+id/editText1"
android:layout_width="match_parent"
android:layout_height="wrap_content"
android:ems="10" >
<requestFocus />
</EditText>
<EditText
android:id="@+id/editText2"
android:layout_width="match_parent"
android:layout_height="wrap_content"
android:ems="10" />
</LinearLayout>
Activity:(該Activity調用了服務器端返回普通字符串的方法)
代碼如下:
package xidian.sl.android.webservice;
import org.ksoap2.SoapEnvelope;
import org.ksoap2.serialization.SoapObject;
import org.ksoap2.serialization.SoapSerializationEnvelope;
import org.ksoap2.transport.HttpTransportSE;
import android.app.Activity;
import android.os.Bundle;
import android.widget.EditText;
public class WebServiceSimpleDemo extends Activity{
final static String SERVICE_NS = "http://webService.service.sl.xidian/";
final static String SERVICE_URL = "http://192.168.1.103:8090/WebExam/services/test";
private EditText txt1;
private EditText txt2;
/** Called when the activity is first created. */
@Override
public void onCreate(Bundle savedInstanceState) {
super.onCreate(savedInstanceState);
setContentView(R.layout.main);
txt1 = (EditText) findViewById(R.id.editText1);
txt2 = (EditText) findViewById(R.id.editText2);
//調用的方法
String methodName = "getUser";
//創建httpTransportSE傳輸對象
HttpTransportSE ht = new HttpTransportSE(SERVICE_URL);
ht.debug = true;
//使用soap1.1協議創建Envelop對象
SoapSerializationEnvelope envelope = new SoapSerializationEnvelope(SoapEnvelope.VER11);
//實例化SoapObject對象
SoapObject request = new SoapObject(SERVICE_NS, methodName);
/**
* 設置參數,參數名不一定需要跟調用的服務器端的參數名相同,只需要對應的順序相同即可
* */
request.addProperty("name", "1006010054");
//將SoapObject對象設置為SoapSerializationEnvelope對象的傳出SOAP消息
envelope.bodyOut = request;
try{
//調用webService
ht.call(null, envelope);
//txt1.setText("看看"+envelope.getResponse());
if(envelope.getResponse() != null){
txt2.setText("有返回");
SoapObject result = (SoapObject) envelope.bodyIn;
String name = result.getProperty(0).toString();
txt1.setText("返回值 = "+name);
}else{
txt2.setText("無返回");
}
}catch (Exception e) {
e.printStackTrace();
}
}
}
在AndroidManifest.xml進行Activity的注冊和並添加訪問網絡的權限
代碼如下:
<?xml version="1.0" encoding="utf-8"?>
<manifest xmlns:android="http://schemas.android.com/apk/res/android"
package="xidian.sl.android.webservice"
android:versionCode="1"
android:versionName="1.0" >
<uses-sdk android:minSdkVersion="10" />
<application
android:icon="@drawable/ic_launcher"
android:label="@string/app_name" >
<activity
android:name=".WebServiceSimpleDemo"
android:label="@string/app_name" >
<intent-filter>
<action android:name="android.intent.action.MAIN" />
<category android:name="android.intent.category.LAUNCHER" />
</intent-filter>
</activity>
</application>
<!-- 聲明該應用自身所擁有的權限 -->
<uses-permission android:name="android.permission.INTERNET" />
</manifest>
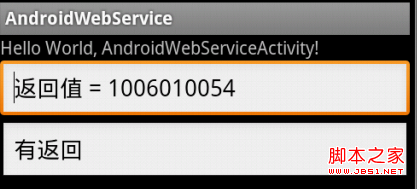
運行後的結果如圖所示:
下面我們來試著調用回傳符合對象的方法:
activity:
代碼如下:
package xidian.sl.android.webservice;
import org.ksoap2.SoapEnvelope;
import org.ksoap2.serialization.SoapObject;
import org.ksoap2.serialization.SoapSerializationEnvelope;
import org.ksoap2.transport.HttpTransportSE;
import android.app.Activity;
import android.os.Bundle;
import android.widget.EditText;
public class WebServiceComplexDemo extends Activity{
final static String SERVICE_NS = "http://webService.service.sl.xidian/";
final static String SERVICE_URL = "http://192.168.1.103:8090/WebExam/services/test";
private EditText txt1;
private EditText txt2;
/** Called when the activity is first created. */
@Override
public void onCreate(Bundle savedInstanceState) {
super.onCreate(savedInstanceState);
setContentView(R.layout.main);
txt1 = (EditText) findViewById(R.id.editText1);
txt2 = (EditText) findViewById(R.id.editText2);
//調用的方法
String methodName = "getStuList";
//創建httpTransportSE傳輸對象
HttpTransportSE ht = new HttpTransportSE(SERVICE_URL);
ht.debug = true;
//使用soap1.1協議創建Envelop對象
SoapSerializationEnvelope envelope = new SoapSerializationEnvelope(SoapEnvelope.VER11);
//實例化SoapObject對象
SoapObject request = new SoapObject(SERVICE_NS, methodName);
/**
* 設置參數,參數名不一定需要跟調用的服務器端的參數名相同,只需要對應的順序相同即可
* */
//request.addProperty("name", "1006010054");
//將SoapObject對象設置為SoapSerializationEnvelope對象的傳出SOAP消息
envelope.bodyOut = request;
try{
//調用webService
ht.call(null, envelope);
txt2.setText("回傳的值 :"+envelope.getResponse());
if(envelope.getResponse() != null){
SoapObject result = (SoapObject) envelope.bodyIn;
SoapObject soapChilds = (SoapObject)result.getProperty(0);
StringBuffer sb = new StringBuffer();
for(int i=0; i <soapChilds.getPropertyCount(); i++){
SoapObject soapChildsChilds = (SoapObject)soapChilds.getProperty(i);
sb.append("姓名["+i+"] = "+soapChildsChilds.getProperty(0).toString()+"\n");
sb.append("學號["+i+"] = "+soapChildsChilds.getProperty(1).toString()+"\n");
sb.append("性別["+i+"] = "+soapChildsChilds.getProperty(2).toString()+"\n"+"\n");
}
txt1.setText(sb.toString());
}else{
txt1.setText("無返回");
}
}catch (Exception e) {
e.printStackTrace();
}
}
}
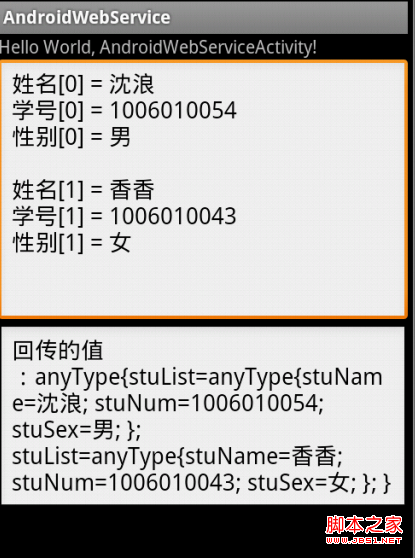
區別就是對於返回值的處理上,使用幾次getPropert()方法,這裡主要看返回值的層次,看下面的結果應該就能明白了,根據括號的層次來進行確定
 Android Bluetooth(藍牙)實例
在很多方面,藍牙是一種能夠發送或接受兩個不同的設備之間傳輸的數據。 Android平台包含了藍牙框架,使設備以無線方式與其他藍牙設備進行數據交換的支持。Android提供
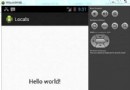
 Android本地化
Android應用程序可以在許多不同地區的許多設備上運行。為了使應用程序更具交互性,應用程序應該處理以適合應用程序將要使用的語言環境方面的文字,數字,文件等。在本章中,我
 Android登錄實例
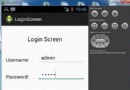
登錄應用程序的屏幕,詢問憑據登錄到一些特定的應用。可能需要登錄到Facebook,微博等本章介紹了,如何創建一個登錄界面,以及如何管理安全問題和錯誤嘗試。首先,必須定義兩
 Android下保存簡單網頁到本地(包括簡單圖片鏈接轉換)實現代碼
最近在做一個項目涉及到將包含圖片的簡單網頁下載到本地,方便離線時觀看,在這裡分享一下,大家做下簡單修改就可以用到自己的項目中了。(這裡用到了AQuery庫) 代