編輯:Android開發實例
Android SDK提供了很多示例程序,從這些示例代碼的閱讀和試驗中能夠學習到很多知識。本系列就是要剖析Android記事本示例程序,用意就是一步步跟著實例進行動手操作,在實踐中體會和學習Android開發。該系列共有四篇文章,本文是第一篇。
前期准備
搭建開發環境,嘗試編寫"Hello World”,了解Android的基本概念,熟悉Android的API(官方文檔中都有,不贅述)。
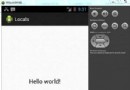
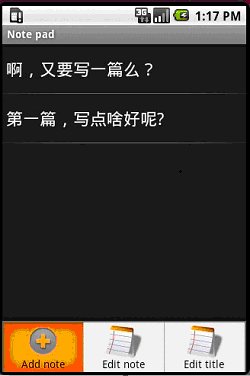
記事本程序運行界面
先來簡單了解下程序運行的效果:

程序入口點
類似於win32程序裡的WinMain函數,Android自然也有它的程序入口點。它通過在AndroidManifest.xml文件中配置來指明,可以看到名為NotesList的activity節點下有這樣一個intent-filter,其action為android.intent.action.MAIN, Category指定為 android.intent.category.LAUNCHER,這就指明了這個activity是作為入口activity,系統查找到它後,就會創建這個activity實例來運行,若未發現就不啟動(你可以把MAIN改名字試試)。
XML/HTML代碼NotesList詳解
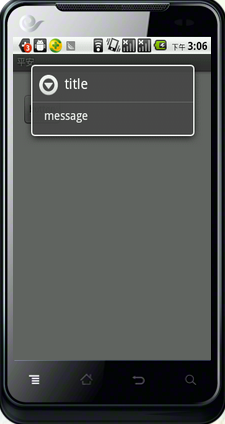
就從入口點所在的activity(見圖1)開始,可以看到這個activity最重要的功能就是顯示日志列表。這個程序的日志都存放在Sqlite數據庫中,因此需要讀取出所有的日志記錄並顯示。先來看兩個重要的私有數據,第一個PROJECTION字段指明了“日志列表“所關注的數據庫中的字段(即只需要ID和Title就可以了)。
Java代碼第二個字段COLUMN_INDEX_TITLE指明title字段在數據表中的索引。
private static final int COLUMN_INDEX_TITLE = 1;
然後就進入第一個調用的函數onCreate。
Java代碼因為NotesList這個activity是系統調用的,此時的intent是不帶數據和操作類型的,系統只是在其中指明了目標組件是Notelist,所以這裡把“content:// com.google.provider.NotePad/notes”保存到intent裡面,這個URI地址指明了數據庫中的數據表名(參見以後的NotePadProvider類),也就是保存日志的數據表notes。
Cursor cursor = managedQuery(getIntent().getData(), PROJECTION, null, null, Notes.DEFAULT_SORT_ORDER);
然後調用managedQuery函數查詢出所有的日志信息,這裡第一個參數就是上面設置的” content:// com.google.provider.NotePad/notes”這個URI,即notes數據表。PROJECTION 字段指明了結果中所需要的字段,Notes.DEFAULT_SORT_ORDER 指明了結果的排序規則。實際上managedQuery並沒有直接去查詢數據庫,而是通過Content Provider來完成實際的數據庫操作,這樣就實現了邏輯層和數據庫層的分離。
Java代碼查詢出日志列表後,構造一個CursorAdapter,並將其作為List View的數據源,從而在界面上顯示出日志列表。可以看到,第二個參數是R.layout.noteslist_item,打開對應的noteslist_item.xml文件:
XML/HTML代碼就是用來顯示一條日志記錄的TextView,最後兩個字段指明了實際的字段映射關系,通過這個TextView來顯示一條日志記錄的title字段。
處理“選擇日志”事件
既然有了“日志列表”,就自然要考慮如何處理某一條日志的單擊事件,這通過重載onListItemClick方法來完成:
Java代碼首先通過”content:// com.google.provider.NotePad/notes”和日志的id 號拼接得到選中日志的真正URI,然後創建一個新的Intent,其操作類型為Intent.ACTION_EDIT,數據域指出待編輯的日志URI(這裡只分析else塊)。
Intent深度剖析
那麼,上面這句startActivity(new Intent(Intent.ACTION_EDIT, uri))執行後會發生什麼事情呢?這時候Android系統就跳出來接管了,它會根據intent中的信息找到對應的activity,在這裡找到的是NoteEditor這個activity,然後創建這個activity的實例並運行。
那麼,Android又是如何找到NoteEditor這個對應的activity的呢?這就是intent發揮作用的時刻了。
new Intent(Intent.ACTION_EDIT, uri)
這裡的Intent.ACTION_EDIT=” android.intent.action.EDIT”,另外通過設置斷點,我們看下這裡的uri值:
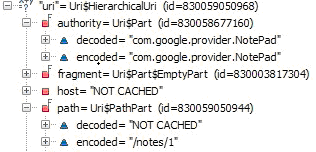
可以看到選中的日志條目的URI是:content://com.google.provider.NotePad/notes/1。然後我們再來看下Androidmanfest.xml,其中有這個provider:
XML/HTML代碼發現沒有?它也有com.google.provider.NotePad,這個是content://com.google.provider.NotePad/notes/1的一部分,同時:
XML/HTML代碼上面第一個intent-filter中有一個action 名為android.intent.action.EDIT,而前面我們創建的Intent也正好是Intent.ACTION_EDIT=” android.intent.action.EDIT”,想必大家已經明白是怎麼回事了吧。
下面就進入activity選擇機制了:
系統從intent中獲取道uri,得到了content://com.google.provider.NotePad/notes/1,去掉開始的content:標識,得到com.google.provider.NotePad/notes/1,然後獲取前面的com.google.provider.NotePad,然後就到Androidmanfest.xml中找到authorities為com.google.provider.NotePad的provider,這個就是後面要講的contentprovider,然後就加載這個content provider。
XML/HTML代碼在這裡是NotePadProvider,然後調用NotePadProvider的gettype函數,並把上述URI傳給這個函數,函數返回URI所對應的類型(這裡返回Notes.CONTENT_ITEM_TYPE,代表一條日志記錄,而CONTENT_ITEM_TYPE = " vnd.android.cursor.item/vnd.google.note ")。
Java代碼上面的sUriMatcher.match是用來檢測uri是否能夠被處理,而sUriMatcher.match(uri)返回值其實是由決定的。
sUriMatcher = new UriMatcher(UriMatcher.NO_MATCH);
sUriMatcher.addURI(NotePad.AUTHORITY, "notes", NOTES);
sUriMatcher.addURI(NotePad.AUTHORITY, "notes/#", NOTE_ID);
然後系統使用獲得的" vnd.android.cursor.item/vnd.google.note "和”android.intent.action.EDIT”到androidmanfest.xml中去找匹配的activity。
XML/HTML代碼正好NoteEditor這個activity的intent-filter滿足上述條件,這樣就找到了NoteEditor。於是系統加載這個類並實例化,運行,然後就到了NoteEditor的OnCreate函數中(見後續文章)。
小技巧
1. 在命令行中使用”adb shell”命令進入系統中,然後”cd app”進入應用程序所在目錄,”rm XXX”就可以刪除你指定的apk,從而去掉其在系統頂層界面占據的圖標,若兩次”cd data”則可以進入應用程序使用的數據目錄,你的數據可以保存在這裡,例如Notepad就是把其數據庫放在它的databases目錄下,名為note_pad.db.
2. 第一次啟動模擬器會比較慢,但以後就別關閉模擬器了,修改代碼,調試都不需要再次啟動的,直接修改後run或debug就是。
 android sdk安裝及開發環境部署
引言在windows安裝Android的開發環境不簡單也說不上算復雜,本文寫給第一次想在自己Windows上建立Android開發環境投入Android浪潮的朋友
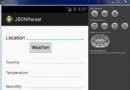 Android JSON解析器
JSON代表JavaScript對象符號。它是一個獨立的數據交換格式,是XML的最佳替代品。本章介紹了如何解析JSON文件,並從中提取所需的信息。Android提供了四個
 Android MediaPlayer(多媒體播放)
Android提供了許多方法來控制播放的音頻/視頻文件和流。其中該方法是通過一類稱為MediaPlayer。Android是提供MediaPlayer類訪問內置的媒體播放
 Android仿水波紋流量球進度條控制器
仿水波紋流球進度條控制器,Android實現高端大氣的主流特效,供大家參考,具體內容如下 效果圖: CircleView 這裡主要是實現中心圓以及水波特效