編輯:關於android開發
1、今天我們來分析Service中的一個小技巧:前台服務(Forground Service)
----------------------------------------------------------------------------------------------------------------------------------------
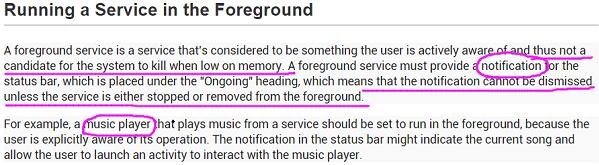
【問題】:我們都知道服務是運行在後台的,如果系統出現內存不足的情況,那麼此時,系統就可能回收後代的服務,那麼我們如何保證服務可以一直運行?
【解決】:在服務中,有一個前台服務的概念,調用startForground()方法。
我們看看官網對前台服務及startForeground()的描述:
看了官方的解釋後,我們再來看看如何使用,上代碼:
Java代碼我們再看一下官方文檔:
以上的代碼是在Service的創建中添加了一個Notification,調用startForground()就可以保證:只要服務一直存在,那麼在前台就會一直顯示這個Notification。
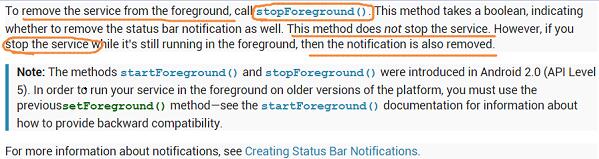
如果我們在onDestroy()中調用stopForground()方法,會銷毀這個Notification,但是Service還是存活的,此時Service就會面臨被System干掉的風險。
如果直接STOP SERVICE,那麼Notification和Service都會銷毀。
----------------------------------------------------------------------------------------------------------------------------------------
2、接下來,我們再來看一個Service的另外一個小技巧:IntentService
【問題】:我們知道服務的代碼邏輯是在主線程中執行的,如果我們在主線程中需要執行一些耗時的操作,那麼很有可能出現ANR(程序暫無響應)的狀況。
這個時候,我們可以采用Android的多線程編程(小編在之前的 AsyncTask 貼中講解過多線程,可以回顧)的方式,我們來看一段代碼:
Java代碼現在,服務可以啟動起來了,但是如果不調用StopService()或stopSelf()方法,服務會一直運行,現在我們修改一下代碼:
Java代碼上面的代碼就是一個標准的Service的書寫形式,主要包含兩個知識點:Thread子線程的創建和stopSelf()方法的調用。
其實,在一般的使用過程中,一部分程序員很容易忘記以上兩個要點,存在遺忘,那麼有沒有更好的辦法能夠實現上面兩個需求呢?
【解決】:在Android中,專門提供了一個IntentService類(android.app.IntentService),這個類就能很好的滿足我們的需求!我們直接通過代碼來看:
(1)新建一個MyIntentService類繼承自IntentService,代碼:
Java代碼以上代碼做了幾件事:
1、提供了一個無參的構造方法,並且調用了父類的有參構造函數(這個就不需要我說為什麼了吧);
2、子類實現父類的onHandleIntent()抽象方法,這個方法好就好在,它是一個已經運行在子線程中的方法。也就是說,服務調用了它,那麼執行的邏輯就如同Thread子線程。
onHandleIntent = Thread().start() + stopSelf()
3、onHandleIntent()執行完後會銷毀服務?會selfStop()?接著往下看代碼。
----------------------------------------------------------------------------------------------------------------------------------------
(2)在xml文件中,創建一個MyIntentService服務按鈕:
XML/HTML代碼(3)接下來,修改MainActivity中的代碼:
Java代碼(4)最後,在AndroidMainfest中注冊服務:
XML/HTML代碼【結果】:直接看一下代碼執行的效果。

從打出的LOG可以看出:
(1)MyIntentService和MainActivity所在進程的id是不一樣的;
(2)onHandleIntent()方法在執行完邏輯後確實銷毀了服務,效果等同於stopSelf()。
從上面的分析可以看出onHandleIntent()方法確實相當的好用!
 Android 6.0 Permission權限與安全機制,androidpermission
Android 6.0 Permission權限與安全機制,androidpermissionMarshmallow版本權限修改 android的權限系統一直是首要的
 Android學習指南之十八:共享參數類SharedPreferences的使用
Android系統在數據存儲和數據共享方面提供了多種方式,包括前面我們講過的使
 android:ListView緩存機制及BaseAdapter的三重境界(逗比式,普通式,文藝式)
android:ListView緩存機制及BaseAdapter的三重境界(逗比式,普通式,文藝式) 大家都知道listview的格式是一定的 而數據源確是多重多樣的
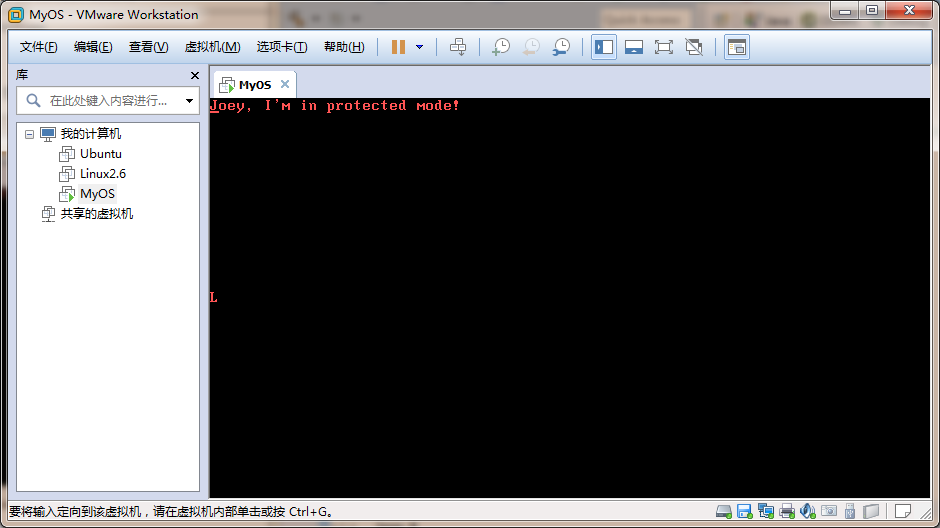 Linux內核系列—4.操作系統開發之LDT,linuxldt
Linux內核系列—4.操作系統開發之LDT,linuxldt一直以來,我們把所有的段描述符都放在GDT中,而不管它屬於內核還是用戶程序,為了有效地在任務之間實施隔離,處