編輯:關於android開發
分類:C#、Android、VS2015;
創建日期:2016-02-17
上一講已經說過,系統升級為Win10後,重新創建了一個新的項目:MyDemos,並把前7章合並到了這個項目中,這次簡單介紹一下合並後的項目結構以及主界面相關的代碼。
創建的MyDemos項目結構截圖如下:
這些資源文件和活動文件的創建辦法見前面章節的介紹,此處不再重復。
1、修改Main.axml文件
將該文件改為下面的內容:
<?xml version="1.0" encoding="utf-8"?>
<LinearLayout xmlns:android="http://schemas.android.com/apk/res/android"
    android:orientation="vertical"
    android:layout_width="fill_parent"
    android:layout_height="fill_parent">
    <TextView
        android:id="@+id/heading1"
        android:text="用C#和VS2015編寫Android手機App"
        android:layout_width="fill_parent"
        android:layout_height="wrap_content"
        android:background="#00000000"
        android:textSize="16dp"
        android:textColor="#FFFF0000"
        android:text
        android:padding="5dp"
        android:gravity="center_horizontal" />
    <TextView
        android:id="@+id/heading2"
        android:text="www.cnblogs.com/rainmj/"
        android:layout_width="fill_parent"
        android:layout_height="wrap_content"
        android:background="#00000000"
        android:textSize="14dp"
        android:textColor="#FF267F00"
        android:text
        android:gravity="center_horizontal"
        android:paddingBottom="5dp" />
    <View
        android:layout_width="match_parent"
        android:layout_height="1dip"
        android:background="#FF909090"
        android:layout_marginBottom="5dp" />
    <ExpandableListView
        android:minWidth="25px"
        android:minHeight="25px"
        android:layout_width="match_parent"
        android:layout_height="match_parent"
        android:id="@+id/expandableListView1" />
</LinearLayout>
2、添加MyApplication.cs文件
在項目的根目錄下添加該文件,然後將該文件改為下面的內容:
using System;
using Android.App;
using Android.Runtime;
using Com.Baidu.Mapapi;
namespace MyDemos
{
    [Application]
    public class MyApplication : Application
    {
        //必須提供此構造函數
        public MyApplication(IntPtr javaReference, JniHandleOwnership transfer)
            : base(javaReference, transfer)
        {
        }

        public override void OnCreate()
        {
            base.OnCreate();
            SDKInitializer.Initialize(ApplicationContext);
        }
    }
}
3、添加MyBroadcastReceiver.cs文件
在項目的根目錄下添加該文件,然後將該文件改為下面的內容:
using Android.Content;
using Android.Widget;
using Com.Baidu.Mapapi;
using Android.Util;

namespace MyDemos
{
    [BroadcastReceiver]
    public class MyBroadcastReceiver : BroadcastReceiver
    {
        private MainActivity mainActivity;

        //必須提供無參數的構造函數
        public MyBroadcastReceiver() { }

        public MyBroadcastReceiver(MainActivity bdMapMain)
        {
            mainActivity = bdMapMain;
        }

        public override void OnReceive(Context context, Intent intent)
        {
            string s = intent.Action;
            TextView text = mainActivity.FindViewById<TextView>(Resource.Id.heading2);
            switch (s)
            {
                case SDKInitializer.SdkBroadtcastActionStringPermissionCheckError:
                    text.Text= "Andoid SDK(v3.7.1)key 驗證出錯!";
                    break;
                case SDKInitializer.SdkBroadtcastActionStringPermissionCheckOk:
                    Log.Debug("MainActivity", "百度Andoid SDK(v3.7.1)key 驗證成功!");
                    break;
                case SDKInitializer.SdkBroadcastActionStringNetworkError:
                    text.Text = "Andoid SDK(v3.7.1)key 驗證失敗:網絡出錯!";
                    break;
            }
        }
    }
}
4、添加MyExpandableListAdapter.cs文件
在項目的根目錄下添加該文件,然後將該文件改為下面的內容:
using System;
using System.Collections.Generic;
using Android.Content;
using Android.Views;
using Android.Widget;
using Android.Graphics;

namespace MyDemos
{
    public class Chapter
    {
        public string ChapterName { get; set; }
        public ChItem[] ChapterItems { get; set; }
    }

    public class ChItem
    {
        public Type type { get; set; }
        public string Title { get; set; }
        public string Desc { get; set; }
    }

    public class MyExpandableListAdapter : BaseExpandableListAdapter
    {
        private readonly Context context;
        private readonly IList<Chapter> chapter;
        public MyExpandableListAdapter(Context context, IList<Chapter> chapter)
        {
            this.context = context;
            this.chapter = chapter;
        }

        public override int GroupCount
        {
            get { return chapter.Count; }
        }

        public override bool HasStableIds
        {
            get{ return true; }
        }

        public override Java.Lang.Object GetChild(int groupPosition, int childPosition)
        {
            return null;
        }

        public override long GetChildId(int groupPosition, int childPosition)
        {
            return childPosition;
        }

        public override int GetChildrenCount(int groupPosition)
        {
            var ch = chapter[groupPosition];
            return ch.ChapterItems.Length;
        }

        public override View GetChildView(int groupPosition, int childPosition, bool isLastChild, View convertView, ViewGroup parent)
        {
            var view = convertView;
            if (view == null)
            {
                var inflater = context.GetSystemService(Context.LayoutInflaterService) as LayoutInflater;
                view = inflater.Inflate(Android.Resource.Layout.SimpleExpandableListItem2, null);
            }
            var ch = chapter[groupPosition];
            var chItem = ch.ChapterItems[childPosition];
            TextView textView = view.FindViewById<TextView>(Android.Resource.Id.Text1);
            textView.Text = chItem.Title;
            textView.SetTextColor(Color.Blue);
            textView.TextSize = 12;
            textView = view.FindViewById<TextView>(Android.Resource.Id.Text2);
            textView.Text = chItem.Desc;
            textView.TextSize = 9;
            return view;
        }

        public override Java.Lang.Object GetGroup(int groupPosition)
        {
            return null;
        }

        public override long GetGroupId(int groupPosition)
        {
            return groupPosition;
        }

        public override View GetGroupView(int groupPosition, bool isExpanded, View convertView, ViewGroup parent)
        {
            var view = convertView;
            if (view == null)
            {
                var inflater = context.GetSystemService(Context.LayoutInflaterService) as LayoutInflater;
                view = inflater.Inflate(Android.Resource.Layout.SimpleExpandableListItem1, null);
            }
            var ch = chapter[groupPosition];
            TextView textView = view.FindViewById<TextView>(Android.Resource.Id.Text1);
            textView.Text = ch.ChapterName;
            textView.TextSize = 14;
            return view;
        }

        public override bool IsChildSelectable(int groupPosition, int childPosition)
        {
            return true;
        }
    }
}
5、修改MainActivity.cs文件
將該文件改為下面的內容:
using Android.App;
using Android.Content;
using Android.Widget;
using Android.OS;
using System.Collections.Generic;
using Com.Baidu.Mapapi.Model;
using Com.Baidu.Mapapi;
using MyDemos.SrcDemos;

namespace MyDemos
{
    [Activity(Label = "MyDemos--毛毛雨的博客樂園",
        MainLauncher = true, Icon = "@drawable/icon")]
    public class MainActivity : Activity
    {
        private IList<Chapter> chItems;
        private MyBroadcastReceiver myReceiver;

        //自定義的中心點位置經緯度,可以根據需要改為你自己感興趣的任意經緯度
        public static readonly LatLng MyLatLng = new LatLng(34.824635, 114.315745);

        protected override void OnCreate(Bundle bundle)
        {
            base.OnCreate(bundle);
            SetContentView(Resource.Layout.Main);

            // 注冊廣播監聽
            IntentFilter intentFilter = new IntentFilter();
            intentFilter.AddAction(SDKInitializer.SdkBroadtcastActionStringPermissionCheckOk);
            intentFilter.AddAction(SDKInitializer.SdkBroadtcastActionStringPermissionCheckError);
            intentFilter.AddAction(SDKInitializer.SdkBroadcastActionStringNetworkError);
            myReceiver = new MyBroadcastReceiver(this);
            RegisterReceiver(myReceiver, intentFilter);

            CreateChItems();
            var adapter = new MyExpandableListAdapter(this, chItems);
            var expandableListView1 = FindViewById<ExpandableListView>(Resource.Id.expandableListView1);
            expandableListView1.SetAdapter(adapter);
            expandableListView1.ChildClick += (sender, args) =>
            {
                var type = chItems[args.GroupPosition].ChapterItems[args.ChildPosition].type;
                if (type != null)
                {
                    StartActivity(new Intent(this, type));
                }
            };
        }

        protected override void OnResume()
        {
            base.OnResume();
        }

        protected override void OnDestroy()
        {
            base.OnDestroy();
            // 取消廣播監聽
            UnregisterReceiver(myReceiver);
        }

        private void CreateChItems()
        {
            chItems = new List<Chapter>();
            chItems.Add(new Chapter()
            {
                ChapterName = "第1章 開發環境安裝和配置",
                ChapterItems = new ChItem[]
                {
                    new ChItem {type=null, Title="本章無示例", Desc = "" },
                }
            });
            chItems.Add(new Chapter()
            {
                ChapterName = "第2章 Android應用程序的調試和部署",
                ChapterItems = new ChItem[]
                {
                    new ChItem { type=typeof(ch0201Main), Title="例2-1 Phoneword", Desc = "演示如何導航到另一個界面以及如何撥號" },
                }
            });
            //後面章節的內容與前面類似,就不再全部列出了
            ……
        }
    }
}
OK,以後再添加後續章節的示例時,只需要在CreateChItems()方法中添加對應的代碼即可,而其他內容則不需要做任何改變:
chItems.Add(new Chapter()
{
ChapterName = "……",
ChapterItems = new ChItem[]
{
……
};
});
下一講接著介紹第8章的內容。
 Android工程師進階之路 :《Android開發進階:從小工到專家》上市啦!
Android工程師進階之路 :《Android開發進階:從小工到專家》上市啦! 封面 目錄1 目錄2
 Android 6.0: 動態權限管理的解決方案
Android 6.0: 動態權限管理的解決方案 Android 6.0版本(Api 23)推出了很多新的特性, 大幅提升了用戶體驗, 同時也為程序員帶來新的負擔. 動態
 美女的秘密項目源碼,美女秘密項目源碼
美女的秘密項目源碼,美女秘密項目源碼 這是一個不錯的Android美女的秘密項目。 源碼下載:http://code.662p.com/list/11
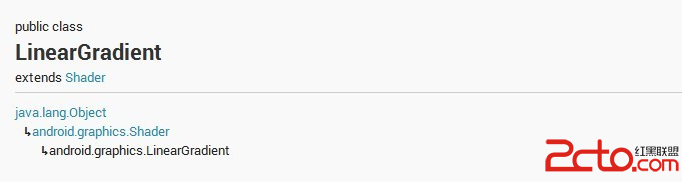 android實現文字漸變效果和歌詞進度的效果
android實現文字漸變效果和歌詞進度的效果 要用TextView使用漸變色,那我們就必須要了解LinearGradient(線性漸變)的用法。 LinearGra