編輯:關於android開發
android最後一個組件便是service了,終於學習到最後一個組件了,從年前的開發環境的搭建,到現在學到最後一個組件花了三周的時間,期間記錄的點點滴滴,照著書本學習編寫的代碼都受益匪淺,這裡要感謝第一行代碼這本書。三個星期除了三十和初一沒有學習,其余時間堅持每天學習一個知識點,總算慢慢地學習了個大概,接下去繼續學習其他的東西。說了這麼多還是開始學習Service組件吧。
Service從字面上理解就是服務的意思,也就是為應用程序提供服務,比如我們在播放一首歌的時候,我又想把它下載下來,那麼我們就可以把他交給Service去處理。播放歌曲是在後台運行的,那麼它也是個服務,還是來個例子吧。先新建工程ServiceTest。編寫布局如下:
<!--{cke_protected}{C}%3C!%2D%2D%3Fxml%20version%3D%221.0%22%20encoding%3D%22utf-8%22%3F%2D%2D%3E-->
<linearlayout xmlns:android="http://schemas.android.com/apk/res/android" xmlns:tools="http://schemas.android.com/tools" android:layout_width="match_parent" android:layout_height="match_parent" android:orientation="vertical" android:layout_margin="10dp" android:padding="10dp" tools:context="com.example.jared.servicetest.MainActivity"><button android:id="@+id/startService" android:text="啟動Service" android:layout_width="match_parent" android:layout_height="wrap_content" android:textallcaps="false"></button><button android:id="@+id/stopService" android:text="停止Service" android:layout_width="match_parent" android:layout_height="wrap_content" android:textallcaps="false"></button></linearlayout>
這裡實現了兩個按鈕啟動和停止Service。接著新建一個MyService類,繼承Service,代碼如下:
package com.example.jared.servicetest;

import android.app.Service;
import android.content.Intent;
import android.os.IBinder;
import android.support.annotation.Nullable;
import android.util.Log;
import android.widget.Toast;

/**
 * Created by jared on 16/2/18.
 */
public class MyService extends Service{

    private static final String TAG = "MyService";

    @Nullable
    @Override
    public IBinder onBind(Intent intent) {
        return null;
    }

    @Override
    public void onCreate() {
        super.onCreate();
        Log.d(TAG, "onCreate is called");
        Toast.makeText(MyService.this, "onCreate is called",Toast.LENGTH_SHORT).show();
    }

    @Override
    public int onStartCommand(Intent intent, int flags, int startId) {
        Log.d(TAG, "onStartCommand is called");
        Toast.makeText(MyService.this, "onStartCommand is called",Toast.LENGTH_SHORT).show();
        return super.onStartCommand(intent, flags, startId);
    }

    @Override
    public void onDestroy() {
        super.onDestroy();
        Log.d(TAG, "onDestroy is called");
        Toast.makeText(MyService.this, "onDestroy is called",Toast.LENGTH_SHORT).show();
    }
}
這裡重寫了onCreate方法,onStartCommand方法和onDestroy方法,這裡在各個方法裡加了些調試信息,接著我們再實現MainActivity的代碼:
package com.example.jared.servicetest;

import android.content.Intent;
import android.support.v7.app.AppCompatActivity;
import android.os.Bundle;
import android.view.View;
import android.widget.Button;

public class MainActivity extends AppCompatActivity {

    private Button mStartServiceBtn;
    private Button mStopServiceBtn;

    @Override
    protected void onCreate(Bundle savedInstanceState) {
        super.onCreate(savedInstanceState);
        setContentView(R.layout.activity_main);

        mStartServiceBtn = (Button)findViewById(R.id.startService);
        mStopServiceBtn = (Button)findViewById(R.id.stopService);

        mStartServiceBtn.setOnClickListener(new myOnClickListener());
        mStopServiceBtn.setOnClickListener(new myOnClickListener());
    }

    private class myOnClickListener implements View.OnClickListener {
        @Override
        public void onClick(View view) {
            switch (view.getId()) {
                case R.id.startService:
                    Intent mStartIntent = new Intent(getApplicationContext(), MyService.class);
                    startService(mStartIntent);
                    break;
                case R.id.stopService:
                    Intent mSopIntent = new Intent(getApplicationContext(), MyService.class);
                    stopService(mSopIntent);
                    break;
                default:
                    break;
            }
        }
    }
}
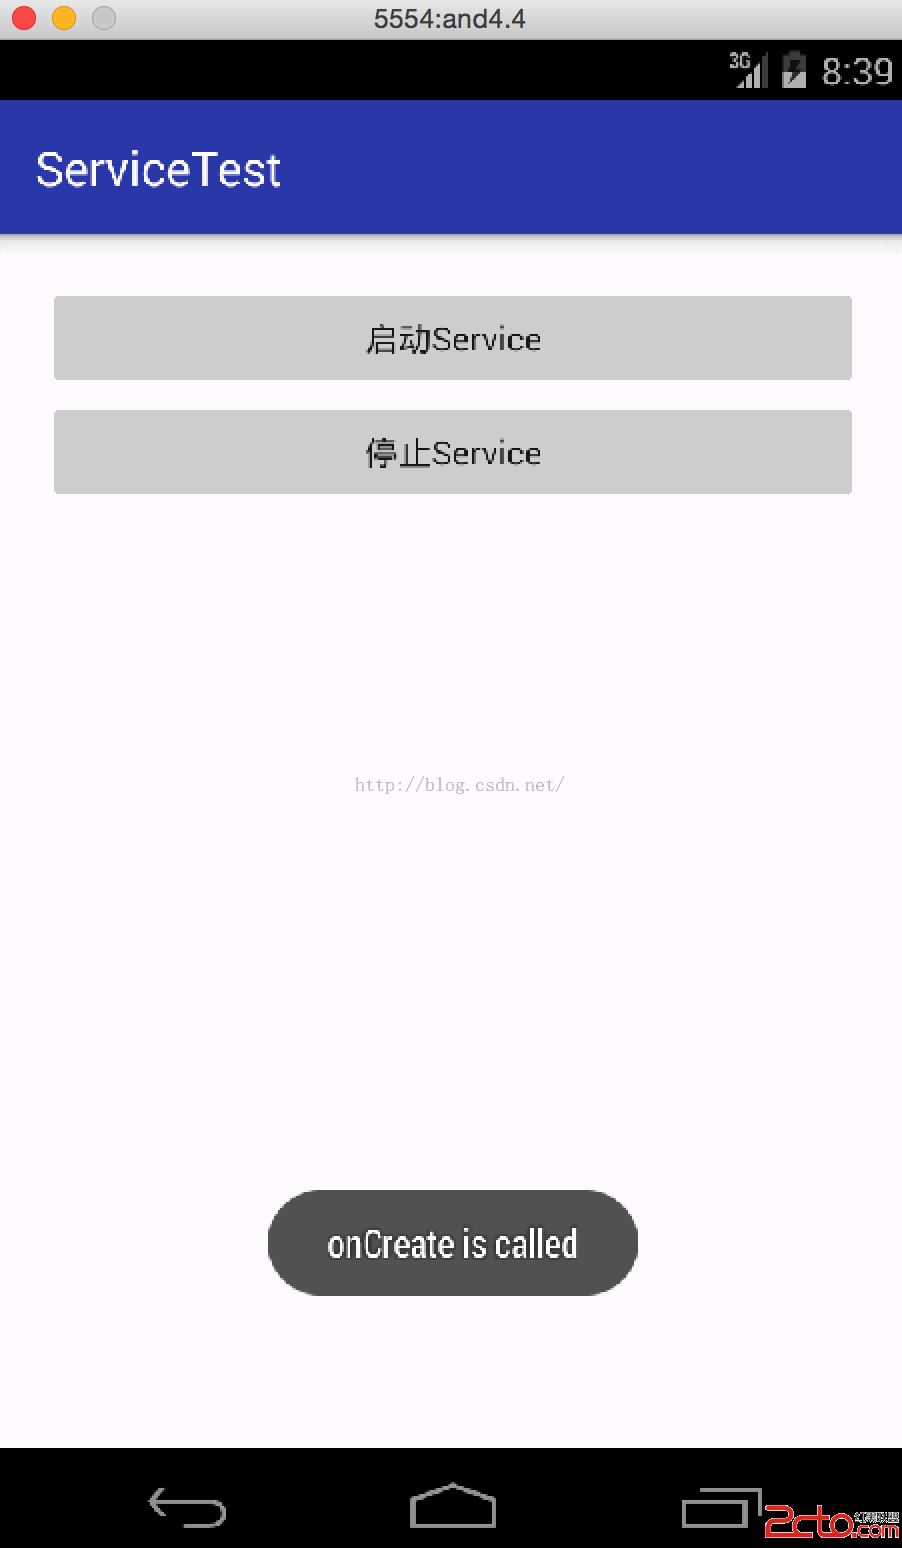
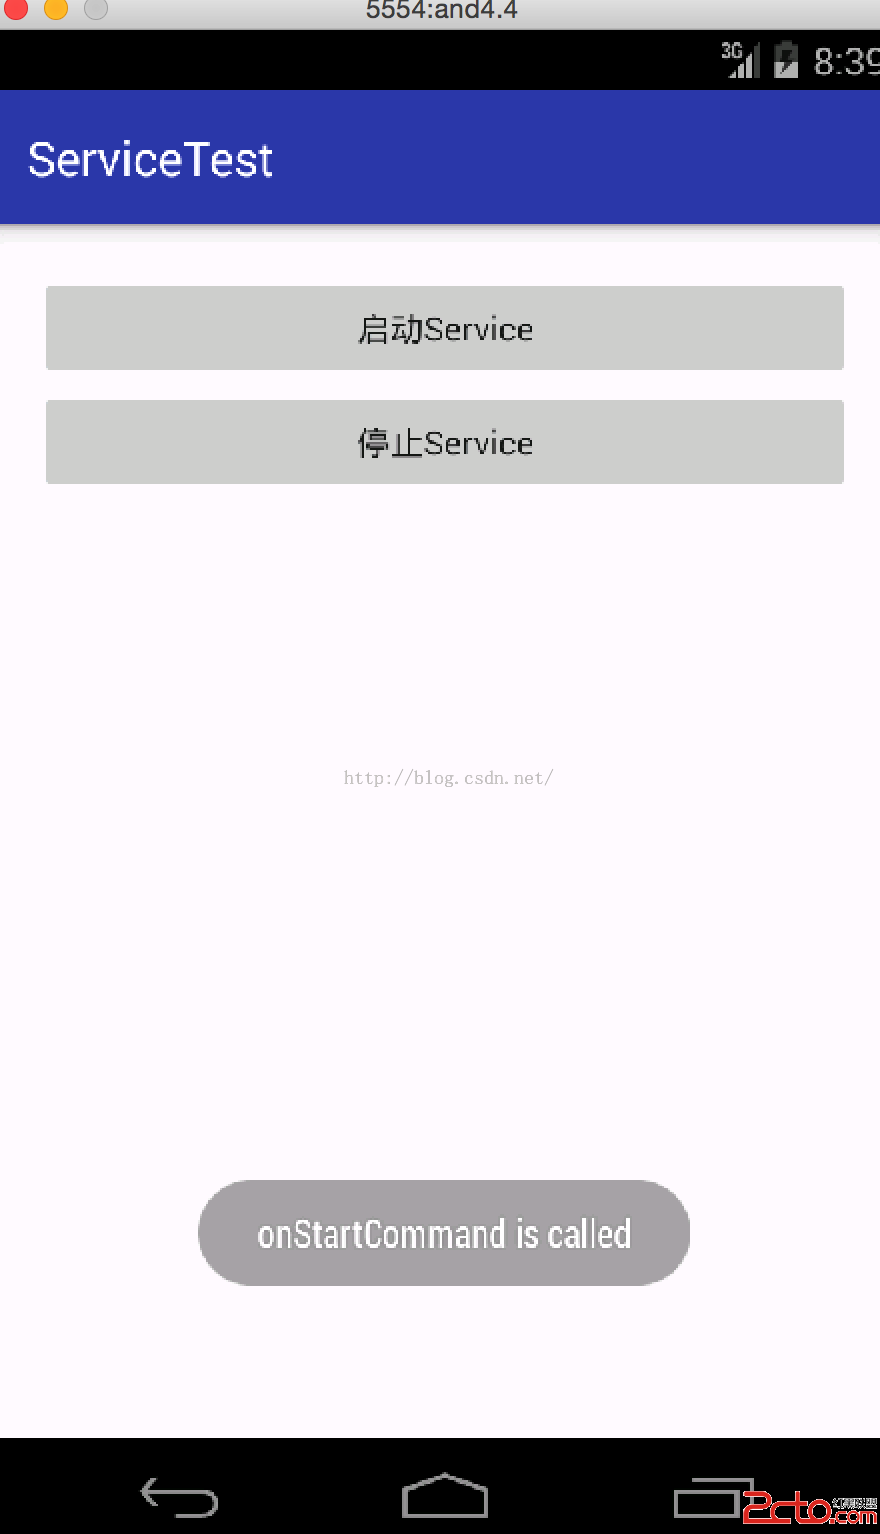
從上可知先調用了onCreate方法,然後調用onStartCommand方法。然後我們看下在運行著的服務,打開手機的setting下的apps裡的running:
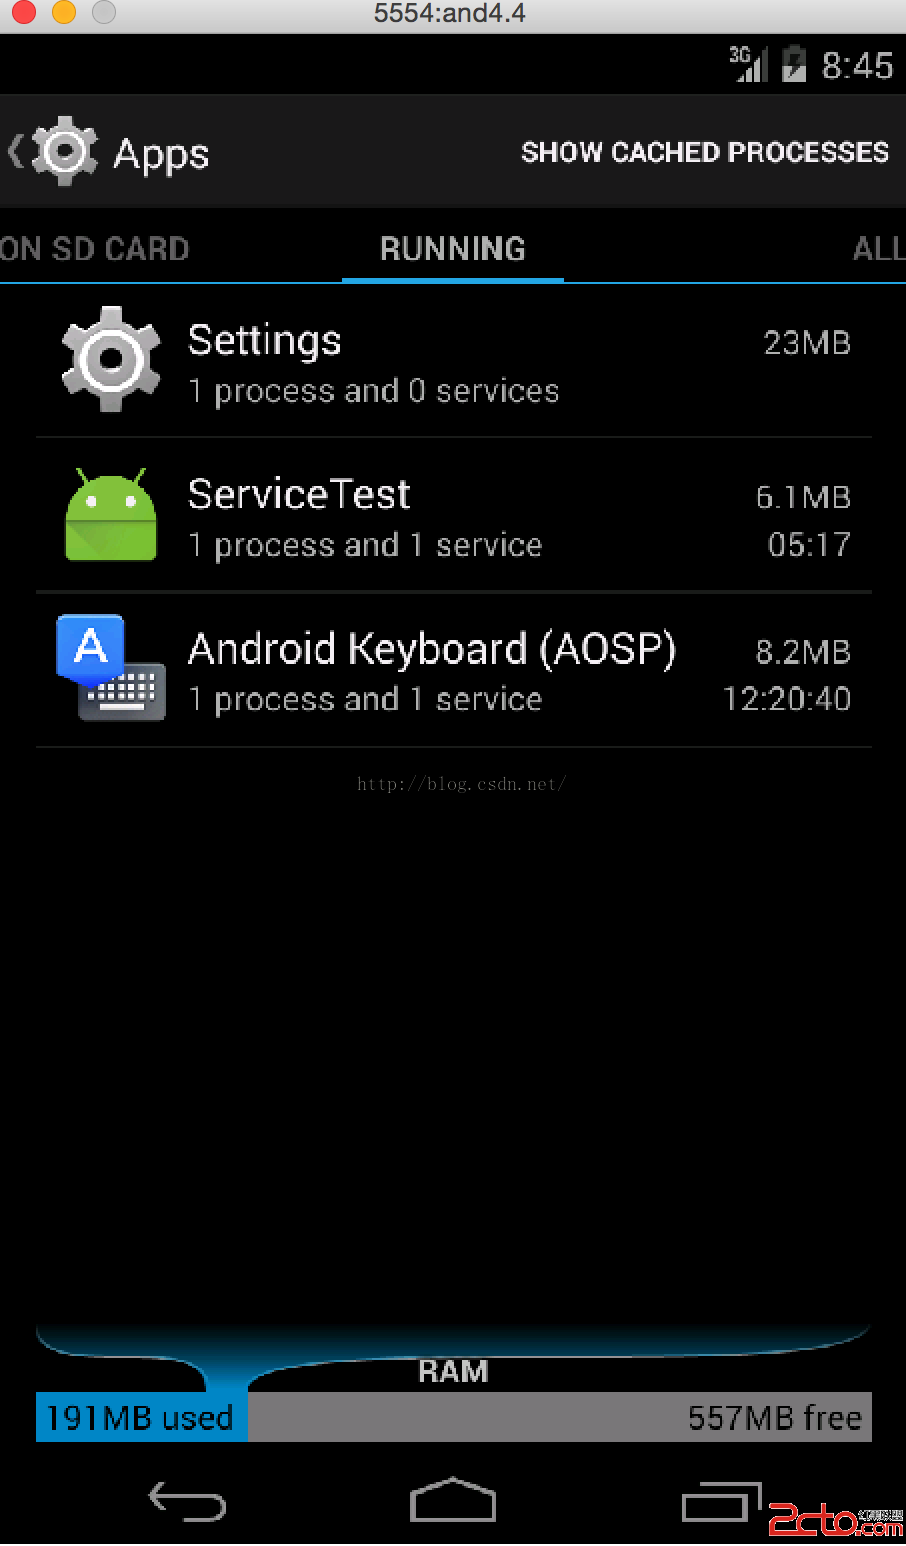
從圖可知ServiceTest已經在了,然後這個時候我們再點擊啟動Service的話,是不會再調用onCreate方法的,只會調用onStartCommand方法,只有stop了Service才可以,那我們先stop掉Service,效果如下:

如圖調用了onDestroy方法。接著再啟動Service的話,就和上述一樣了。
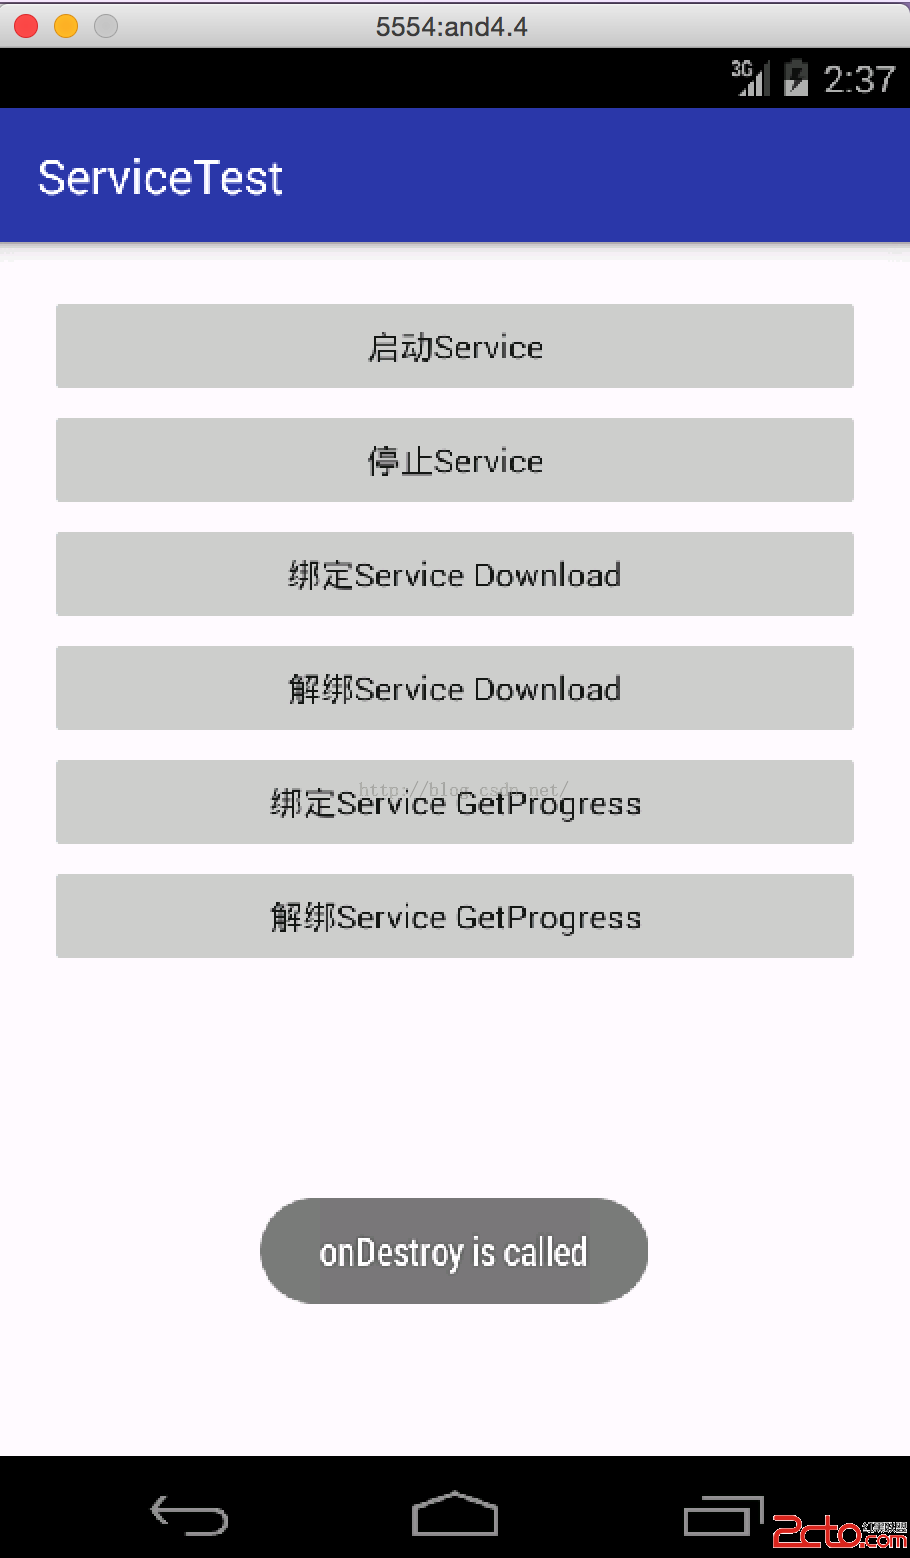
上面代碼中還有個方法那就是onBind方法了,從字面可以理解到這個方法是把Activity和Service綁定了,那樣就可以通過Activity控制Service了。下面實現下代碼,修改layout如下:
<!--{cke_protected}{C}%3C!%2D%2D%3Fxml%20version%3D%221.0%22%20encoding%3D%22utf-8%22%3F%2D%2D%3E-->
<linearlayout xmlns:android="http://schemas.android.com/apk/res/android" xmlns:tools="http://schemas.android.com/tools" android:layout_width="match_parent" android:layout_height="match_parent" android:orientation="vertical" android:layout_margin="10dp" android:padding="10dp" tools:context="com.example.jared.servicetest.MainActivity"><button android:id="@+id/startService" android:text="啟動Service" android:layout_width="match_parent" android:layout_height="wrap_content" android:textallcaps="false"></button><button android:id="@+id/stopService" android:text="停止Service" android:layout_width="match_parent" android:layout_height="wrap_content" android:textallcaps="false"></button><button android:id="@+id/startDownloadService" android:text="綁定Service Download" android:layout_width="match_parent" android:layout_height="wrap_content" android:textallcaps="false"></button><button android:id="@+id/stopDownloadService" android:text="解綁Service Download" android:layout_width="match_parent" android:layout_height="wrap_content" android:textallcaps="false"></button><button android:id="@+id/startGetProgressService" android:text="綁定Service GetProgress" android:layout_width="match_parent" android:layout_height="wrap_content" android:textallcaps="false"></button><button android:id="@+id/stopGetProgressService" android:text="解綁Service GetProgress" android:layout_width="match_parent" android:layout_height="wrap_content" android:textallcaps="false"></button></linearlayout>
package com.example.jared.servicetest;

import android.app.Service;
import android.content.Intent;
import android.os.Binder;
import android.os.IBinder;
import android.support.annotation.Nullable;
import android.util.Log;
import android.widget.Toast;

/**
 * Created by jared on 16/2/18.
 */
public class MyService extends Service{

    private static final String TAG = "MyService";

    private DownloadBinder mDownloadBinder = new DownloadBinder();

    class DownloadBinder extends Binder {
        private int progress = 0;
        public void startDownload() {
            Log.d(TAG, "startDownload is called");
            Toast.makeText(MyService.this, "startDownload is called",Toast.LENGTH_SHORT).show();
            progress = 0;
            new Thread(new Runnable(){
                @Override
                public void run() {
                    for (int i=0; i<=100; i++) {
                        try {
                            Thread.sleep(1000);
                            progress++;
                        } catch (InterruptedException e) {
                            e.printStackTrace();
                        }
                    }
                }
            }).start();
        }
        public int getProgress() {
            Log.d(TAG, "getProgress is called");
            Toast.makeText(MyService.this, "getProgress is called",Toast.LENGTH_SHORT).show();
            return progress;
        }
    }

    @Nullable
    @Override
    public IBinder onBind(Intent intent) {
        return mDownloadBinder;
    }

    @Override
    public void onCreate() {
        super.onCreate();
        Log.d(TAG, "onCreate is called");
        Toast.makeText(MyService.this, "onCreate is called",Toast.LENGTH_SHORT).show();
    }

    @Override
    public int onStartCommand(Intent intent, int flags, int startId) {
        Log.d(TAG, "onStartCommand is called");
        Toast.makeText(MyService.this, "onStartCommand is called",Toast.LENGTH_SHORT).show();
        return super.onStartCommand(intent, flags, startId);
    }

    @Override
    public void onDestroy() {
        super.onDestroy();
        Log.d(TAG, "onDestroy is called");
        Toast.makeText(MyService.this, "onDestroy is called",Toast.LENGTH_SHORT).show();
    }
}
package com.example.jared.servicetest;

import android.content.ComponentName;
import android.content.Intent;
import android.content.ServiceConnection;
import android.os.Bundle;
import android.os.IBinder;
import android.support.v7.app.AppCompatActivity;
import android.view.View;
import android.widget.Button;
import android.widget.Toast;

public class MainActivity extends AppCompatActivity {

    private Button mStartServiceBtn;
    private Button mStopServiceBtn;
    private Button mBindService1Btn;
    private Button mUnbindService1Btn;
    private Button mBindService2Btn;
    private Button mUnbindService2Btn;

    private MyService.DownloadBinder downloadBinder;

    @Override
    protected void onCreate(Bundle savedInstanceState) {
        super.onCreate(savedInstanceState);
        setContentView(R.layout.activity_main);

        mStartServiceBtn = (Button)findViewById(R.id.startService);
        mStopServiceBtn = (Button)findViewById(R.id.stopService);
        mBindService1Btn = (Button)findViewById(R.id.startDownloadService);
        mUnbindService1Btn = (Button)findViewById(R.id.stopDownloadService);
        mBindService2Btn = (Button)findViewById(R.id.startGetProgressService);
        mUnbindService2Btn = (Button)findViewById(R.id.stopGetProgressService);

        mStartServiceBtn.setOnClickListener(new myOnClickListener());
        mStopServiceBtn.setOnClickListener(new myOnClickListener());
        mBindService1Btn.setOnClickListener(new myOnClickListener());
        mUnbindService1Btn.setOnClickListener(new myOnClickListener());
        mBindService2Btn.setOnClickListener(new myOnClickListener());
        mUnbindService2Btn.setOnClickListener(new myOnClickListener());
    }

    private class myOnClickListener implements View.OnClickListener {
        @Override
        public void onClick(View view) {
            switch (view.getId()) {
                case R.id.startService:
                    Intent mStartIntent = new Intent(getApplicationContext(), MyService.class);
                    startService(mStartIntent);
                    break;
                case R.id.stopService:
                    Intent mSopIntent = new Intent(getApplicationContext(), MyService.class);
                    stopService(mSopIntent);
                    break;
                case R.id.startDownloadService:
                    Intent mBindIntent = new Intent(getApplicationContext(), MyService.class);
                    bindService(mBindIntent, startDownloadInService, BIND_AUTO_CREATE);
                    break;
                case R.id.stopDownloadService:
                    unbindService(startDownloadInService);
                    break;
                case R.id.startGetProgressService:
                    Intent mGetProgress = new Intent(getApplicationContext(), MyService.class);
                    bindService(mGetProgress, getProgressInService, BIND_AUTO_CREATE);
                    break;
                case R.id.stopGetProgressService:
                    unbindService(getProgressInService);
                    break;
                default:
                    break;
            }
        }
    }

    private ServiceConnection startDownloadInService = new ServiceConnection() {
        @Override
        public void onServiceConnected(ComponentName componentName, IBinder iBinder) {
            downloadBinder = (MyService.DownloadBinder)iBinder;
            downloadBinder.startDownload();
        }

        @Override
        public void onServiceDisconnected(ComponentName componentName) {

        }
    };

    private ServiceConnection getProgressInService = new ServiceConnection() {
        @Override
        public void onServiceConnected(ComponentName componentName, IBinder iBinder) {
            downloadBinder = (MyService.DownloadBinder)iBinder;
            String progressValue = String.valueOf(downloadBinder.getProgress());
            Toast.makeText(getApplicationContext(), "ProgressNow is:"+progressValue, Toast.LENGTH_SHORT).show();
        }

        @Override
        public void onServiceDisconnected(ComponentName componentName) {

        }
    };
}
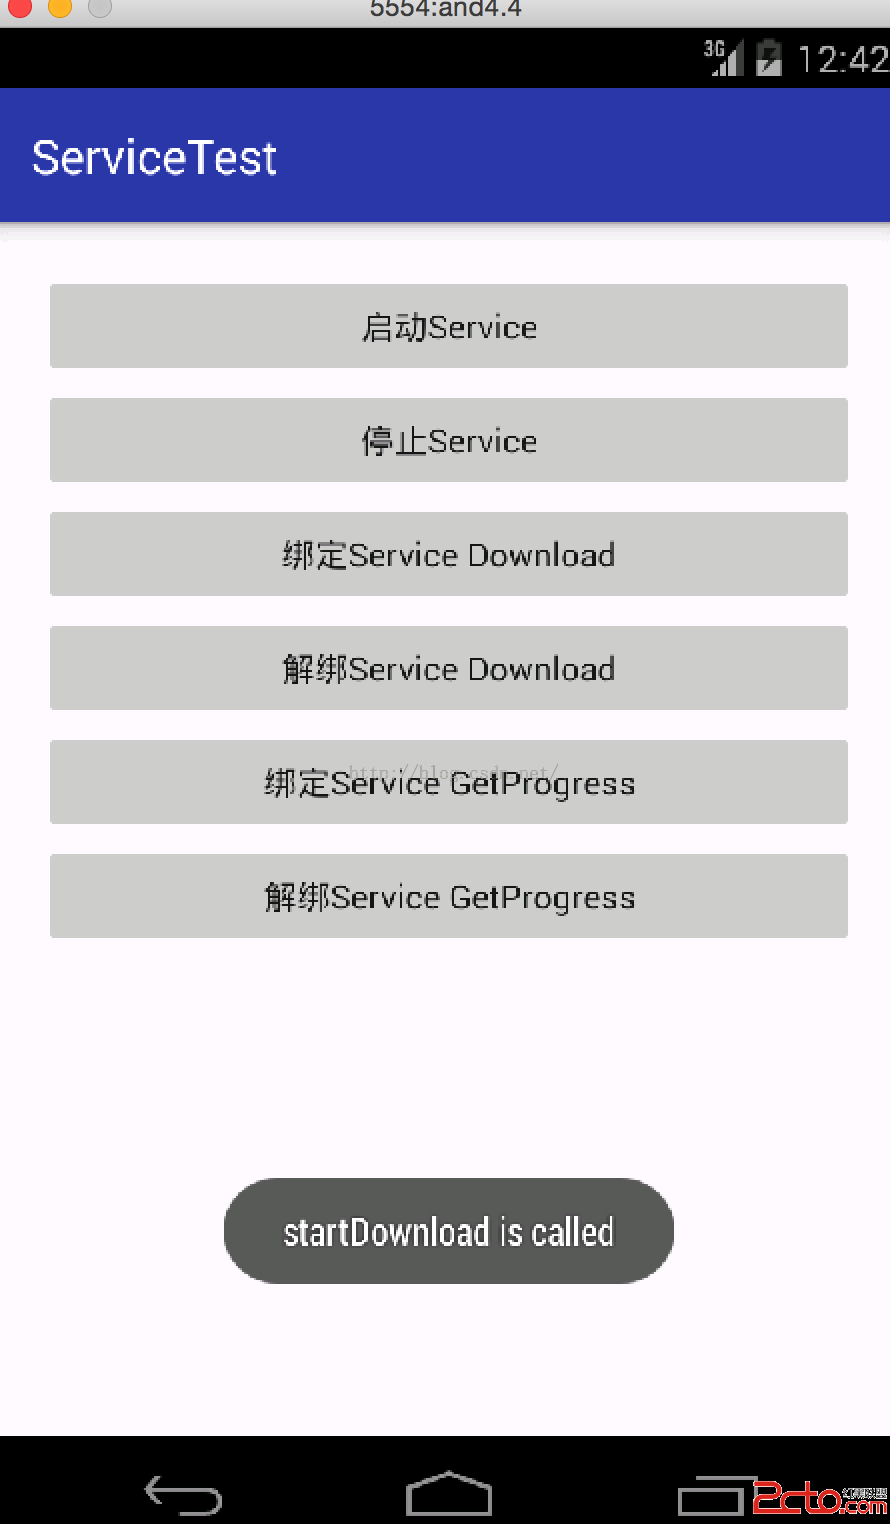
這裡實例化了ServiceConnection,當通過bindService方法的時候,會通過ServiceConnection的onServiceConnected方法來調用Service中剛創建的下載類的方法。運行看下效果,先啟動下載,再獲取progress,運行效果如下:
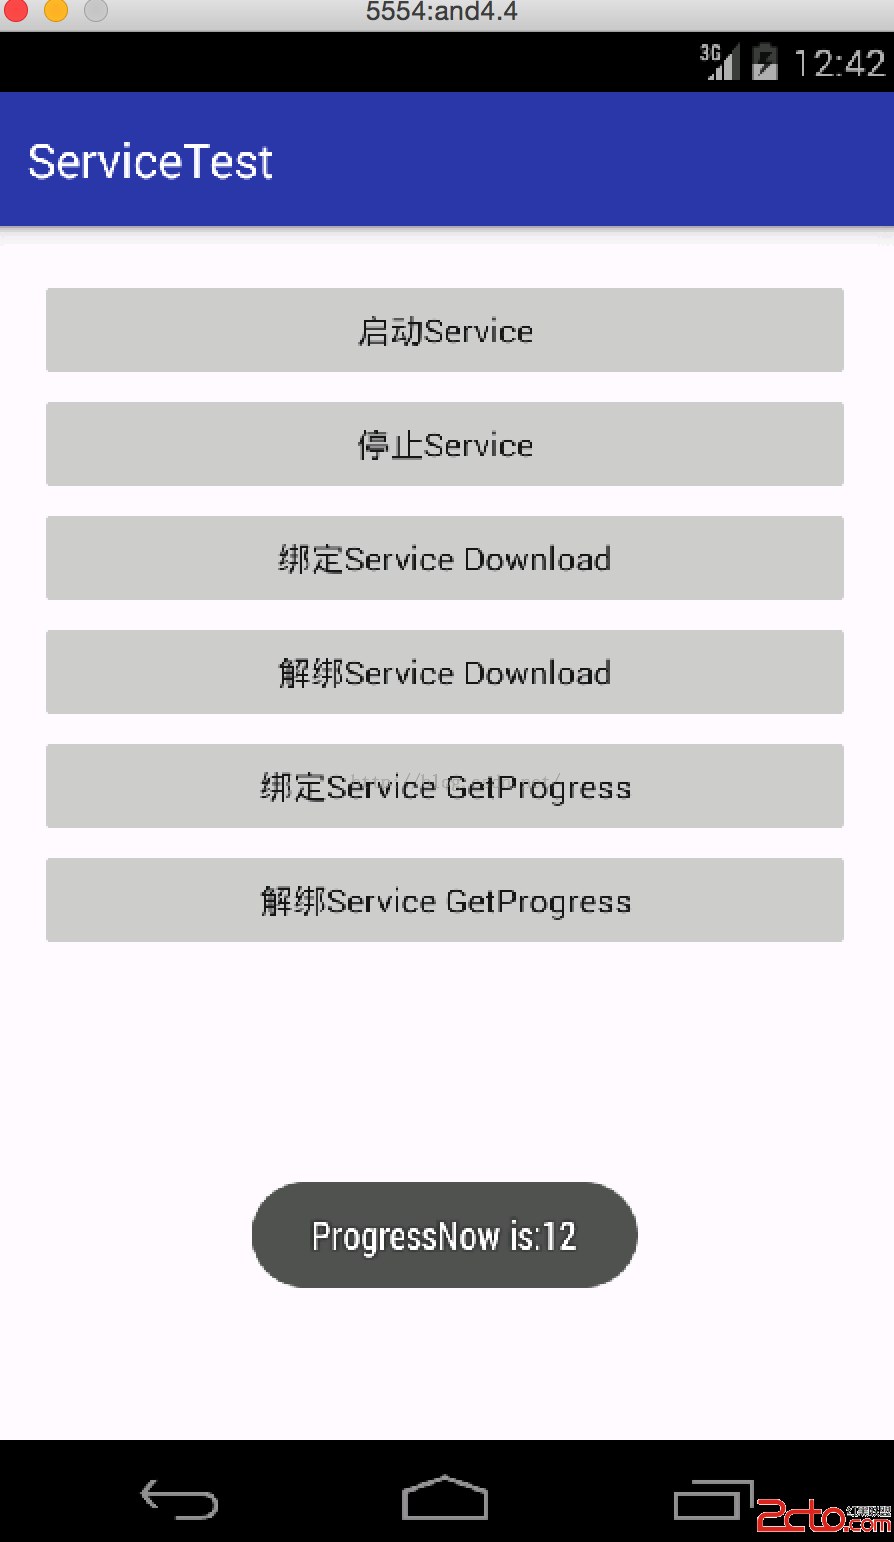
這裡要注意的是,服務是單例的,所謂單例就是只有一個實例,只能被new一次,不同進程也只能調用一次。當我們調用bind download的時候會直接調用Service的onCreate,當我們解綁的時候,也會調用Service的onDestroy方法。不過當我們調用了啟動Service,又調用了binder的話,那就得ubind和stop方法都得調用。
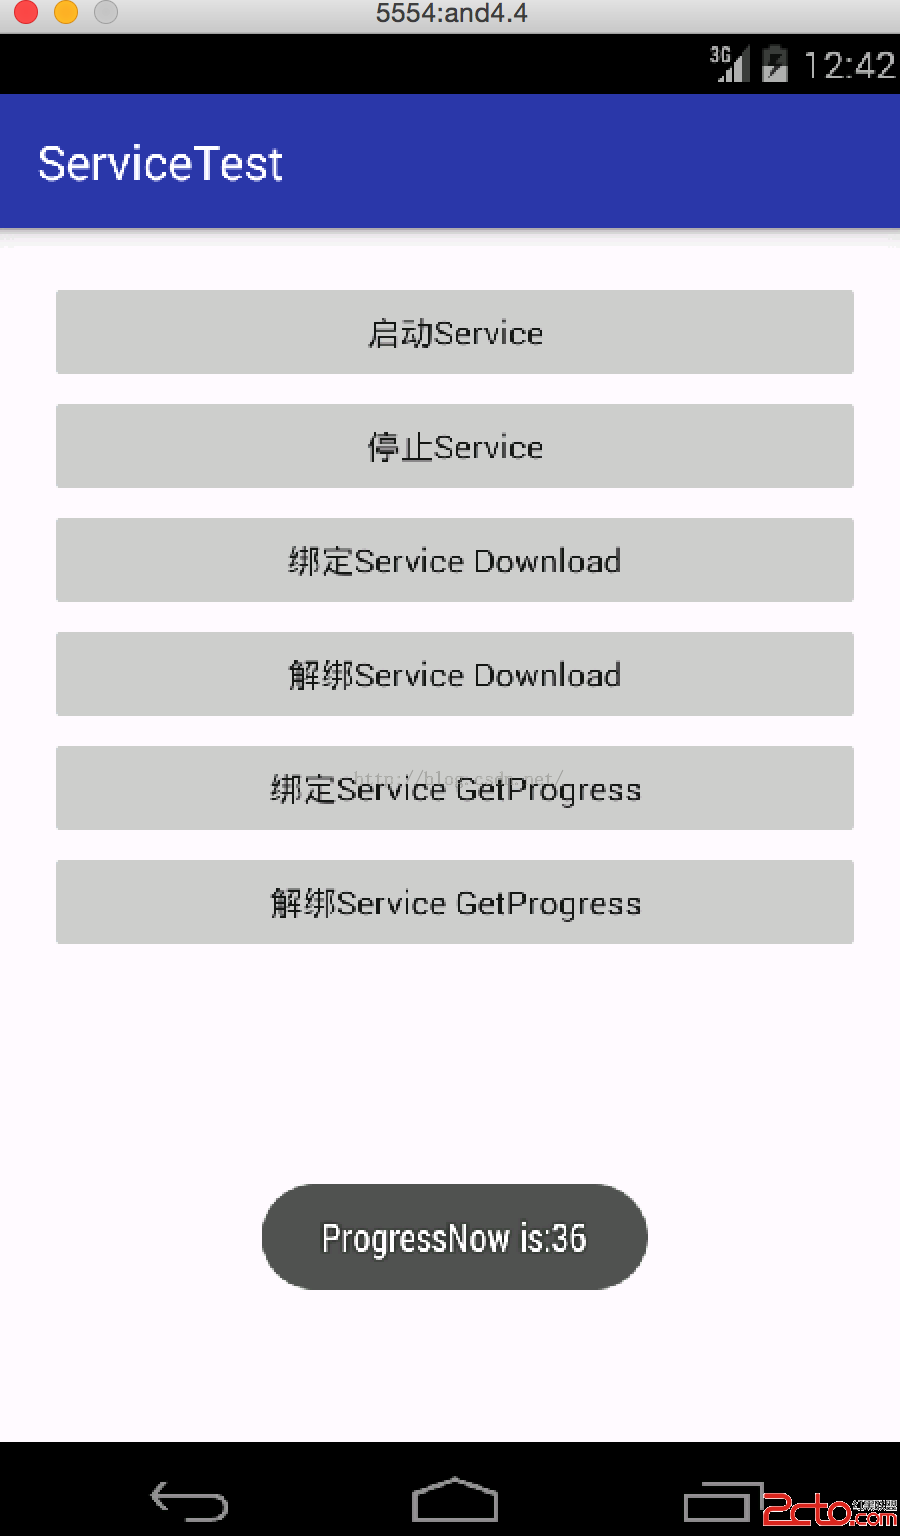
上述當我們獲取progress的時候,如果不解綁,那麼之後的都是無效的。只有獲取了一次,解綁了,再獲取才有效。
android系統當內存不夠的時候會自動回收優先級比較低的服務,所以為了讓服務可以一直保存運行狀態,而不會由於內存不足的原因導致被回收,就需要使用前台服務。前台服務就是一直運行並在狀態欄顯示,類似音樂播放器就會在狀態欄一直保存著。簡單修改Service代碼如下:
package com.example.jared.servicetest;

import android.app.PendingIntent;
import android.app.Service;
import android.content.Intent;
import android.os.Binder;
import android.os.IBinder;
import android.support.annotation.Nullable;
import android.support.v4.app.NotificationCompat;
import android.util.Log;
import android.widget.Toast;

/**
 * Created by jared on 16/2/18.
 */
public class MyService extends Service{

    private static final String TAG = "MyService";
    private static final int NOTIFICATION_ID = 1;

    private DownloadBinder mDownloadBinder = new DownloadBinder();

    class DownloadBinder extends Binder {
        private int progress = 0;
        public void startDownload() {
            Log.d(TAG, "startDownload is called");
            Toast.makeText(MyService.this, "startDownload is called",Toast.LENGTH_SHORT).show();
            progress = 0;
            new Thread(new Runnable(){
                @Override
                public void run() {
                    for (int i=0; i<=100; i++) {
                        try {
                            Thread.sleep(1000);
                            progress++;
                        } catch (InterruptedException e) {
                            e.printStackTrace();
                        }
                    }
                }
            }).start();
        }
        public int getProgress() {
            Log.d(TAG, "getProgress is called");
            Toast.makeText(MyService.this, "getProgress is called",Toast.LENGTH_SHORT).show();
            return progress;
        }
    }

    @Nullable
    @Override
    public IBinder onBind(Intent intent) {
        return mDownloadBinder;
    }

    @Override
    public void onCreate() {
        super.onCreate();
        Log.d(TAG, "onCreate is called");
        Toast.makeText(MyService.this, "onCreate is called",Toast.LENGTH_SHORT).show();
        NotificationCompat.Builder notification = new NotificationCompat.Builder(this);
        notification.setSmallIcon(R.mipmap.ic_launcher);
        notification.setContentTitle("前台服務");
        notification.setContentText("這是個前台服務");
        Intent intent = new Intent(this, MainActivity.class);
        PendingIntent pendingIntent = PendingIntent.getActivity(this, 0, intent, 0);
        notification.setContentIntent(pendingIntent);
        startForeground(NOTIFICATION_ID, notification.build());
    }

    @Override
    public int onStartCommand(Intent intent, int flags, int startId) {
        Log.d(TAG, "onStartCommand is called");
        Toast.makeText(MyService.this, "onStartCommand is called",Toast.LENGTH_SHORT).show();
        return super.onStartCommand(intent, flags, startId);
    }

    @Override
    public void onDestroy() {
        super.onDestroy();
        Log.d(TAG, "onDestroy is called");
        Toast.makeText(MyService.this, "onDestroy is called",Toast.LENGTH_SHORT).show();
        stopForeground(true);
    }
}
這裡用到了notification,然後通過startForegroid方法來啟動一個前台服務,運行看下效果:
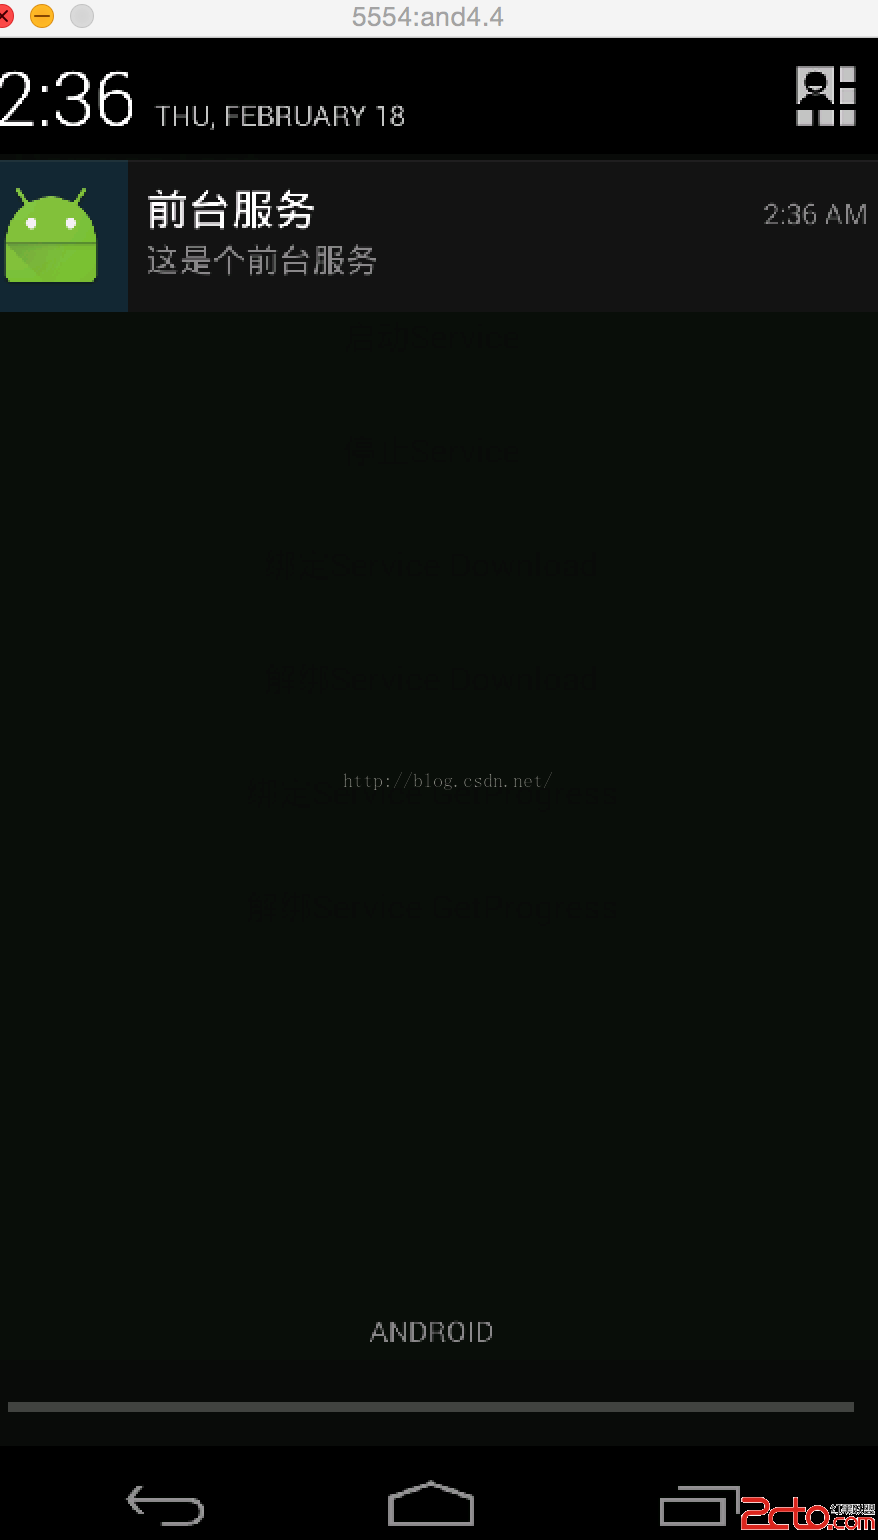
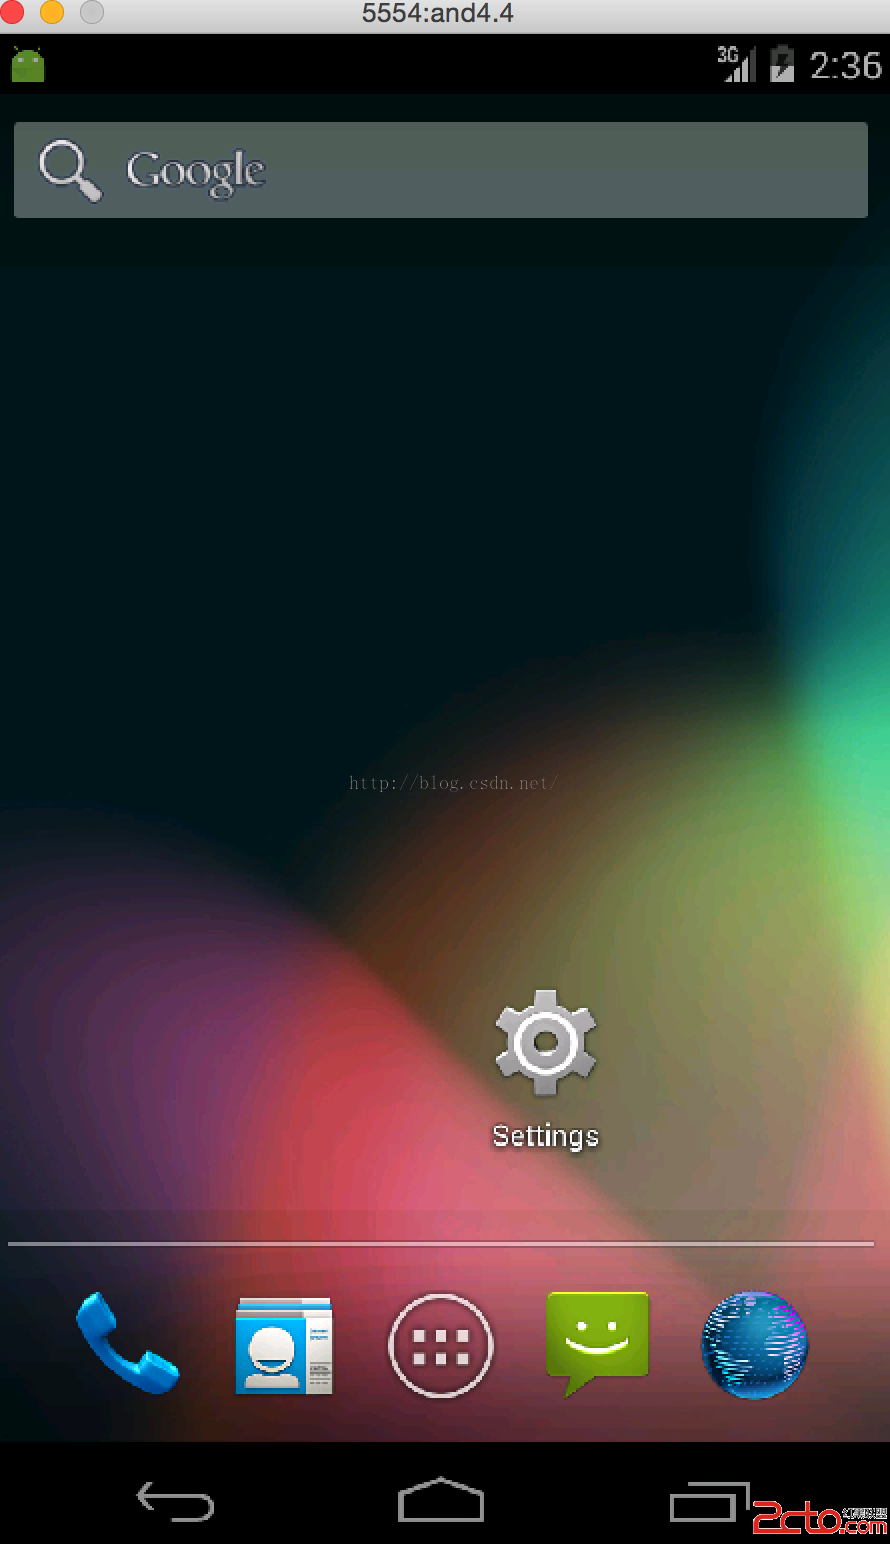
從上圖可知,當啟動了前台服務的時候,在狀態欄有個圖標顯示,當activity退出的時候,還是存在,只有當停止服務的時候才消失,那麼就可以理解了為什麼qq音樂退出了還在播放歌曲,還可以通過前台服務點擊進入app。其實就是這個道理了。
關於Service就先學習到這裡了。總算把Service學習好了。接下去繼續學習別的知識點了。
 Android junit單元測試,androidjunit
Android junit單元測試,androidjunit軟件測試的分類* 黑盒測試 * 測試邏輯業務* 白盒測試 * 測試邏輯方法 根據測試粒度 * 方法測試:fun
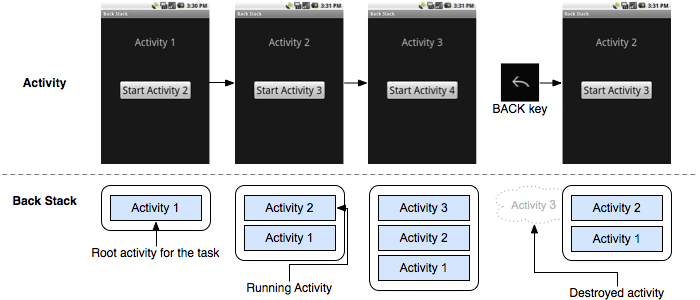 Activity的四種啟動模式,activity四種模式
Activity的四種啟動模式,activity四種模式在多Activity開發中,有可能是自己應用之間的Activity跳轉,或者夾帶其他應用的可復用Activity。
 android之文件操作——讀取assets和raw文件下的內容,androidassets
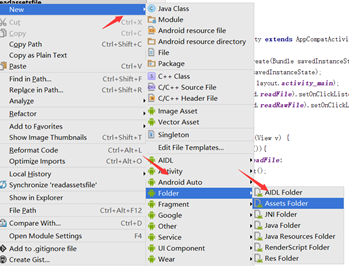
android之文件操作——讀取assets和raw文件下的內容,androidassets1.分別創建assets文件夾和res/raw文件夾:(要注意的raw文件是在
 Menu創建菜單,menu創建
Menu創建菜單,menu創建 菜單是用戶界面中最常見的元素之一,使用非常頻繁,在And