編輯:關於android開發
Android仿即刻首頁垂直滾動圖
這個效果是在即刻app上看到,覺得很不錯,遂仿之。
先說下我的實現思路(以上方的圖片滾動為例,下方的文字實現效果類似):
自定義ViewGroup
裝載兩個ImageView和一個陰影View
通過一定規律交替控制兩個ImageView和它們的marginTop,在onLayout()中實現
marginTop的具體值由屬性動畫控制,不斷調用requestLayout()
接下來依次說明
一、自定義ViewGroup
?
1
2
3
4
5
6
7
8
9
10
11
12
13
14
15
16
17
18
19
20
21
22
23
24
25
26
27
28
29
30
31
32
33
34
35
36
37
38
39
//滑動狀態
protected static final int STATUS_SMOOTHING = 0;
//停止狀態
protected static final int STATUS_STOP = 1;
//ViewGroup寬高
protected int mWidth, mHeight;
//變化的marginTop值
protected int mSmoothMarginTop;
//默認狀態
protected int mStatus = STATUS_STOP;
//滾動時間間隔
protected int mDuration = 500;
//重復次數
protected int mRepeatTimes = 0;
...
@Override
protected void onSizeChanged(int w, int h, int oldw, int oldh) {
super.onSizeChanged(w, h, oldw, oldh);
mWidth = w;
mHeight = h;
mSmoothMarginTop = -h;
initView();
}
protected abstract void initView();
...
/**
* 是否是奇數圈
*
* @return 結果
*/
protected boolean isOddCircle() {
return mRepeatTimes % 2 == 1;
}
先了解下成員變量,其中最重要的一個就是mSmoothMarginTop,相信很多人都知道一個View的marginTop可以設為負數,這個負數可以給我們帶來太多的方便。
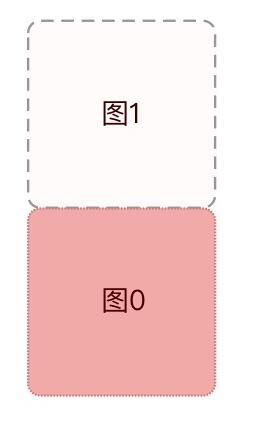
上圖的圖0就是我們展現在屏幕上的ImageView,圖1則是屏幕外marginTop為-height的ImageView,這個一定要明白,接下來才好繼續實現。
二、裝載兩個ImageView和一個陰影View
?
1
2
3
4
5
6
7
8
9
10
11
12
13
14
15
16
17
18
19
20
21
22
23
24
25
26
27
28
29
30
31
32
33
34
35
36
37
38
39
40
41
42
43
44
private List<String> mImgList = new ArrayList<>();
private ImageView[] mImgs = new ImageView[2];
private View mShadowView;
...
@Override
protected void initView() {
//如果沒有內容,則不進行初始化操作
if (mImgList.size() == 0) {
return;
}
removeAllViews();
MarginLayoutParams params = new MarginLayoutParams(mWidth, mHeight);
//兩個ImageView加載前兩張圖
for (int i = 0; i < mImgs.length; i++) {
mImgs[i] = new ImageView(getContext());
addViewInLayout(mImgs[i], -1, params, true);
Glide.with(getContext()).load(getImgPath(i)).centerCrop().into(mImgs[i]);
}
//創建陰影View
mShadowView = new View(getContext());
mShadowView.setBackgroundColor(Color.parseColor("#60000000"));
mShadowView.setAlpha(0);
addViewInLayout(mShadowView, -1, params, true);
}
...
/**
* 獲取圖片地址
*
* @param position 位置
* @return 圖片地址
*/
private String getImgPath(int position) {
position = position % mImgList.size();
return mImgList.get(position);
}
關鍵點說明:
MarginLayoutParams 為了之後方便取出margin值
addViewInLayout() 為了對requestLayout的絕對控制
getImgPath() 為了實現循環滾動
這樣一來,我們需要的View都已經創建好了。
三、通過一定規律交替控制兩個ImageView和它們的marginTop,在onLayout()中實現
?
1
2
3
4
5
6
7
8
9
10
11
12
13
14
15
16
17
18
19
20
21
22
23
24
25
26
27
28
29
30
31
32
33
34
35
36
37
38
39
40
41
@Override
protected void onLayout(boolean changed, int l, int t, int r, int b) {
int cCount = getChildCount();
MarginLayoutParams cParams;
for (int i = 0; i < cCount; i++) {
View childView = getChildAt(i);
cParams = (MarginLayoutParams) childView.getLayoutParams();
int cl = 0, ct = 0, cr, cb;
if (isOddCircle()) {
if (i == 1) {
cl = cParams.leftMargin;
ct = mSmoothMarginTop + mHeight;
} else if (i == 0) {
cl = cParams.leftMargin;
ct = mSmoothMarginTop;
}
} else {
if (i == 0) {
cl = cParams.leftMargin;
ct = mSmoothMarginTop + mHeight;
} else if (i == 1) {
cl = cParams.leftMargin;
ct = mSmoothMarginTop;
}
}
//控制shadowView
if (i == 2) {
cl = cParams.leftMargin;
ct = mSmoothMarginTop + mHeight;
}
cr = cl + mWidth;
cb = ct + mHeight;
childView.layout(cl, ct, cr, cb);
}
}
以上實現的就是不斷的替換圖1和圖2誰上誰下,陰影和下方的圖保持同步。
四、marginTop的具體值由屬性動畫控制,不斷調用requestLayout()
先看基類ViewGroup
?
1
2
3
4
5
6
7
8
9
10
11
12
13
14
15
16
17
18
19
20
21
22
23
24
25
26
27
28
29
30
31
32
33
34
35
36
37
38
39
40
41
42
43
44
45
46
47
48
49
50
51
/**
* 開啟滑動
*
*/
public void startSmooth() {
if (mStatus != STATUS_STOP) {
return;
}
ValueAnimator animator = ValueAnimator.ofFloat(-mHeight, 0);
animator.setDuration(mDuration);
animator.setInterpolator(new AccelerateDecelerateInterpolator());
animator.addUpdateListener(new ValueAnimator.AnimatorUpdateListener() {
@Override
public void onAnimationUpdate(ValueAnimator animation) {
float marginTop = (float) animation.getAnimatedValue();
mSmoothMarginTop = (int) marginTop;
if (marginTop == 0) {
postDelayed(new Runnable() {
@Override
public void run() {
mRepeatTimes++;
mSmoothMarginTop = -mHeight;
doAnimFinish();
mStatus = STATUS_STOP;
}
}, 50);
} else {
doAnim();
}
}
});
animator.start();
mStatus = STATUS_SMOOTHING;
}
//動畫結束
protected abstract void doAnimFinish();
//動畫進行時
protected abstract void doAnim();
關鍵點說明:
屬性動畫控制著mSmoothMarginTop在[-mHeight, 0]中變化
每完成一圈,mRepeatTimes自增1
再來看看Gallery實現類
?
1
2
3
4
5
6
7
8
9
10
11
12
13
14
15
@Override
protected void doAnimFinish() {
if (isOddCircle()) {
Glide.with(getContext()).load(getImgPath(mRepeatTimes + 1)).centerCrop().into(mImgs[0]);
} else {
Glide.with(getContext()).load(getImgPath(mRepeatTimes + 1)).centerCrop().into(mImgs[1]);
}
mShadowView.setAlpha(0);
}
@Override
protected void doAnim() {
mShadowView.setAlpha(((1 - (-mSmoothMarginTop) / (float) mHeight)));
requestLayout();
}
關鍵點說明:
通過mSmoothMarginTop與mHeight的比值控制陰影View的透明度
每次動畫完成時,下方的圖(此時下方的圖已經超出屏幕了,而上方圖顯示在屏幕內)需要加載第三張圖,使用getImgPath()取出
pic1

以上就是圖片的滾動實現,文字的滾動90%是一樣的,有點區別的就是需要文字需要控制下垂直居中,我就不贅述了。
 Android學習指南之二十五:Android動畫的實現 下
本節講解使用SurfaceView組件繪制動畫的方法。SurfaceView類
 刷新實現原理,刷新原理
刷新實現原理,刷新原理 package com.zzw.testrefresh; import java.util.ArrayList; import
 高仿餓了麼應用項目源碼,高仿餓項目源碼
高仿餓了麼應用項目源碼,高仿餓項目源碼 高仿餓了麼界面效果,動畫效果還是不錯滴,分享給大家一下。 源碼下載:http://code.662p.com/list/11
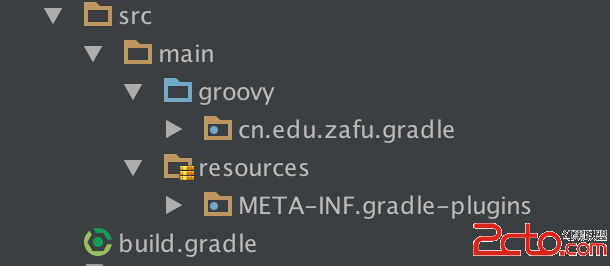 如何使用Android Studio開發Gradle插件
如何使用Android Studio開發Gradle插件 緣由 首先說明一下為什麼會有這篇文章。前段時間,插件化以及熱修復的技術很熱,Nuwa熱修復的工具NuwaGr
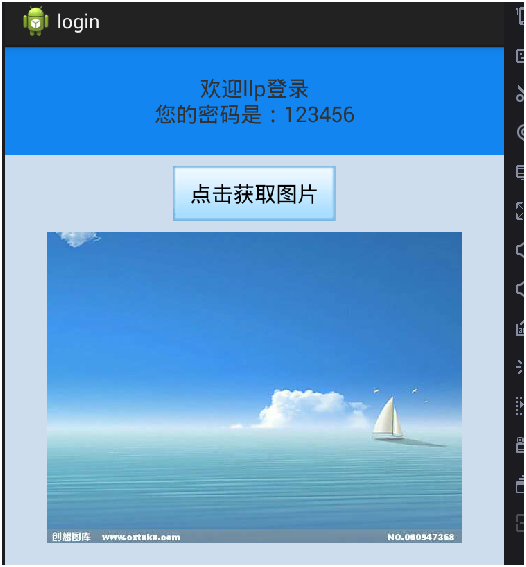 簡單登錄案例(SharedPreferences存儲賬戶信息)&聯網請求圖片並下載到SD卡(文件外部存儲),sharedpreferences
簡單登錄案例(SharedPreferences存儲賬戶信息)&