編輯:關於android開發
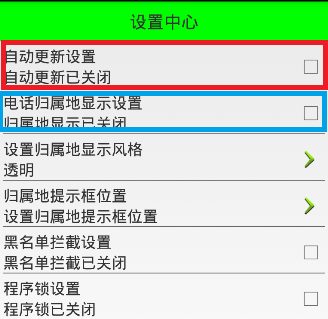
在前面的文章中,已經實現了“設置中心”第一欄的功能以及布局
本文地址:http://www.cnblogs.com/wuyudong/p/5936016.html,轉載請注明出處。
接下來實現其他欄的布局和功能,由於它們之間的功能和布局類似,只是屬性名稱不同。所以本文在自定義控件的基礎上實現自定義屬性
首先參考標准控件的源碼,這裡選擇TextView
源碼路徑為:D:\adt-bundle-windows-x86_64_20140101\sdk\platforms\android-18\data\res\values
打開本文件夾下的attrs.xml文件,找到下面的代碼:
    <declare-styleable name="TextView">
        <!-- Determines the minimum type that getText() will return.
             The default is "normal".
             Note that EditText and LogTextBox always return Editable,
             even if you specify something less powerful here. -->
        <attr name="bufferType">
            <!-- Can return any CharSequence, possibly a
             Spanned one if the source text was Spanned. -->
            <enum name="normal" value="0" />
            <!-- Can only return Spannable. -->
            <enum name="spannable" value="1" />
            <!-- Can only return Spannable and Editable. -->
            <enum name="editable" value="2" />
        </attr>
        <!-- Text to display. -->
        <attr name="text" format="string" localization="suggested" />
        <!-- Hint text to display when the text is empty. -->
        <attr name="hint" format="string" />
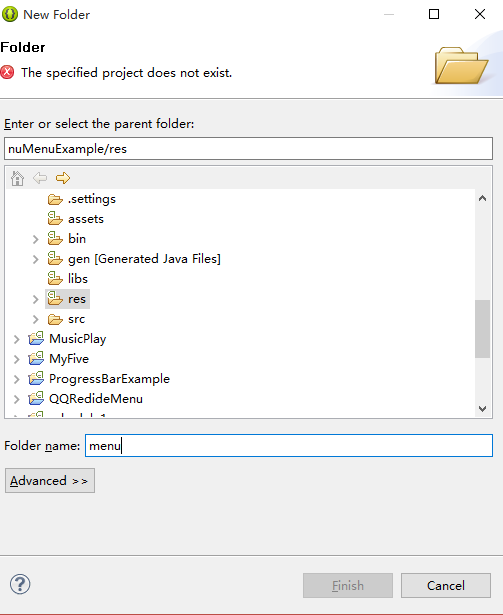
於是我們也可以模仿關鍵節點,寫出自定義屬性,工程res\values文件夾下新建attrs.xml文件,添加代碼如下:
<?xml version="1.0" encoding="utf-8"?>
<resources>
    <declare-styleable name="com.wuyudong.mobilesafe.view.SettingItemView">
        <attr name="destitle" format="string"/>
        <attr name="desoff" format="string"/>
        <attr name="deson" format="string"/>
    </declare-styleable>
</resources>
接下來定義命名空間,也是參考android標准來寫
<?xml version="1.0" encoding="utf-8"?>
<LinearLayout xmlns:android="http://schemas.android.com/apk/res/android"
……
mobilesafe替換掉原有android
com.wuyudong.mobilesafe必須這樣編寫,替換掉了android,代表當前應用自定義屬性
xmlns:mobilesafe="http://schemas.android.com/apk/res/com.wuyudong.mobilesafe"
修改後的代碼如下:
    <com.wuyudong.mobilesafe.view.SettingItemView
        xmlns:mobilesafe="http://schemas.android.com/apk/res/com.wuyudong.mobilesafe"
        android:id="@+id/siv_update"
        android:layout_width="match_parent"
        android:layout_height="wrap_content"
        mobilesafe:destitle="自動更新設置"
        mobilesafe:desoff="自動更新已關閉"
        mobilesafe:deson="自動更新已開啟" >
    </com.wuyudong.mobilesafe.view.SettingItemView>
自定義屬性值已經搞定,現在是SettingItemView類如何獲取這些值?
在SettingItemView類的構造函數中調用initAttrs函數,然後通過initAttrs函數實現屬性的返回。先通過一些小的實踐來熟悉相關的API
   /**
     * 返回屬性集合中自定義屬性的屬性值
     * @param attrs  構造方法中維護好的屬性集合
     */
    private void initAttrs(AttributeSet attrs) {
        //獲取屬性的總個數
        Log.i(tag,"attrs.getAttributeCount(): " + attrs.getAttributeCount());
        //獲取屬性名稱以及屬性值
        for (int i = 0; i < attrs.getAttributeCount(); i++) {
            Log.i(tag, "name = " + attrs.getAttributeName(i));
            Log.i(tag, "value = " + attrs.getAttributeValue(i));
            Log.i(tag, "==================分割線======================");
        }
    }
運行項目後在Logcat中打印下面的日志信息:
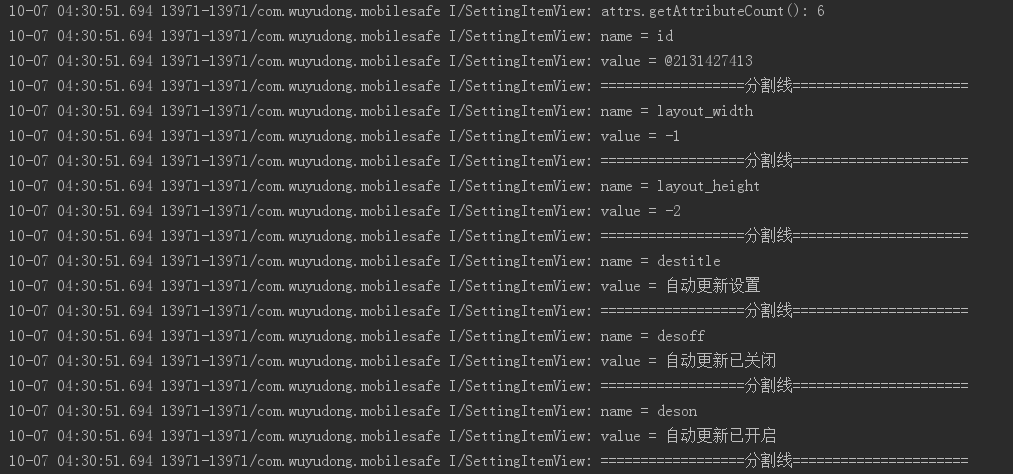
解釋一下上面的部分代碼:
value = @2131427413對應的十六進制值為:7F0B0055,其實就是對應的R文件中
public static final int siv_update=0x7f0b0055;
其他的都很簡單
接著我們使用其他的API來進行獲取屬性的值
private static final String NAMESPACE = "http://schemas.android.com/apk/res/com.wuyudong.mobilesafe";
...........

 /**
     * 返回屬性集合中自定義屬性的屬性值
     * @param attrs  構造方法中維護好的屬性集合
     */
    private void initAttrs(AttributeSet attrs) {
     /*   //獲取屬性的總個數
        Log.i(tag,"attrs.getAttributeCount(): "+attrs.getAttributeCount());
        //獲取屬性名稱以及屬性值
        for (int i = 0; i < attrs.getAttributeCount(); i++) {
            Log.i(tag, "name = " + attrs.getAttributeName(i));
            Log.i(tag, "value = " + attrs.getAttributeValue(i));
            Log.i(tag, "==================分割線======================");
        }*/
        String destitle = attrs.getAttributeValue(NAMESPACE, "destitle");
        String desoff = attrs.getAttributeValue(NAMESPACE, "desoff");
        String deson = attrs.getAttributeValue(NAMESPACE, "deson");
        Log.i(tag, destitle);
        Log.i(tag, desoff);
        Log.i(tag, deson);
    }
運行項目後在Logcat中打印下面的日志信息:

說明已經成功獲取所設置的屬性值
這樣就可以復用代碼實現第二欄的電話歸屬地的布局
    <com.wuyudong.mobilesafe.view.SettingItemView
        xmlns:mobilesafe="http://schemas.android.com/apk/res/com.wuyudong.mobilesafe"
        android:id="@+id/siv_update"
        android:layout_width="match_parent"
        android:layout_height="wrap_content"
        mobilesafe:destitle="自動更新設置"
        mobilesafe:desoff="自動更新已關閉"
        mobilesafe:deson="自動更新已開啟" >
    </com.wuyudong.mobilesafe.view.SettingItemView>

    <com.wuyudong.mobilesafe.view.SettingItemView
        xmlns:mobilesafe="http://schemas.android.com/apk/res/com.wuyudong.mobilesafe"
        android:layout_width="match_parent"
        android:layout_height="wrap_content"
        mobilesafe:destitle="電話歸屬地的顯示設置"
        mobilesafe:desoff="歸屬地的顯示已關閉"
        mobilesafe:deson="歸屬地的顯示已開啟" >
    </com.wuyudong.mobilesafe.view.SettingItemView>
 材料設計---Design,設計---design
材料設計---Design,設計---design 效果: main_activity.xml <?xml version=1.0 encoding
 android開發我的新浪微博客戶端-載入頁面UI篇(1.1),androidui
android開發我的新浪微博客戶端-載入頁面UI篇(1.1),androidui本軟件設定用戶第一個接觸到的功能就是頁面載入等待功能,這個功能對使用者來說就是一個持續1
 Activity啟動模式之SingleTop,activitysingletop
Activity啟動模式之SingleTop,activitysingletop 當活動的啟動模式指定為singleTop,在啟動活動時如果發現返回棧的棧頂已經是該活動
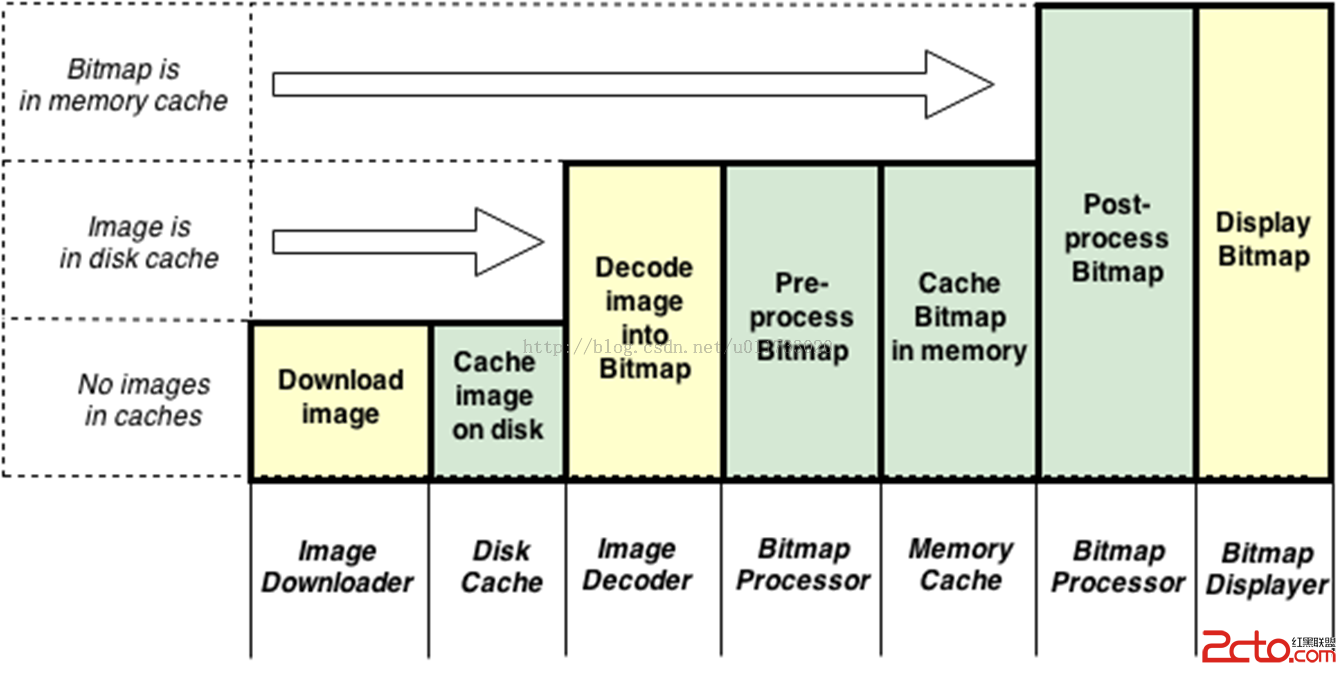 Android-Universal-Image-Loader (圖片異步加載緩存庫)的源碼解讀
Android-Universal-Image-Loader (圖片異步加載緩存庫)的源碼解讀 前言: 在Android開發中,對於圖片的加載可以說是個老生常談的問題了,