編輯:關於android開發
和Android一樣,React的組件也有對應的生命周期。Android React Native組件的生命周期可以總的概括為下面這一張圖。

可以把組件生命周期大致分為三個階段:
第一階段:是組件第一次繪制階段,如圖中的上面虛線框內,在這裡完成了組件的加載和初始化; 第二階段:是組件在運行和交互階段,如圖中左下角虛線框,這個階段組件可以處理用戶交互,或者接收事件更新界面; 第三階段:是組件卸載消亡的階段,如圖中右下角的虛線框中,這裡做一些組件的清理工作。生命周期回調函數總共有10個。
object getDefaultPrZ喎?http://www.Bkjia.com/kf/ware/vc/" target="_blank" class="keylink">vcHMoKTwvc3Ryb25nPjxiciAvPg0K1NrX6bz+wOC0tL2otcTKsbrytffTw9K7tM6jrMi7uvO3tbvY1rWxu7u6tObPwsC0oaPIq77WtffTw9K7tM6jrMv509DKtcD9ubLP7aGjPC9wPg0KPHA+PHN0cm9uZz5vYmplY3QgZ2V0SW5pdGlhbFN0YXRlKCk8L3N0cm9uZz48YnIgLz4NCtTa1+m8/rnS1NjWrsewtffTw9K7tM6ho7e1u9jWtb2ru+HX986qIHRoaXMuc3RhdGUgtcSz9cq81rWhozwvcD4NCjxwPjxzdHJvbmc+Y29tcG9uZW50V2lsbE1vdW50ICgpPC9zdHJvbmc+PGJyIC8+DQrU2rP1yry7r+TWyL7WtNDQ1q7HsMGiv8y199PDPC9wPg0KPHA+PHN0cm9uZz5SZWFjdENvbXBvbmVudCByZW5kZXIoKTwvc3Ryb25nPjxiciAvPg0K1eK49re9t6jKx7HY0Ou1xKOsttTK0828vfjQ0OTWyL6jrMTj0rK/ydLUt7W72CBudWxsILvy1d8gZmFsc2UgwLSx7cP3srvQ6NKq5NbIvsjOus62q873PC9wPg0KPHA+PHN0cm9uZz5jb21wb25lbnREaWRNb3VudCgpPC9zdHJvbmc+PGJyIC8+DQrU2rP1yry7r+TWyL7WtNDQ1q6688Giv8y199PD0ru0zjwvcD4NCjxwPjxzdHJvbmc+Y29tcG9uZW50V2lsbFJlY2VpdmVQcm9wcyhvYmplY3QgbmV4dFByb3BzKTwvc3Ryb25nPjxiciAvPg0K1NrX6bz+vdPK1bW90MK1xCBwcm9wcyC1xMqxuvK199PDo6zSsr7Nyse4uNfpvP7Q3rjE19PX6bz+tcTK9NDUyrG0pbeioaPU2rP1yry7r+TWyL61xMqxuvKjrLjDt723qLK7u+G199PDoaO/ydLU08PT2rj80MIgc3RhdGUgwLTP7NOmxLO49iBwcm9wILXEuMSx5KGjPC9wPg0KPHA+PHN0cm9uZz5ib29sZWFuIHNob3VsZENvbXBvbmVudFVwZGF0ZShvYmplY3QgbmV4dFByb3BzLCBvYmplY3QgbmV4dFN0YXRlKTwvc3Ryb25nPjxiciAvPg0K1Nq908rVtb3QwrXEIHByb3BzILvy1d8gc3RhdGWjrL2r0qrk1si+1q7HsLX308MsyOe5+8i3tqjQwrXEIHByb3BzILrNIHN0YXRlILK7u+G1vNbC1+m8/rj80MKjrNTytMu0ptOmuMMgt7W72CBmYWxzZaGjt7W72HRydWW9q7340NDk1si+oaM8L3A+DQo8cD48c3Ryb25nPmNvbXBvbmVudFdpbGxVcGRhdGUob2JqZWN0IG5leHRQcm9wcywgb2JqZWN0IG5leHRTdGF0ZSk8L3N0cm9uZz48YnIgLz4NCtTavdPK1bW90MK1xCBwcm9wcyC78tXfIHN0YXRlILKix9JzaG91bGRDb21wb25lbnRVcGRhdGW3tbvYdHJ1ZcqxtffTwzwvcD4NCjxwPjxzdHJvbmc+Y29tcG9uZW50RGlkVXBkYXRlKG9iamVjdCBwcmV2UHJvcHMsIG9iamVjdCBwcmV2U3RhdGUpPC9zdHJvbmc+PGJyIC8+DQrU2tfpvP61xLj80MLS0b6tzayyvbW9IERPTSDW0NauuvPBor/Msbu199PDPC9wPg0KPHA+PHN0cm9uZz5jb21wb25lbnRXaWxsVW5tb3VudCgpPC9zdHJvbmc+PGJyIC8+DQrU2tfpvP600yBET00g1tDSxrP9tcTKsbrywaK/zLG7tffTw6Gj1Nq4w7e9t6jW0Na00NDIzrrOsdjSqrXEx+XA7aOsscjI587e0Ke1xLaoyrHG96Osu/LV38fls/3U2iBjb21wb25lbnREaWRNb3VudCDW0LS0vai1xCBET00g1KrL2KGjPC9wPg0KPHA+z8LD5sz5s/ay4srUtPrC66GjPC9wPg0KPHByZSBjbGFzcz0="brush:java;">
最後的輸出如下,我們在componentDidMount中調用了loadDataToSetState函數,該函數中通過了setState函數對state進行了設置,這時候就會回調shouldComponentUpdate,如果返回true,則會繼續調用componentWillUpdate,render,conponentDidUpdate,之後按返回鍵退出應用,則會進行銷毀操作,回調componentWillUnmount 而關於componentWillReceiveProps函數的觸發是在props屬性改變之後才會觸發,這個比較復雜,什麼情況下會改變呢,也就是父組件改變子組件的屬性的時候。 首先我們定義一個子組件 再定義一個父組件,在父組件的渲染函數中使用子組件,並為子組件設置name屬性,即 而在父組件中,getInitialState函數中返回父組件的state值 當組件加載完畢後,通過setState函數設置父組件的state 這時候會觸發父組件的render函數重新渲染,而render函數中會對子組件的name重新賦值,也就是setState中的值。 父組件的代碼如下。 在界面中,我們直接使用父組件作為返回。 這時候,由於子組件的屬性發生了變換,就會回調componentWillReceiveProps生命周期函數,整個生命周期函數如下(我們在componentWillReceiveProps函數中打印了該屬性所在的對象), 而關於調試,React-Native官網提供了一個Chrome下調試的插件,見Chrome Developer Tools ,安裝了該插件後,在手機上的開發者選項中開啟debug js,就可以在chrome中看到控制台輸出的信息以及js的報錯信息了。/**
* Sample React Native App
* https://github.com/facebook/react-native
*/
'use strict';
var React = require('react-native');
var {
AppRegistry,
StyleSheet,
View,
Text
} = React;
var AwesomeProject = React.createClass({
//在組件類創建的時候調用一次,然後返回值被緩存下來。
getDefaultProps:function(){
console.log("getDefaultProps");
return null;
},
//初始化狀態,在組件掛載之前調用一次。返回值將會作為 this.state 的初始值。
getInitialState:function(){
console.log("getInitialState");
return null;
//必須有返回值,可以是NULL或者一個對象。
},
//組件將要被渲染
componentWillMount:function(){
console.log("componentWillmount");
},
//渲染視圖
render:function(){
console.log("render");
return (
getDefaultProps
getInitialState
componentWillmount
render
componentDidMount
loadDataToSetState
shouldComponentUpdate
componentWillUpdate
render
conponentDidUpdate
componentWillUnmount
var Name =React.createClass({
getDefaultProps:function(){
console.log("Name getDefaultProps");
return null;
},
getInitialState:function(){
console.log("Name getInitialState");
return null;
},
componentWillMount:function(){
console.log("Name componentWillmount");
},
render:function(){
console.log("Name render");
return (
return {name:"a"};
this.setState({
            name:"lizhangqu"
        });
var Parent = React.createClass({
render:function(){
return (
var AwesomeProject = React.createClass({
render: function() {
return (
Name getDefaultProps
Name getInitialState
Name componentWillmount
Name render
Name componentDidMount
Name componentWillReceiveProps
Object {name: "lizhangqu"}
Name shouldComponentUpdate
Name componentWillUpdate
Name render
Name conponentDidUpdate
Name componentWillUnmount
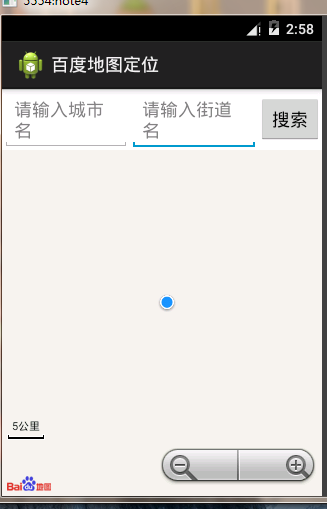 百度地圖可視化定位效果,可以輸入目的地定位。,可視化目的地
百度地圖可視化定位效果,可以輸入目的地定位。,可視化目的地登錄百度開發者帳號後下載sdk導入自己的工程中。 代碼如下: 1 package com.lixu.bai
 android 史上最簡單易懂的跨進程通訊(Messenger)!,androidmessenger
android 史上最簡單易懂的跨進程通訊(Messenger)!,androidmessenger不需要AIDL也不需要復雜的ContentProvider,也不需要S
 Android百度地圖API集成一《基礎地圖》,集成百度地圖api
Android百度地圖API集成一《基礎地圖》,集成百度地圖api 在使用百度地圖API集成百度地圖時,碰到了一些坑,特開此貼記錄。。。 直接開始代碼 1.新建
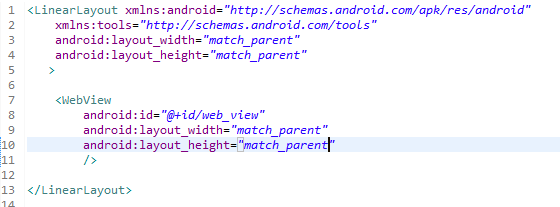 WebView的使用,WebView使用
WebView的使用,WebView使用1.首先修改activity.xml中的代碼: 2.然後MainActivity中的代碼: 3.最後設置權限: <use