編輯:高級開發
以下兩個重要的步驟,在使用廣播接收器工作系統及廣播意圖:
創建廣播接收器
注冊廣播接收器
還有一個附加的步驟,要實現自定義的意圖,那麼將必須創建並廣播意圖。
實現廣播接收機BroadcastReceiver類的一個子類並重寫 onReceive()方法,其中每個收到消息作為一個 Intent 對象參數。
public class MyReceiver extends BroadcastReceiver { @Override public void onReceive(Context context, Intent intent) { Toast.makeText(context, "Intent Detected.", Toast.LENGTH_LONG).show(); } }
應用程序偵聽特定的廣播意圖是通過在 AndroidManifest.xml 文件中注冊一個廣播接收器。寄存器 MyReceiver 系統生成事件 ACTION_BOOT_COMPLETED,在Android系統完成了啟動過程後,這是由系統啟動執行的。
<application android:icon="@drawable/ic_launcher" android:label="@string/app_name" android:theme="@style/AppTheme" > <receiver android:name="MyReceiver"> <intent-filter> <action android:name="android.intent.action.BOOT_COMPLETED"> </action> </intent-filter> </receiver> </application>
當 Android 設備啟動,它會被截獲 BroadcastReceiver 的 MyReceiverand 內實現邏輯,首先onReceive() 將被執行。
有幾個系統產生的事件定義在最後意圖類的靜態字段。下表列出了一些重要的系統事件。
如果希望應用程序本身生成並發送自定義意圖,那麼必須使用sendBroadcast()方法裡面活動類來創建和發送這些的意圖。使用(意向)sendStickyBroadcast() 方法意圖是粘粘的,這意味著所發送的意圖保持周廣圍播出後完成。
public void broadcastIntent(View view) { Intent intent = new Intent(); intent.setAction("com.yiibai.CUSTOM_INTENT"); sendBroadcast(intent); }
意圖 com.yiibai.CUSTOM_INTENT也可以以注冊類似的方式,因為我們產生注冊系統的意圖。
<application android:icon="@drawable/ic_launcher" android:label="@string/app_name" android:theme="@style/AppTheme" > <receiver android:name="MyReceiver"> <intent-filter> <action android:name="com.yiibai.CUSTOM_INTENT"> </action> </intent-filter> </receiver> </application>
這個例子將解釋如何創建BroadcastReceiver 攔截自定義意圖。熟悉自定義意圖後,就可以編寫應用程序來攔截系統生成的意圖。現在按照下面的步驟來修改前面創建的Hello World范例中 Android 應用程序:
以下是修改主要活動文件 src/com.example.helloworld/MainActivity.java 後的內容。這個文件包括每個生命周期方法。這裡添加了 broadcastIntent() 方法來廣播自定義的意圖。
package com.example.helloworld; import android.os.Bundle; import android.app.Activity; import android.view.Menu; import android.content.Intent; import android.view.View; public class MainActivity extends Activity { @Override public void onCreate(Bundle savedInstanceState) { super.onCreate(savedInstanceState); setContentView(R.layout.activity_main); } @Override public boolean onCreateOptionsMenu(Menu menu) { getMenuInflater().inflate(R.menu.activity_main, menu); return true; } // broadcast a custom intent. public void broadcastIntent(View view) { Intent intent = new Intent(); intent.setAction("com.yiibai.CUSTOM_INTENT"); sendBroadcast(intent); } }
下面是 src/com.example.helloworld/MyReceiver.java 的內容:
package com.example.helloworld; import android.content.BroadcastReceiver; import android.content.Context; import android.content.Intent; import android.widget.Toast; public class MyReceiver extends BroadcastReceiver { @Override public void onReceive(Context context, Intent intent) { Toast.makeText(context, "Intent Detected.", Toast.LENGTH_LONG).show(); } }
下面將 AndroidManifest.xml 文件的內容修改。在這裡添加 <service.../>標簽,包括服務:
<manifest xmlns:android="http://schemas.android.com/apk/res/android" package="com.example.helloworld" android:versionCode="1" android:versionName="1.0" > <uses-sdk android:minSdkVersion="8" android:targetSdkVersion="15" /> <application android:icon="@drawable/ic_launcher" android:label="@string/app_name" android:theme="@style/AppTheme" > <activity android:name=".MainActivity" android:label="@string/title_activity_main" > <intent-filter> <action android:name="android.intent.action.MAIN" /> <category android:name="android.intent.category.LAUNCHER"/> </intent-filter> </activity> <receiver android:name="MyReceiver"> <intent-filter> <action android:name="com.yiibai.CUSTOM_INTENT"> </action> </intent-filter> </receiver> </application> </manifest>
以下將 res/layout/activity_main.xml 文件的內容包括一個按鈕來廣播自定義意圖:
<LinearLayout xmlns:android="http://schemas.android.com/apk/res/android" android:layout_width="fill_parent" android:layout_height="fill_parent" android:orientation="vertical" > <Button android:id="@+id/btnStartService" android:layout_width="fill_parent" android:layout_height="wrap_content" android:text="@string/broadcast_intent" android:onClick="broadcastIntent"/> </LinearLayout>下面將在 res/values/strings.xml 中定義兩個新的常量的內容:
<resources> <string name="app_name">HelloWorld</string> <string name="hello_world">Hello world!</string> <string name="menu_settings">Settings</string> <string name="title_activity_main">MainActivity</string> <string name="broadcast_intent">Broadcast Intent</string> </resources>
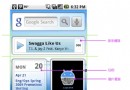
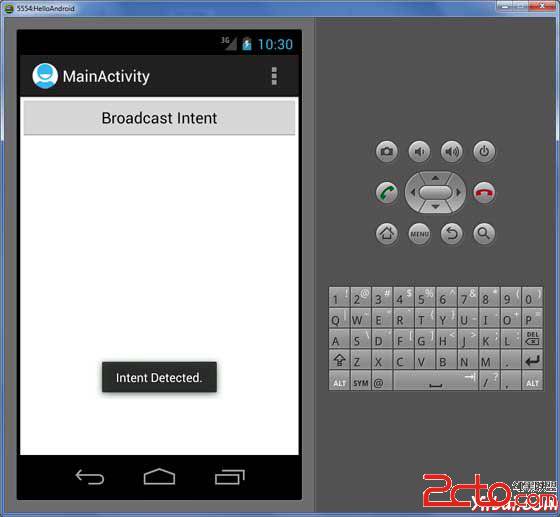
現在運行修改後的 Hello World!應用程序。假設創建了AVD並設置了環境。要從Eclipse運行的應用程序,首先打開一個項目的活動文件,從工具欄單擊“run”  圖標。 Eclipse AVD安裝的應用程序,並啟動它,如果設置和應用都沒有問題,將會顯示以下模擬器窗口:

現在廣播自定義的意圖,點擊上廣播意圖按鈕,這將廣播自定義在 “com.yiibai.CUSTOM_INTENT” 注冊BroadcastReceiver 的意圖將被 MyReceiver攔截。 實現的邏輯如下出現底部的模擬器:
可以嘗試執行其他 BroadcastReceiver 攔截系統的意圖,如系統啟動,更改日期,電池電量不足等。
 深度說明強大的Android手機系統
android手機系統的一個重要特點就是它的應用框架和GUI庫都用Java語言實現,使用目前開發界使用最廣泛的開發語言,一定會使android手機系統在性能方面比其他的
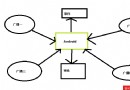 圖解 Android 廣播機制(1)
從現實生活中理解廣播機制 一聽到廣播我們第一感覺就會聯想到小時候村裡面的廣播,每逢村裡有什麼活動都是通過廣播發送的。收聽收音機也是一種廣播,在收音機中有很多個廣播電台
 如何選購使用Android應用手機?
Google推出的android應用手機通過與運營商、設備制造商、開發商和其他有關各方結成深層次的合作伙伴關系,但同顯而易見的,是手機具有便攜性,24小時隨身相伴性和及
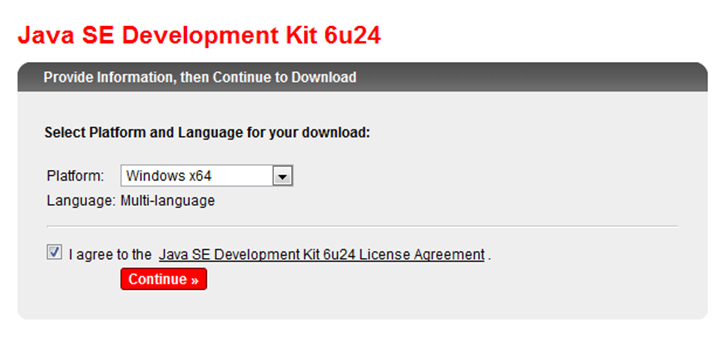 Win7 配置Android開發環境(1)
一、安裝 JDK 下載JDK最新版本,下載地址如下: http://www.Oracle.com/technetwork/java/Javase/downloads