編輯:初級開發
16.CustomVIEw1:

此布局用了自定義的VIEw(com.example.android.apis.view.LabelVIEw)
1: <LinearLayout xmlns:android="http://schemas.android.com/apk/res/android" 2: XMLns:app="http://schemas.android.com/apk/res/com.example.android.apis" 3: android:orientation="vertical" 4: android:layout_width="fill_parent" 5: android:layout_height="wrap_content"> 6: 7: <com.example.android.apis.view.LabelView 8: android:background="@drawable/red" 9: android:layout_width="fill_parent"10: android:layout_height="wrap_content" 11: app:text="Red"/>12: 13: <com.example.android.apis.view.LabelView14: android:background="@drawable/blue"15: android:layout_width="fill_parent"16: android:layout_height="wrap_content" 17: app:text="Blue" app:textSize="20dp"/>18: 19: <com.example.android.apis.view.LabelVIEw20: android:background="@drawable/green"21: android:layout_width="fill_parent"22: android:layout_height="wrap_content" 23: app:text="Green" app:textColor="#ffffffff" />24: 25: </LinearLayout>
17.DateWidgets1 時間控件

18.ExpandableList1 (沒看)
用到android.widget.ExpandableListAdapter;

19.ExpandableList3(沒看)

20.Focus1

1: WebView webView = (WebView) findViewById(R.id.rssWebView);2: webVIEw3: .loadData(4: "<html><body>Can I focus?<br /><a href=\"#\">No I cannot!</a>.</body></html>",5: "text/Html", "utf-8");
21.Gallery1
長按圖片會彈出一個菜單,菜單選項被選後,作調用Toast

1: public class Gallery1 extends Activity { 2: 3: @Override 4: public void onCreate(Bundle savedInstanceState) { 5: super.onCreate(savedInstanceState); 6: setContentView(R.layout.gallery_1); 7: 8: // Reference the Gallery view 9: Gallery g = (Gallery) findViewById(R.id.gallery);10: // Set the adapter to our custom adapter (below)11: g.setAdapter(new ImageAdapter(this));12: 13: // Set a item click listener, and just Toast the clicked position14: g.setOnItemClickListener(new OnItemClickListener() {15: public void onItemClick(AdapterView parent, View v, int position, long id) {16: Toast.makeText(Gallery1.this, "" + position, Toast.LENGTH_SHORT).show();17: }18: });19: 20: // We also want to show context menu for longpressed items in the gallery21: registerForContextMenu(g);22: }23: 24: @Override25: public void onCreateContextMenu(ContextMenu menu, VIEw v,26: ContextMenuInfo menuInfo) {27: menu.add(R.string.gallery_2_text);28: }29: 30: @Override31: public boolean onContextItemSelected(MenuItem item) {32: AdapterContextMenuInfo info = (AdapterContextMenuInfo) item.getMenuInfo();33: Toast.makeText(this, "Longpress: " + info.position, Toast.LENGTH_SHORT)34: .show();35: return true;36: }37: 38: public class ImageAdapter extends BaseAdapter {39: int mGalleryItemBackground;40: 41: public ImageAdapter(Context c) {42: mContext = c;43: // See res/values/attrs.XML for the <declare-styleable> that defines44: // Gallery1.45: TypedArray a = obtainStyledAttributes(R.styleable.Gallery1);46: mGalleryItemBackground = a.getResourceId(47: R.styleable.Gallery1_android_galleryItemBackground, 0);48: a.recycle();49: }50: 51: public int getCount() {52: return mImageIds.length;53: }54: 55: public Object getItem(int position) {56: return position;57: }58: 59: public long getItemId(int position) {60: return position;61: }62: 63: public View getView(int position, View convertView, ViewGroup parent) {64: ImageView i = new ImageView(mContext);65: 66: i.setImageResource(mImageIds[position]);67: i.setScaleType(ImageVIEw.ScaleType.FIT_XY);68: i.setLayoutParams(new Gallery.LayoutParams(136, 88));69: 70: // The preferred Gallery item background71: i.setBackgroundResource(mGalleryItemBackground);72: 73: return i;74: }75: 76: private Context mContext;77: 78: private Integer[] mImageIds = { R.drawable.gallery_photo_1,79: R.drawable.gallery_photo_2, R.drawable.gallery_photo_3,80: R.drawable.gallery_photo_4, R.drawable.gallery_photo_5,81: R.drawable.gallery_photo_6, R.drawable.gallery_photo_7,82: R.drawable.gallery_photo_8 };83: }84: 85: }
22.Grid1

布局:
1: <GridVIEw XMLns:android="http://schemas.android.com/apk/res/android" android:id="@+id/myGrid" 2: android:layout_width="fill_parent" 3: android:layout_height="fill_parent" 4: android:padding="10dp" 5: android:verticalSpacing="10dp" 6: 7: android:horizontalSpacing="10dp" 8: android:numColumns="auto_fit" 9: android:columnWidth="60dp"10: android:CMode="columnWidth"11: 12: android:gravity="center"13: />
23.Grid2

1: setContentView(R.layout.grid_2);2: 3: GridView g = (GridView) findViewById(R.id.myGrid);4: g.setAdapter(new ImageAdapter(this));ImageAdapter的getVIEw方法:
1: public View getView(int position, View convertView, ViewGroup parent) { 2: ImageView imageView; 3: if (convertView == null) { 4: imageView = new ImageView(mContext); 5: imageView.setLayoutParams(new GridView.LayoutParams(45, 45)); 6: imageView.setAdjustViewBounds(false); 7: imageView.setScaleType(ImageView.ScaleType.CENTER_CROP); 8: imageView.setPadding(8, 8, 8, 8); 9: } else {10: imageView = (ImageView) convertView;11: }12: 13: imageView.setImageResource(mThumbIds[position]);14: 15: return imageVIEw;16: }
24.ImageSwitcher1

1: public class ImageSwitcher1 extends Activity implements 2: AdapterView.OnItemSelectedListener, ViewSwitcher.ViewFactory {//實現ViewFactory 3: 4: @Override 5: public void onCreate(Bundle savedInstanceState) { 6: super.onCreate(savedInstanceState); 7: requestWindowFeature(Window.FEATURE_NO_TITLE); 8: 9: setContentView(R.layout.image_switcher_1);10: 11: mSwitcher = (ImageSwitcher) findVIEwById(R.id.switcher);12: mSwitcher.setFactory(this);//注意13: mSwitcher.setInAnimation(AnimationUtils.loadAnimation(this,14: android.R.anim.fade_in));15: mSwitcher.setOutAnimation(AnimationUtils.loadAnimation(this,16: android.R.anim.fade_out));17: 18: Gallery g = (Gallery) findViewById(R.id.gallery);19: g.setAdapter(new ImageAdapter(this));20: g.setOnItemSelectedListener(this);21: }22: 23: //Gallery被選後設置ImageSwitcher的圖片24: public void onItemSelected(AdapterView parent, View v, int position, long id) {25: mSwitcher.setImageResource(mImageIds[position]);26: }27: 28: public void onNothingSelected(AdapterView parent) {29: }30: 31: public View makeView() {//!!!!!!注意Creates a new View to be added in a ViewSwitcher.32: ImageView i = new ImageView(this);33: i.setBackgroundColor(0xFF000000);34: i.setScaleType(ImageView.ScaleType.FIT_CENTER);35: i.setLayoutParams(new ImageSwitcher.LayoutParams(LayoutParams.FILL_PARENT,36: LayoutParams.FILL_PARENT));37: return i;38: }39: 40: private ImageSwitcher mSwitcher;41: 42: public class ImageAdapter extends BaseAdapter {43: public ImageAdapter(Context c) {44: mContext = c;45: }46: 47: public int getCount() {48: return mThumbIds.length;49: }50: 51: public Object getItem(int position) {52: return position;53: }54: 55: public long getItemId(int position) {56: return position;57: }58: 59: public View getView(int position, View convertView, ViewGroup parent) {60: ImageView i = new ImageView(mContext);61: 62: i.setImageResource(mThumbIds[position]);63: i.setAdjustVIEwBounds(true);//preserve the ASPect ratio 64: i.setLayoutParams(new Gallery.LayoutParams(LayoutParams.WRAP_CONTENT,65: LayoutParams.WRAP_CONTENT));66: i.setBackgroundResource(R.drawable.picture_frame);67: return i;68: }69: 70: private Context mContext;71: 72: }73: 74: private Integer[] mThumbIds = { R.drawable.sample_thumb_0,75: R.drawable.sample_thumb_1, R.drawable.sample_thumb_2,76: R.drawable.sample_thumb_3, R.drawable.sample_thumb_4,77: R.drawable.sample_thumb_5, R.drawable.sample_thumb_6,78: R.drawable.sample_thumb_7 };79: 80: private Integer[] mImageIds = { R.drawable.sample_0, R.drawable.sample_1,81: R.drawable.sample_2, R.drawable.sample_3, R.drawable.sample_4,82: R.drawable.sample_5, R.drawable.sample_6, R.drawable.sample_7 };83: 84: }
25.ImageVIEw1:

只是布局:
可以看出android:adjustVIEwBounds="true"為保持比例。
android:maxWidth="50dip" android:maxHeight="50dip"限制圖片的最大寬高 
android:maxWidth="70dip" android:maxHeight="70dip" android:padding="10dip" 限制圖片最大寬高並在圖片周圍填充空白10dip 
android:padding="10dip" android:layout_width="70dip" android:layout_height="70dip" 圖片設置寬高為70,並在圖片周圍填充空白 
1: <?xml version="1.0" encoding="utf-8"?> 2: 3: <ScrollVIEw XMLns:android="http://schemas.android.com/apk/res/android" 4: android:layout_width="fill_parent" 5: android:layout_height="fill_parent"> 6: 7: <LinearLayout 8: android:layout_width="fill_parent" 9: android:layout_height="fill_parent" 10: android:orientation="vertical"> 11: 12: <!-- The following four examples use a large image --> 13: <!-- 1. Non-scaled view, for reference --> 14: <TextView 15: android:layout_width="fill_parent" 16: android:layout_height="wrap_content" 17: android:paddingTop="10dip" 18: android:text="@string/image_view_large_normal"/> 19: <ImageView 20: android:src="@drawable/sample_1" 21: android:adjustViewBounds="true" 22: android:layout_width="wrap_content" 23: android:layout_height="wrap_content" /> 24: 25: <!-- 2. Limit to at most 50x50 --> 26: <TextView 27: android:layout_width="fill_parent" 28: android:layout_height="wrap_content" 29: android:paddingTop="10dip" 30: android:text="@string/image_view_large_at_most"/> 31: <ImageView 32: android:src="@drawable/sample_1" 33: android:adjustViewBounds="true" 34: android:maxWidth="50dip" 35: android:maxHeight="50dip" 36: android:layout_width="wrap_content" 37: android:layout_height="wrap_content" /> 38: 39: <!-- 3. Limit to at most 70x70, with 10 pixels of padding all around --> 40: <TextView 41: android:layout_width="fill_parent" 42: android:layout_height="wrap_content" 43: android:paddingTop="10dip" 44: android:text="@string/image_view_large_at_most_padded"/> 45: <ImageView 46: android:src="@drawable/sample_1" 47: android:background="#66FFFFFF" 48: android:adjustViewBounds="true" 49: android:maxWidth="70dip" 50: android:maxHeight="70dip" 51: android:padding="10dip" 52: android:layout_width="wrap_content" 53: android:layout_height="wrap_content" /> 54: 55: <!-- 4. Limit to exactly 70x70, with 10 pixels of padding all around --> 56: <TextView 57: android:layout_width="fill_parent" 58: android:layout_height="wrap_content" 59: android:paddingTop="10dip" 60: android:text="@string/image_view_large_exactly_padded"/> 61: <ImageView 62: android:src="@drawable/sample_1" 63: android:background="#66FFFFFF" 64: android:scaleType="centerInside" 65: android:padding="10dip" 66: android:layout_width="70dip" 67: android:layout_height="70dip" /> 68: 69: <!-- Repeating the previous four examples with small image --> 70: <!-- 1. Non-scaled view, for reference --> 71: <TextView 72: android:layout_width="fill_parent" 73: android:layout_height="wrap_content" 74: android:paddingTop="10dip" 75: android:text="@string/image_view_small_normal"/> 76: <ImageView 77: android:src="@drawable/stat_happy" 78: android:background="#FFFFFFFF" 79: android:adjustViewBounds="true" 80: android:layout_width="wrap_content" 81: android:layout_height="wrap_content" /> 82: 83: <!-- 2. Limit to at most 50x50 --> 84: <TextView 85: android:layout_width="fill_parent" 86: android:layout_height="wrap_content" 87: android:paddingTop="10dip" 88: android:text="@string/image_view_small_at_most"/> 89: <ImageView 90: android:src="@drawable/stat_happy" 91: android:background="#FFFFFFFF" 92: android:adjustViewBounds="true" 93: android:maxWidth="50dip" 94: android:maxHeight="50dip" 95: android:layout_width="wrap_content" 96: android:layout_height="wrap_content" /> 97: 98: <!-- 3. Limit to at most 70x70, with 10 pixels of padding all around --> 99: <TextView100: android:layout_width="fill_parent"101: android:layout_height="wrap_content"102: android:paddingTop="10dip"103: android:text="@string/image_view_small_at_most_padded"/>104: <ImageView105: android:src="@drawable/stat_happy"106: android:background="#FFFFFFFF"107: android:adjustViewBounds="true"108: android:maxWidth="70dip"109: android:maxHeight="70dip"110: android:padding="10dip"111: android:layout_width="wrap_content"112: android:layout_height="wrap_content" />113: 114: <!-- 4. Limit to exactly 70x70, with 10 pixels of padding all around -->115: <TextView116: android:layout_width="fill_parent"117: android:layout_height="wrap_content"118: android:paddingTop="10dip"119: android:text="@string/image_view_small_exactly_padded"/>120: <ImageVIEw121: android:src="@drawable/stat_happy"122: android:background="#FFFFFFFF"123: android:scaleType="centerInside"124: android:padding="10dip"125: android:layout_width="70dip"126: android:layout_height="70dip" />127: 128: 129: </LinearLayout>130: </ScrollVIEw>131: 26.LayoutAnimation2
此為一個ListActivity在加載時有個加載動畫效果

注意:第9到24行為設置動畫 此例了Alpha+Translate
1: public class LayoutAnimation2 extends ListActivity { 2: @Override 3: public void onCreate(Bundle savedInstanceState) { 4: super.onCreate(savedInstanceState); 5: 6: setListAdapter(new ArrayAdapter<String>(this, 7: android.R.layout.simple_list_item_1, mStrings)); 8: 9: AnimationSet set = new AnimationSet(true);10: 11: Animation animation = new AlphaAnimation(0.0f, 1.0f);12: animation.setDuration(50);13: set.addAnimation(animation);14: 15: animation = new TranslateAnimation(Animation.RELATIVE_TO_SELF, 0.0f,16: Animation.RELATIVE_TO_SELF, 0.0f, Animation.RELATIVE_TO_SELF, -1.0f,17: Animation.RELATIVE_TO_SELF, 0.0f);18: animation.setDuration(100);19: set.addAnimation(animation);20: 21: LayoutAnimationController controller = new LayoutAnimationController(set,22: 0.5f);23: ListView listView = getListView();24: listVIEw.setLayoutAnimation(controller);25: }26: 27: private String[] mStrings = { "Bordeaux", "Lyon", "Marseille", "Nancy",28: "Paris", "Toulouse", "Strasbourg" };29: }
27.LayoutAnimation3
此為布局動畫,在加載整個布局時的動畫效果

布局XML
第7行說明此ListVIEw加載了一個LayoutAnimation動畫layout_bottom_to_top_slide
1: <?xml version="1.0" encoding="utf-8"?>2: 3: <ListVIEw xmlns:android="http://schemas.android.com/apk/res/android"4: android:id="@android:id/list"5: android:layout_width="fill_parent"6: android:layout_height="fill_parent"7: android:layoutAnimation="@anim/layout_bottom_to_top_slide" />8: layout_bottom_to_top_slide.XML 聲音了一個LayoutAnimation動畫如下:
第6行聲明了一個animation動畫為slide_right
1: <?xml version="1.0" encoding="utf-8"?>2: 3: <layoutAnimation xmlns:android="http://schemas.android.com/apk/res/android"4: android:delay="30%"5: android:animationOrder="reverse"6: android:animation="@anim/slide_right" />7: slide_right.XML如下
1: <?xml version="1.0" encoding="utf-8"?>2: 3: <set XMLns:android="http://schemas.android.com/apk/res/android" android:interpolator="@android:anim/accelerate_interpolator">4: <translate android:fromXDelta="-100%p" android:toXDelta="0"5: android:duration="@android:integer/config_shortAnimTime" />6: </set>
28.LayoutAnimation4隨機動態顯示

布局裡有個LayoutAnimation動畫 layout_random_fade
1: <GridVIEw xmlns:android="http://schemas.android.com/apk/res/android" android:id="@+id/grid" 2: android:layoutAnimation="@anim/layout_random_fade" 3: 4: android:layout_width="fill_parent" 5: android:layout_height="fill_parent" 6: android:padding="10dp" 7: android:verticalSpacing="10dp" 8: 9: android:horizontalSpacing="10dp"10: android:numColumns="auto_fit"11: android:columnWidth="60dp"12: android:stretchMode="columnWidth"13: 14: android:gravity="center" />layout_random_fade.XML動畫如下:
1: <?xml version="1.0" encoding="utf-8"?>2: 3: <layoutAnimation XMLns:android="http://schemas.android.com/apk/res/android"4: android:delay="0.5"5: android:animationOrder="random"6: android:animation="@anim/fade" />第6行又加載了動畫fade
fade.XML如下
1: <?xml version="1.0" encoding="utf-8"?>2: 3: <alpha XMLns:android="http://schemas.android.com/apk/res/android"4: android:interpolator="@android:anim/accelerate_interpolator"5: android:fromAlpha="0.0" android:toAlpha="1.0"6: android:duration="@android:integer/config_longAnimTime" />7:
29.LayoutAnimation5 以風格順序方向顯示
布局:android:layoutAnimation="@anim/layout_grid_inverse_fade"的LayoutAnimation動畫
1: <GridVIEw xmlns:android="http://schemas.android.com/apk/res/android" android:id="@+id/grid" 2: android:layoutAnimation="@anim/layout_grid_inverse_fade" 3: 4: android:layout_width="fill_parent" 5: android:layout_height="fill_parent" 6: android:padding="10dp" 7: android:verticalSpacing="10dp" 8: 9: android:horizontalSpacing="10dp"10: android:numColumns="auto_fit"11: android:columnWidth="60dp"12: android:stretchMode="columnWidth"13: 14: android:gravity="center" />layout_grid_inverse_fade.XML動畫
注意:此為gridLayoutAnimation ,動畫方向:android:direction="right_to_left|bottom_to_top"
1: <?xml version="1.0" encoding="utf-8"?>2: 3: <gridLayoutAnimation xmlns:android="http://schemas.android.com/apk/res/android"4: android:columnDelay="0.5"5: android:directionPriority="row"6: android:direction="right_to_left|bottom_to_top"7: android:animation="@anim/fade" />8: fade.XML如下
1: <?xml version="1.0" encoding="utf-8"?>2: 3: <alpha XMLns:android="http://schemas.android.com/apk/res/android"4: android:interpolator="@android:anim/accelerate_interpolator"5: android:fromAlpha="0.0" android:toAlpha="1.0"6: android:duration="@android:integer/config_longAnimTime" />7: 30.LayoutAnimation6
布局:
注意:第4行的android:layoutAnimation="@anim/layout_wave_scale"
1: <?xml version="1.0" encoding="utf-8"?> 2: 3: <GridVIEw xmlns:android="http://schemas.android.com/apk/res/android" android:id="@+id/grid" 4: android:layoutAnimation="@anim/layout_wave_scale" 5: 6: android:layout_width="fill_parent" 7: android:layout_height="fill_parent" 8: android:verticalSpacing="10dp" 9: 10: android:horizontalSpacing="10dp"11: android:numColumns="auto_fit"12: android:columnWidth="60dp"13: android:stretchMode="columnWidth"14: 15: android:gravity="center" />layout_wave_scale.XML動畫如下:
注意:此為gridLayoutAnimation
1: <?xml version="1.0" encoding="utf-8"?>2: 3: <gridLayoutAnimation xmlns:android="http://schemas.android.com/apk/res/android"4: android:rowDelay="75%"5: android:columnDelay="0%"6: android:directionPriority="none"7: android:animation="@anim/wave_scale" />8: wave_scale.XML動畫如下:
1: <?xml version="1.0" encoding="utf-8"?> 2: 3: <set XMLns:android="http://schemas.android.com/apk/res/android" android:interpolator="@android:anim/accelerate_interpolator"> 4: <alpha 5: android:fromAlpha="0.0" 6: android:toAlpha="1.0" 7: android:duration="100" /> 8: <scale 9: android:fromXScale="0.5" android:toXScale="1.5"10: android:fromYScale="0.5" android:toYScale="1.5"11: android:pivotX="50%" android:pivotY="50%"12: android:duration="200" />13: <scale 14: android:fromXScale="1.5" android:toXScale="1.0"15: android:fromYScale="1.5" android:toYScale="1.0"16: android:pivotX="50%" android:pivotY="50%"17: android:startOffset="200"18: android:duration="100" />19: </set>31.LayoutAnimation7
布局:
注意:TableLayout中加入了多個TableRow 每個TableRow裡有一個TextView和一個EditVIEw,每個TableRow裡有分別有一個動畫
1: <?xml version="1.0" encoding="utf-8"?> 2: 3: <TableLayout XMLns:android="http://schemas.android.com/apk/res/android" 4: android:layoutAnimation="@anim/layout_animation_table" 5: android:animationCache="false" 6: android:clipToPadding="false" 7: android:padding="12dp" 8: android:layout_width="fill_parent" 9: android:layout_height="fill_parent"10: android:stretchColumns="1">11: 12: <TableRow13: android:layoutAnimation="@anim/layout_animation_row_right_slide">14: <TextView15: android:gravity="right"16: android:text="@string/layout_animation_name" />17: <EditText />18: </TableRow>19: 20: <TableRow21: android:layoutAnimation="@anim/layout_animation_row_left_slide">22: <TextView23: android:gravity="right"24: android:text="@string/layout_animation_lastname" />25: <EditText />26: </TableRow>27: 28: <TableRow29: android:layoutAnimation="@anim/layout_animation_row_right_slide">30: <TextView31: android:gravity="right"32: android:text="@string/layout_animation_phone" />33: <EditText />34: </TableRow>35: 36: <TableRow37: android:layoutAnimation="@anim/layout_animation_row_left_slide">38: <TextVIEw39: android:gravity="right"40: android:text="@string/layout_animation_address" />41: <EditText android:lines="3" />42: </TableRow>43: </TableLayout>44:
第41行<EditText android:lines="3" /> 
動畫layout_animation_row_left_slide.XML
1: <?xml version="1.0" encoding="utf-8"?>2: 3: <layoutAnimation XMLns:android="http://schemas.android.com/apk/res/android"4: android:delay="10%"5: android:animation="@anim/slide_left" />6: 第6行 slide_left動畫:
1: <?xml version="1.0" encoding="utf-8"?>2: 3: <set xmlns:android="http://schemas.android.com/apk/res/android" android:interpolator="@android:anim/accelerate_interpolator">4: <translate android:fromXDelta="100%p" android:toXDelta="0"5: android:duration="@android:integer/config_shortAnimTime" />6: </set>動畫layout_animation_row_right_slide.XML
1: <?xml version="1.0" encoding="utf-8"?>2: 3: <layoutAnimation XMLns:android="http://schemas.android.com/apk/res/android"4: android:delay="10%"5: android:animationOrder="reverse"6: android:animation="@anim/slide_right" />7: 第6行 slide_right動畫:
1: <?xml version="1.0" encoding="utf-8"?>2: 3: <set XMLns:android="http://schemas.android.com/apk/res/android" android:interpolator="@android:anim/accelerate_interpolator">4: <translate android:fromXDelta="-100%p" android:toXDelta="0"5: android:duration="@android:integer/config_shortAnimTime" />6: </set>7:
32.LinearLayout3

布局:
注意:第三個TextVIEw android:layout_weight="1",activity根據這個View的比0大的layout_weight值來劃分剩余的空間和其它VIEws定義的layout_weight也按比例進行空間的劃分
1: <?xml version="1.0" encoding="utf-8"?> 2: 3: <!-- 4: Demonstrates a simple linear layout. The layout fills the screen, with the 5: children stacked from the top. The middle child gets allocated any extra 6: space. 7: --> 8: 9: <LinearLayout XMLns:android="http://schemas.android.com/apk/res/android"10: android:orientation="vertical"11: android:background="@drawable/blue"12: android:layout_width="fill_parent"13: android:layout_height="fill_parent">14: 15: <!-- view1 goes on top -->16: <TextView17: android:background="@drawable/box"18: android:layout_width="fill_parent"19: android:layout_height="wrap_content"20: android:text="@string/linear_layout_3_top"/>21: 22: <!-- view2 goes in the middle -->23: <TextView24: android:background="@drawable/box"25: android:layout_width="fill_parent"26: android:layout_height="wrap_content"27: android:layout_weight="1"28: android:text="@string/linear_layout_3_middle"/>29: 30: <!-- view3 goes on the bottom -->31: <TextVIEw32: android:background="@drawable/box"33: android:layout_width="fill_parent"34: android:layout_height="wrap_content"35: android:text="@string/linear_layout_3_bottom"/>36: 37: </LinearLayout>38: 33.LinearLayout4

布局:
注意:每個TextVIEw的android:layout_weight="1" android:layout_height="fill_parent"
1: <?xml version="1.0" encoding="utf-8"?> 2: 3: <!-- 4: Demonstrates a horizontal linear layout with equally sized columns 5: --> 6: 7: <LinearLayout XMLns:android="http://schemas.android.com/apk/res/android" 8: android:orientation="horizontal" 9: android:layout_width="fill_parent"10: android:layout_height="fill_parent">11: 12: <TextView13: android:background="@drawable/red"14: android:layout_width="0dip"15: android:layout_height="fill_parent"16: android:layout_weight="1"/>17: 18: <TextView19: android:background="@drawable/green"20: android:layout_width="0dip"21: android:layout_height="fill_parent"22: android:layout_weight="1"/>23: 24: <TextView25: android:background="@drawable/blue"26: android:layout_width="0dip"27: android:layout_height="fill_parent"28: android:layout_weight="1"/>29: 30: <TextVIEw31: android:background="@drawable/yellow"32: android:layout_width="0dip"33: android:layout_height="fill_parent"34: android:layout_weight="1"/>35: 36: </LinearLayout>37:
34.LinearLayout5

布局:
注意:第33行android:background="@android:drawable/editbox_background" 設置了EditVIEw的背景樣子
第43行又加了一個LinearLayout放兩個按鈕,第47行android:layout_gravity="right" 設置兩按鈕右邊對齊
1: <?xml version="1.0" encoding="utf-8"?> 2: 3: <!-- 4: Demonstrates a nesting layouts to make a form 5: --> 6: 7: <LinearLayout XMLns:android="http://schemas.android.com/apk/res/android" 8: android:orientation="vertical" 9: android:background="@drawable/blue"10: android:layout_width="fill_parent"11: android:layout_height="wrap_content"12: android:padding="10dip">13: 14: <!--15: TextView goes on top...16: -->17: <TextView18: android:layout_width="fill_parent"19: android:layout_height="wrap_content"20: android:text="@string/linear_layout_5_instructions"/>21: 22: <!--23: Followed by the EditText field...24: 25: Also give it a standard background (the "android:"26: part in @android:drawable/editbox_background27: means it is system resource rather than28: an application resource.29: -->30: <EditText31: android:layout_width="fill_parent"32: android:layout_height="wrap_content"33: android:background="@android:drawable/editbox_background"/>34: 35: <!--36: Use a horizontal layout to hold the two buttons.37: This item has layout_gravity="right". This means the whole38: horizontal LinearLayout is right aligned, not the individual39: items within it. The horizontal LinearLayout's width is set to40: wrap_content. (If it was fill_parent it would not have any41: room to slide to the right.)42: -->43: <LinearLayout44: android:orIEntation="horizontal"45: android:layout_width="wrap_content"46: android:layout_height="wrap_content"47: android:layout_gravity="right" >48: 49: <Button50: android:layout_width="wrap_content"51: android:layout_height="wrap_content"52: android:text="@string/linear_layout_5_cancel"/>53: 54: <Button55: android:layout_width="wrap_content"56: android:layout_height="wrap_content"57: android:layout_marginLeft="10dip"58: android:text="@string/linear_layout_5_ok" />59: 60: </LinearLayout>61: 62: </LinearLayout>
35.LinearLayout6

此例子在LinearLayout 布局中加入了android:padding="20dip" android:layout_width="wrap_content" android:layout_height="wrap_content"
布局:
1: <?xml version="1.0" encoding="utf-8"?> 2: 3: <!-- 4: LinearLayout which uses a combination of wrap_content on itself and 5: fill_parent on its children to get every item to be the same width. 6: --> 7: 8: <LinearLayout XMLns:android="http://schemas.android.com/apk/res/android" 9: android:orientation="vertical"10: android:background="@drawable/blue"11: android:padding="20dip"12: android:layout_width="wrap_content"13: android:layout_height="wrap_content">14: 15: <TextView16: android:background="@drawable/box"17: android:layout_width="fill_parent"18: android:layout_height="wrap_content"19: android:text="@string/linear_layout_6_one"/>20: 21: <TextView22: android:background="@drawable/box"23: android:layout_width="fill_parent"24: android:layout_height="wrap_content"25: android:text="@string/linear_layout_6_two"/>26: 27: <TextView28: android:background="@drawable/box"29: android:layout_width="fill_parent"30: android:layout_height="wrap_content"31: android:text="@string/linear_layout_6_three"/>32: 33: <TextVIEw34: android:background="@drawable/box"35: android:layout_width="fill_parent"36: android:layout_height="wrap_content"37: android:text="@string/linear_layout_6_four"/>38: 39: </LinearLayout>
36.LinearLayout7

布局:
注意:主要起作用的是第8行android:layout_width="fill_parent"和第15行android:layout_weight="1"
1: <?xml version="1.0" encoding="utf-8"?> 2: <!-- 3: Demonstrates a horizontal linear layout with equally sized columns. 4: Some columns force their height to match the parent. 5: --> 6: 7: <LinearLayout XMLns:android="http://schemas.android.com/apk/res/android" android:orientation="horizontal" 8: android:layout_width="fill_parent" 9: android:layout_height="wrap_content">10: 11: <TextView12: android:background="@drawable/red"13: android:layout_width="0dip"14: android:layout_height="fill_parent"15: android:layout_weight="1"16: android:text="@string/linear_layout_7_small"/>17: 18: <TextView19: android:background="@drawable/green"20: android:layout_width="0dip"21: android:layout_height="fill_parent"22: android:layout_weight="1"23: android:text="@string/linear_layout_7_big"/>24: 25: <TextView26: android:background="@drawable/blue"27: android:layout_width="0dip"28: android:layout_height="fill_parent"29: android:layout_weight="1"30: android:text="@string/linear_layout_7_small" />31: 32: <TextVIEw33: android:background="@drawable/yellow"34: android:layout_width="0dip"35: android:layout_height="wrap_content"36: android:layout_weight="1"37: android:text="@string/linear_layout_7_wrap"/>38: 39: </LinearLayout>
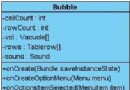 Android編程之“捏泡泡”游戲
從學習搭環境到開發,雖然也遇到些讓人糾結的問題,還好都一一解決了。言歸正轉,這次寫的是一個Demo似的小應用,簡單得不能再簡單了,一共就三個類,主類Bubble繼承於A
 Android手機通過USB線共享電腦的網絡上網
本人嘗試,裡面提供得軟件在索愛x8上失敗了 提示說不能網絡共享 。看來自己編譯x8迫在眉睫啊 (有幸下載到了x8得源代碼。。。)--------------------
 Android 開發TextView 部分字符高亮
TextVIEw 部分字體高[功能]TextVIEw是不支持部分字段高亮的 但是我們可以進行擴展[思路]1. 利用LinearLayout 作為 TextVIEw 的
 口袋互聯網 HTC Hero用戶自行開發Android 2.1升級包
HTC Hero作為一款硬件配置強悍的智能手機,對不同版本的android系統兼容性非常好,曾有用戶將HTC新機Espresso內的2.1版android系統和最新的S