編輯:初級開發
轉自:http://blog.csdn.Net/lzx_bupt/archive/2010/05/17/5600187.ASPx
完成動態加載Layout有兩種方法,依據個人喜好進行選擇:
方法1:靜態主Layout動態加載靜態子Layout
首先構建子Layout:main2
vIEw plaincopy to clipboardprint?
<?XML version="1.0" encoding="utf-8"?>
<!--布局可以任意定義,此處拿線性布局舉例,裡面有2個按鈕元素-->
<LinearLayout XMLns:android="http://schemas.android.com/apk/res/android"
android:id="@+id/menubar"
android:background="@drawable/menubar"
android:layout_width="wrap_content"
android:layout_height="wrap_content">
<!--按鈕1-->
<ImageButton android:id="@+id/button1"
android:src="@drawable/btn1"
android:layout_width="wrap_content"
android:layout_height="wrap_content"
></ImageButton>
<!--按鈕2-->
<ImageButton android:id="@+id/button2"
android:src="@drawable/btn2"
android:layout_width="wrap_content"
android:layout_height="wrap_content"
></ImageButton>
</LinearLayout>
然後構建主Layout:main
vIEw plaincopy to clipboardprint?
<?XML version="1.0" encoding="utf-8"?>
<RelativeLayout XMLns:android="http://schemas.android.com/apk/res/android"
android:id="@+id/background"
android:layout_width="fill_parent"
android:layout_height="fill_parent"
android:background="@drawable/background">
<!--主Layout要給子Layout設置一個容器box,可以在此指定容器的位置,這段是關鍵部分-->
<LinearLayout android:id="@+id/box"
android:layout_alignParentBottom="true"
android:layout_width="wrap_content"
android:layout_height="wrap_content"
android:layout_centerHorizontal="true">
</LinearLayout>
</RelativeLayout>
最後在程序中加載子layout:
vIEw plaincopy to clipboardprint?
public class BackgroundTest extends Activity {
/** Called when the activity is first created. */
// 子Layout要以vIEw的形式加入到主Layout中
private View mBarVIEw;
// 主Layout的容器加載子Layout的VIEw
private LinearLayout mLinearLayout;
//給出關鍵內容
public void onCreate(Bundle savedInstanceState) {
super.onCreate(savedInstanceState);
// 顯示主Layout
setContentVIEw(R.layout.main);
// 加載子Layout
mBarView = VIEw.inflate(this, R.layout.main2, null);
// 找到容器
mLinearLayout = (LinearLayout)findVIEwById(R.id.box);
// 加上VIEw 結束
mLinearLayout.addView(mBarVIEw);
}
方法2:靜態主Layout動態加載動態的Layout
首先構造你自己的子Layout和上面一樣;
然後構建你自定義的Layout類:
vIEw plaincopy to clipboardprint?
public class MenuLandscapeLinearLayout extends LinearLayout{
// 構造函數
public MenuLandscapeLinearLayout(Context context) {
super(context);
// TODO Auto-generated constructor stub
//加載需要的屬性,加載方法一的子Layout
((Activity) getContext()).getLayoutInflater().inflate(R.layout.main2, this);
//在此你可以封裝很多方法
}
}
public class MenuLandscapeLinearLayout extends LinearLayout{
// 構造函數
public MenuLandscapeLinearLayout(Context context) {
super(context);
// TODO Auto-generated constructor stub
//加載需要的屬性,加載方法一的子Layout
((Activity) getContext()).getLayoutInflater().inflate(R.layout.main2, this);
//在此你可以封裝很多方法
}
}
最後在程序中動態實例化並加載即可:
vIEw plaincopy to clipboardprint?
public class BackgroundTest extends Activity {
/** Called when the activity is first created. */
private LinearLayout mLinearLayout;
//聲明一個子Layout VIEw對象
private MenuLandscapeLinearLayout mMenuLandscapeLinearLayout;
@Override
public void onCreate(Bundle savedInstanceState) {
super.onCreate(savedInstanceState);
// 加載主Layout
setContentVIEw(R.layout.main);
// 找到容器
mLinearLayout = (LinearLayout)findVIEwById(R.id.box);
// 實例化一個子VIEw
mMenuLandscapeLinearLayout=new MenuLandscapeLinearLayout(this);
// 添加到容器
mLinearLayout.addVIEw(mMenuLandscapeLinearLayout);
}
}
至此,完成了動態加載子Layout的兩種形式,裡面可思考的很多,比如封裝常用事件、資源,從而節省代碼、節省資源;
 Android系OPhone,中國開發瞄准世界
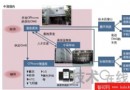
圖2:OPhone的水平分工體制通信運營商中國移動占據主導。軟件開發和終端開發由播思通訊和各終端廠商負責。日本的窗口為鵬開科技。(圖:播思通訊的圖片。佐佐木陽拍攝,中國
 Android 輕松實現語音識別
完整代碼如下:package com.example.android.apis.app;import com.example.android.apis.R;import
 Android 連接網絡時顯示進度條
public class HelloXML extends Activity {private static final int MESSAGETYPE_01 = 0x
 Android PendingIntent的深入理解
Intent比較簡單,類似消息,發送給別的activity,別的activity會立即執行我主要說說什麼是PendingIntent以及它的執行過程以alarm ser