編輯:Android技術基礎
所有的基於UI的應用程序,事件都變得不可或缺!試想一下,如果我們做的程序單擊按鈕和其它控件都沒有反應,那麼就如同一個人在這個世界上聽不到聲音一樣!
Android為我們提供了兩種方式的事件處理:(1)基於監聽器的事件處理;(2)基於回調的事件處理。
對於基於監聽器的事件處理而言,主要就是為Android界面組件綁定特定的事件監聽器;對於基於回調的事件處理而言,主要做法是重寫Android組件特定的回調函數,Android大部分界面組件都提供了事件響應的回調函數,我們只要重寫它們就行。
本章我們著重講一下基於監聽器的事件處理,基於回調的事件處理放在下一章講解。
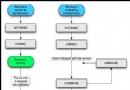
相比於基於回調的事件處理,這是更具“面向對象”性質的事件處理方式。在監聽器模型中,主要涉及三類對象:
(1)事件源Event Source:產生事件的來源,通常是各種組件,如按鈕,窗口等。
(2)事件Event:事件封裝了界面組件上發生的特定事件的具體信息,如果監聽器需要獲取界面組件上所發生事件的相關信息,一般通過事件Event對象來傳遞。
(3)事件監聽器Event Listener:負責監聽事件源發生的事件,並對不同的事件做相應的處理。
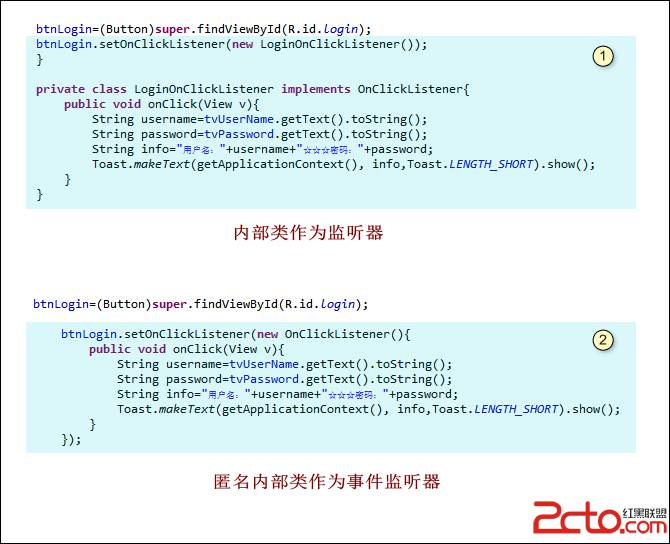
一、第一種:內部類作為監聽器
將事件監聽器類定義成當前類的內部類。
a)使用內部類可以在當前類中復用監聽器類,因為監聽器類是外部類的內部類。
b)可以自由訪問外部類的所有界面組件,這也是內部類的兩個優勢。
我們前面的例子全部采用的該種方式!
1、activity_main.xml界面文件
[html] view plain copy2、MainActivity.java程序文件
[java] view plain copy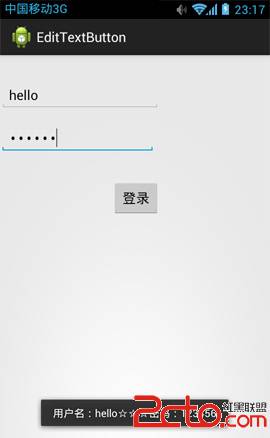
上面的理論也許聽起來讓你頭大,尤其java這一套事件監聽模型,讓很多盡管可能是其它語言編程高手也感覺甚不適應,但如果分析上面代碼,則發現實際也是非常簡單的。
我們這個案例中:單擊按鈕,顯示用戶名和密碼!
事件:單擊事件;
(1)注冊監聽事件:btnLogin.setOnClickListener(new LoginOnClickListener());
(2)事件監聽器:private class LoginOnClickListener implements OnClickListener
定義LoginOnClickListener類,從OnClickListener接口實現。
就這麼簡單!
二、第二種:匿名內部類作為事件監聽器類
如果事件監聽器只是臨時使用一次,建議使用匿名內部類形式的事件監聽器更合適。
我們仍然以上述例子為例,加以改造,學習一下如何使用“匿名內部類作為事件監聽器類”。
1、界面部分不變!
activity_main.xml界面文件
[html] view plain copy2、源程序加以改造!
MainActivity.java程序文件
[java] view plain copy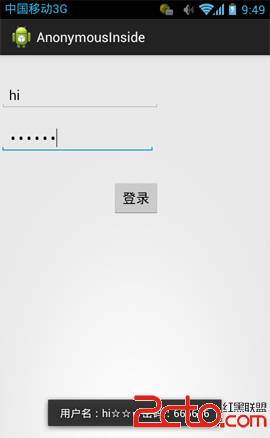
三、對比
我們對比一下這兩種寫法:
1、第①種
(1)注冊:btnLogin.setOnClickListener(new LoginOnClickListener());
(2)內部類:
[java] view plain copy
2、第②種
實際上是把①種合二為一了,使用匿名內部類直接完成了。
[java] view plain copy
 8.3.2 繪圖類實戰示例
本節引言:前兩節我們學了Bitmap和一些基本的繪圖API的屬性以及常用的方法,但心裡總覺得有點不踏實,總得寫點什麼加深下映像是吧,嗯,本節我們就來
 2.3.8 SeekBar(拖動條)
本節引言:本節我們繼續來學習Android的基本UI控件中的拖動條——SeekBar,相信大家對他並不陌生,最常見的地方就是音樂播放器或者視頻播放器
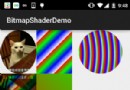 8.3.13 Paint API之—— Shader(圖像渲染)
1.構造方法詳解1)BitmapShader(圖像渲染)BitmapShader(Bitmap bitmap, Shader.TileMode ti
 6.3.2 數據存儲與訪問之——又見SQLite數據庫
本節引言:學習完上一節,關於Android中的SQLite的基本操作,你就已經掌握了,而在本節我們將會學習一些稍微高級一點的東西,數據庫事務,怎麼將