編輯:Android技術基礎
在上一節中我們對LinearLayout進行了詳細的解析,LinearLayout也是我們 用的比較多的一個布局,我們更多的時候更鐘情於他的weight(權重)屬性,等比例劃分,對屏幕適配還是 幫助蠻大的;但是使用LinearLayout的時候也有一個問題,就是當界面比較復雜的時候,需要嵌套多層的 LinearLayout,這樣就會降低UI Render的效率(渲染速度),而且如果是listview或者GridView上的 item,效率會更低,另外太多層LinearLayout嵌套會占用更多的系統資源,還有可能引發stackoverflow; 但是如果我們使用RelativeLayout的話,可能僅僅需要一層就可以完成了,以父容器或者兄弟組件參考+margin +padding就可以設置組件的顯示位置,是比較方便的!當然,也不是絕對的,具體問題具體分析吧! 總結就是:盡量使用RelativeLayout + LinearLayout的weight屬性搭配使用吧!
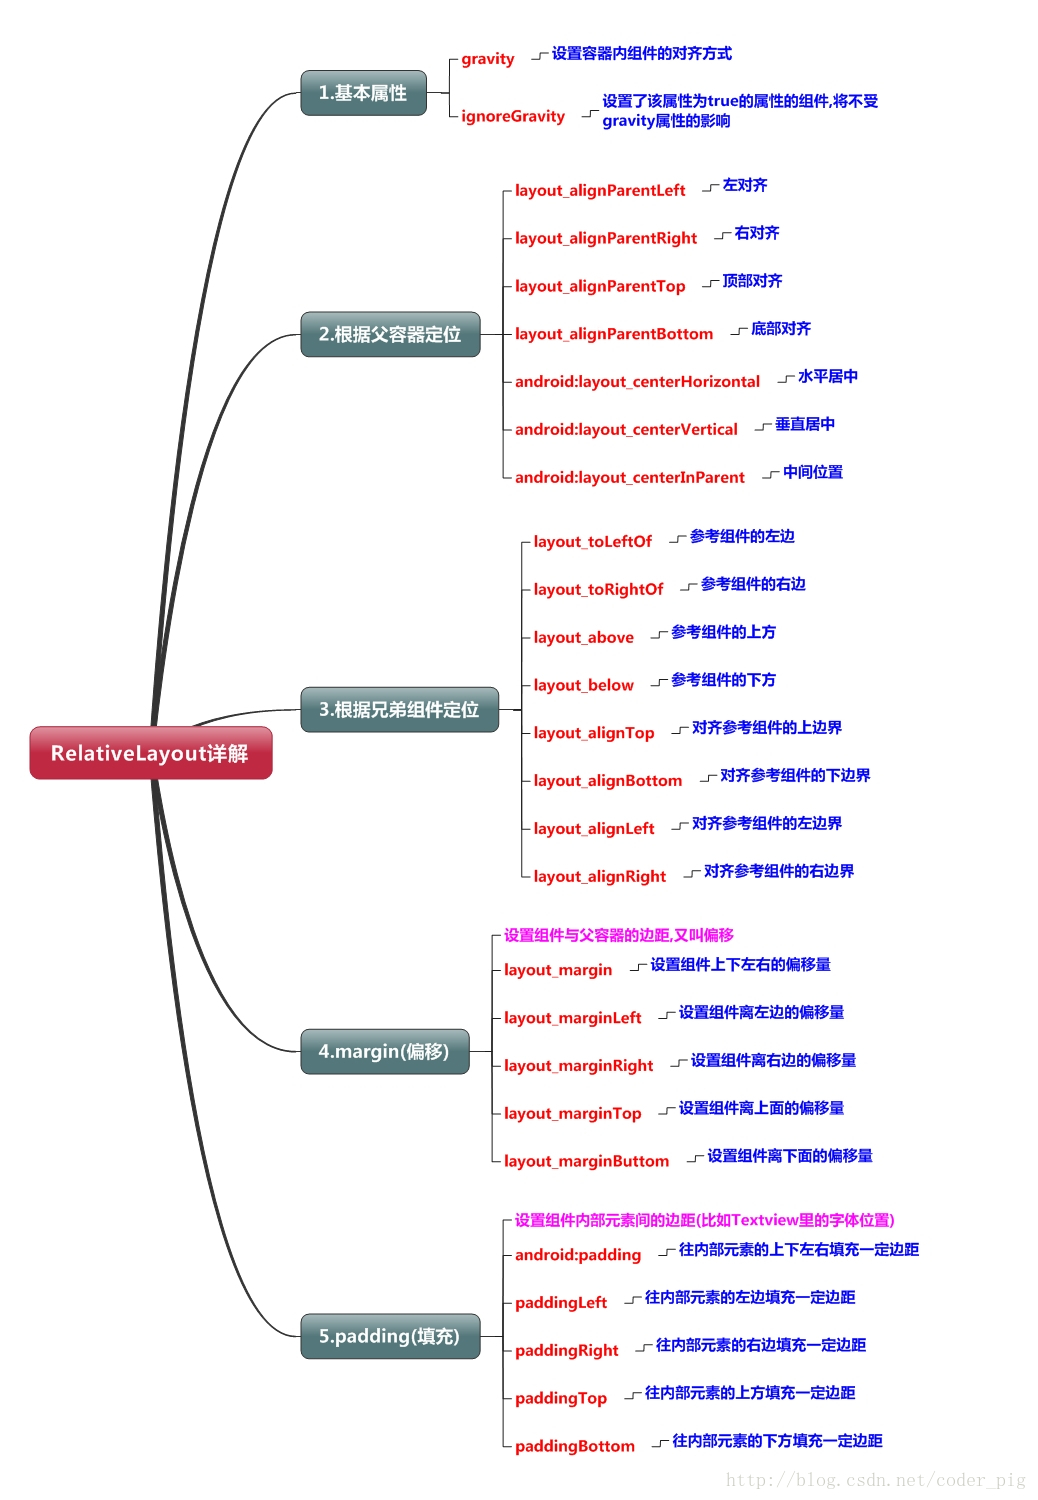
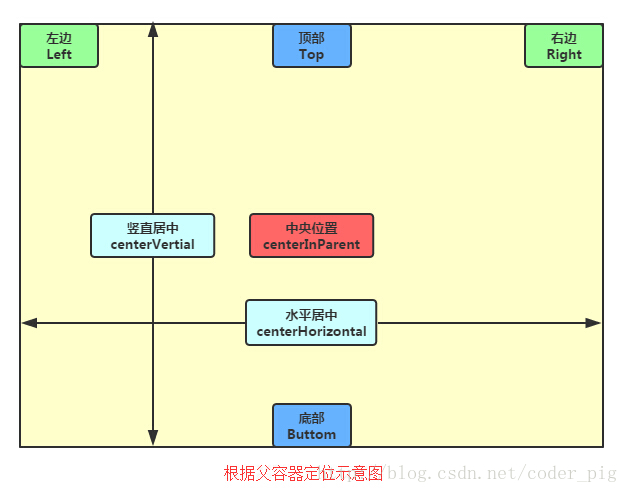
恩,先說下什麼是兄弟組件吧,所謂的兄弟組件就是處於同一層次容器的組件,如圖
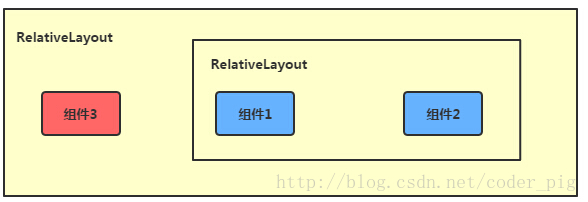
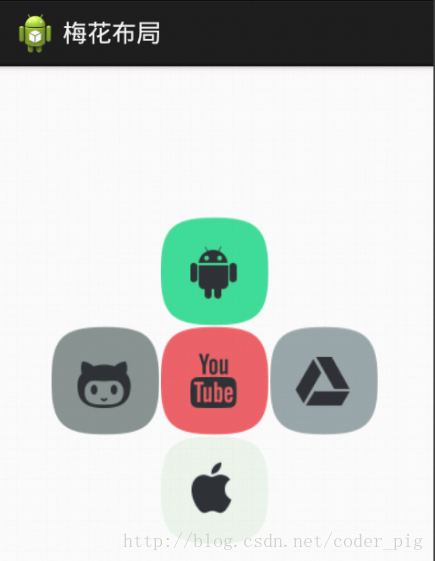
圖中的組件1,2就是兄弟組件了,而組件3與組件1或組件2並不是兄弟組件,所以組件3不能通過 組件1或2來進行定位,比如layout_toleftof = "組件1"這樣是會報錯的!切記! 關於這個兄弟組件定位的最經典例子就是"梅花布局"了,下面代碼實現下:
運行效果圖:
實現代碼:
<RelativeLayout xmlns:android="http://schemas.android.com/apk/res/android"
    xmlns:tools="http://schemas.android.com/tools"
    android:id="@+id/RelativeLayout1"
    android:layout_width="match_parent"
    android:layout_height="match_parent" >

    <!-- 這個是在容器中央的 -->

    <ImageView
        android:id="@+id/img1"
        android:layout_width="80dp"
        android:layout_height="80dp"
        android:layout_centerInParent="true"
        android:src="@drawable/pic1"/>

    <!-- 在中間圖片的左邊 -->
    <ImageView
        android:id="@+id/img2"
        android:layout_width="80dp"
        android:layout_height="80dp"
        android:layout_toLeftOf="@id/img1"
        android:layout_centerVertical="true"
        android:src="@drawable/pic2"/>

    <!-- 在中間圖片的右邊 -->
    <ImageView
        android:id="@+id/img3"
        android:layout_width="80dp"
        android:layout_height="80dp"
        android:layout_toRightOf="@id/img1"
        android:layout_centerVertical="true"
        android:src="@drawable/pic3"/>

    <!-- 在中間圖片的上面-->
    <ImageView
        android:id="@+id/img4"
        android:layout_width="80dp"
        android:layout_height="80dp"
        android:layout_above="@id/img1"
        android:layout_centerHorizontal="true"
        android:src="@drawable/pic4"/>

    <!-- 在中間圖片的下面 -->
    <ImageView
        android:id="@+id/img5"
        android:layout_width="80dp"
        android:layout_height="80dp"
        android:layout_below="@id/img1"
        android:layout_centerHorizontal="true"
        android:src="@drawable/pic5"/>

</RelativeLayout>
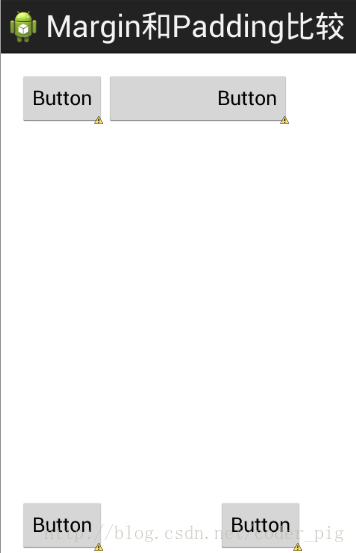
初學者對於這兩個屬性可能會有一點混淆,這裡區分下: 首先margin代表的是偏移,比如marginleft = "5dp"表示組件離容器左邊緣偏移5dp; 而padding代表的則是填充,而填充的對象針對的是組件中的元素,比如TextView中的文字 比如為TextView設置paddingleft = "5dp",則是在組件裡的元素的左邊填充5dp的空間! margin針對的是容器中的組件,而padding針對的是組件中的元素,要區分開來! 下面通過簡單的代碼演示兩者的區別:
比較示例代碼如下:
<RelativeLayout xmlns:android="http://schemas.android.com/apk/res/android"
    xmlns:tools="http://schemas.android.com/tools"
    android:layout_width="match_parent"
    android:layout_height="match_parent"
    android:paddingBottom="@dimen/activity_vertical_margin"
    android:paddingLeft="@dimen/activity_horizontal_margin"
    android:paddingRight="@dimen/activity_horizontal_margin"
    android:paddingTop="@dimen/activity_vertical_margin"
    tools:context=".MainActivity" >

    <Button
        android:id="@+id/btn1"
        android:layout_height="wrap_content"
        android:layout_width="wrap_content"
        android:text="Button"/>
    <Button
        android:paddingLeft="100dp"
        android:layout_height="wrap_content"
        android:layout_width="wrap_content"
        android:text="Button"
        android:layout_toRightOf="@id/btn1"/>

    <Button
        android:id="@+id/btn2"
        android:layout_height="wrap_content"
        android:layout_width="wrap_content"
        android:text="Button"
        android:layout_alignParentBottom="true"/>
    <Button
        android:layout_marginLeft="100dp"
        android:layout_height="wrap_content"
        android:layout_width="wrap_content"
        android:text="Button"
        android:layout_toRightOf="@id/btn2"
        android:layout_alignParentBottom="true"/>

</RelativeLayout>
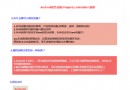
運行效果圖比較:
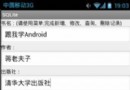
相信很多朋友都不知道一點吧,平時我們設置margin的時候都習慣了是正數的, 其實是可以用負數的,下面寫個簡單的程序演示下吧,模擬進入軟件後,彈出廣告 頁面的,右上角的cancle按鈕的margin則是使用負數的!
效果圖如下:
貼出的廣告Activity的布局代碼吧,當然,如果你對這個有興趣的話可以下下demo, 因為僅僅是實現效果,所以代碼會有些粗糙!
<RelativeLayout xmlns:android="http://schemas.android.com/apk/res/android"
    xmlns:tools="http://schemas.android.com/tools"
    android:layout_width="match_parent"
    android:layout_height="match_parent"
    tools:context="com.jay.example.relativelayoutdemo.MainActivity"
    android:background="#00CCCCFF">

    <ImageView
        android:id="@+id/imgBack"
        android:layout_width="200dp"
        android:layout_height="200dp"
        android:layout_centerInParent="true"
        android:background="@drawable/myicon" />

    <ImageView
        android:id="@+id/imgCancle"
        android:layout_width="28dp"
        android:layout_height="28dp"
        android:layout_alignRight="@id/imgBack"
        android:layout_alignTop="@id/imgBack"
        android:background="@drawable/cancel"
        android:layout_marginTop="-15dp"
        android:layout_marginRight="-10dp" />

</RelativeLayout>
關於RelativeLayout的詳解就到這裡,有什麼纰漏,錯誤,好的建議,歡迎提出~ 最後提供下上面的demo代碼供大家下載:RelativeLayoutDemo
 第7章、單選按鈕RadioGroup與復選框CheckBox(從零開始學Android)
在Android App應用中,單選按鈕和復選框也是經常使用的,下面我們一起學習一下。我們需要學習Android中的基本控件:(1)單選按鈕RadioGroup、(2)復
 8.4.3 Android動畫合集之屬性動畫-初見
本節引言:本節給帶來的是Android動畫中的第三種動畫——屬性動畫(Property Animation),記得在上一節8.4.2 Android
 8.3.3 Paint API之—— MaskFilter(面具)
本節引言:在Android基礎入門教程——8.3.1 三個繪圖工具類詳解的Paint方法中有這樣一個方法:setMaskFilter(MaskFil
 第89章、系統服務之SMS服務(從零開始學Android)
每逢佳節,中國移動、電信、聯通都是偷偷笑的日子,又不知道多少短信費用納入囊中,盡管微信、QQ、飛信漫天飛,但仍然阻擋不了節日祝福短信的火爆,但群發實在沒有意義,你是不是想